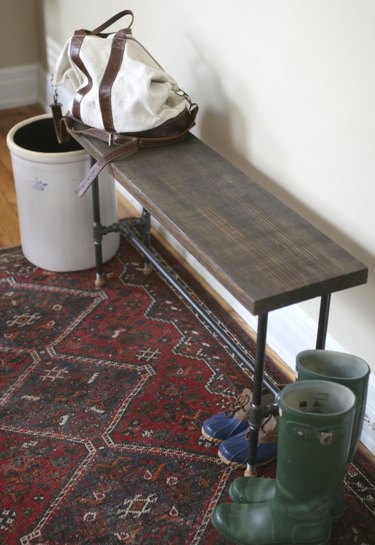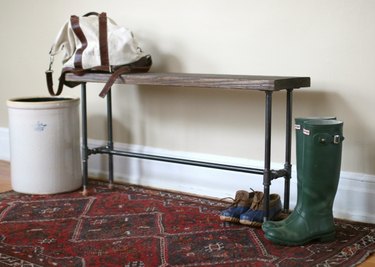
With all of the comings and goings day after day, the entryway is no doubt one of the highest traffic areas in your home. An entryway bench can add a great deal of convenience to your daily routine. Not only is it the perfect place to sit while putting on and taking off your shoes but it makes an ideal landing area for purses, shopping bags, and other entryway essentials.
And there's no need to spend a lot of money for this convenience; in fact, you can make your own bench — even with beginner-level skills! Our stylish and functional industrial-style bench has a simple design, and you can make it with standard steel plumbing pipe and fittings that you can find at any home center.
Video of the Day
Video of the Day
Things You'll Need
12-in. pipe, 1/2-in. round, 4
6-in. pipe, 1/2-in. round, 4
2-in. pipe, 1/2-in. round, 4
36-in. pipe, 1/2-in. round
6 T fittings, 1/2-in. round
4 floor flanges, 1/2-in. round
42-in.-long 2x12 board (actual dimensions: 1 1/2 x 11 1/4 x 42 in.)
Medium-grit sandpaper, #60
Palm sander
Wood stain, color of your choice
Paintbrush
16 wood screws, 3/4-in., #6
4 bottle corks, at least 1/2-in. round or 1/2-in. pipe caps
Box cutter
Tip
You can adjust the bench to a custom length by using a longer or shorter seat board and connecting base pipe. All of the other components and the following steps remain the same.
1. Attach the fittings to the 6-inch pipes
Twist each of the four T fittings securely onto the threaded openings of each of the four 6-inch pipes, positioning the "T" vertically on the pipe.
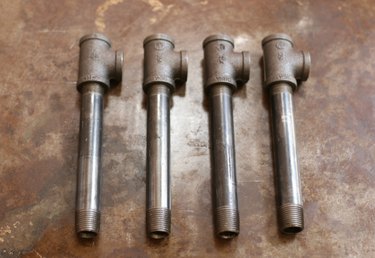
2. Attach the 12-inch pipes
Attach each of the four 12-inch pipes into the exposed arm end of the T fittings. These four (now 19-inch) pipes will become the bench seat legs.
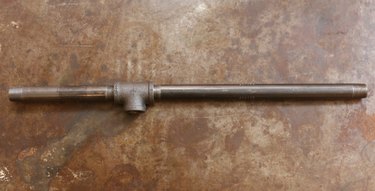
3. Attach the 2-inch pipes
Use two of the 2-inch pipes connected by a T fitting to join two of the now 19-inch bench legs. Repeat with the remaining pipes and fittings to create two identical H-shaped structures. Each "H" will act as a leg support for the bench.
Tip
Face the T fitting that connects the smaller 2-inch pipes perpendicular to the direction of the other T fittings.
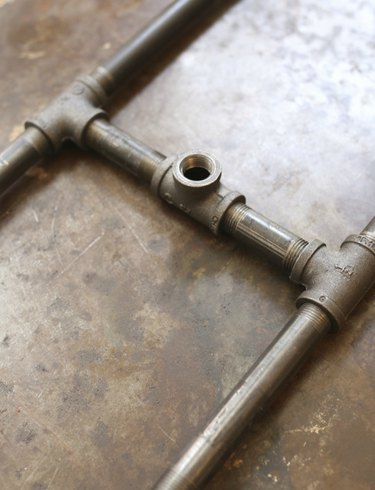
4. Attach the 36-inch pipe
Join the two side leg structures by attaching the 36-inch pipe into the ends of the T fittings left exposed in Step 3. This joining pipe will help give the resulting bench added support, helping to evenly distribute weight.
Tip
Adjust the length of the base pipe for a longer or shorter bench seat.
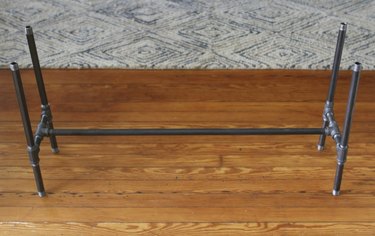
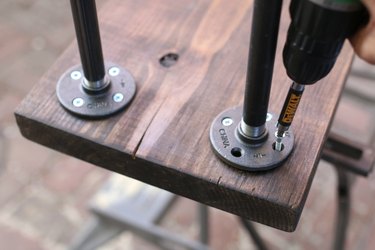
5. Attach the flanges
Screw each of the four flanges onto the threaded ends of the 12-inch pipes, right side facing down. Each flange will help adhere the wooden seat to the bench base.
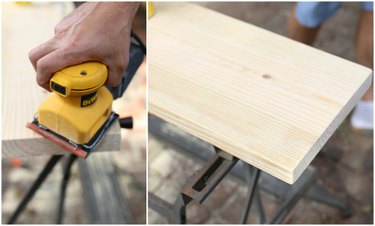
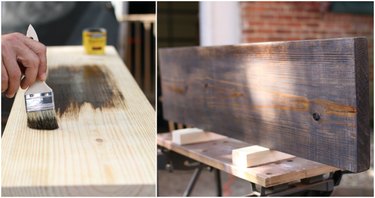
6. Sand the seat
To prepare the wooden bench seat, sand the 42-inch wood board using a medium-grit sandpaper to smooth away any debris, splintering, and jagged edges. A palm sander will make lighter work of the task.
Tip
Before beginning this project, you can have the hardware store cut your lumber to size for you to make it even easier.
7. Stain and seal the seat
Stain and seal the top, sides, and bottom of the wood to your desired finish using a paintbrush. Allow the finish to fully dry before adhering the bench base.
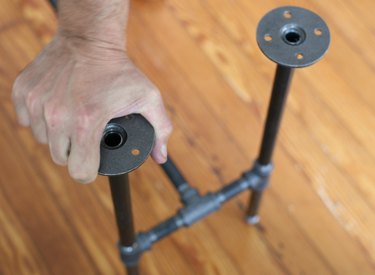
8. Attach the base to the seat
Turn over the entire base structure of the bench so that the flanges rest centered on the underside of the bench board. Adhere the structure to the wood seat by screwing the 16 wood screws into the openings of each flange.
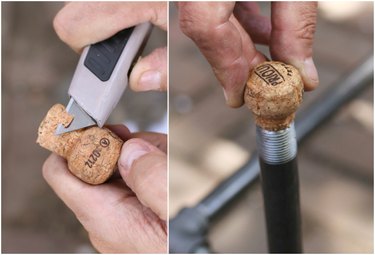
9. Make the feet
Make custom feet for the bench using corks to provide a protective barrier against scratching. Gently shave each cork with a box cutter so that it slides directly into a bench leg opening. The corks can be adjusted to account for any floor unevenness.
Tip
Alternatively, you can use 1/2-inch pipe caps for the feet. These screw onto the ends of the pipes, making them height-adjustable. Apply a furniture felt pad to each cap to prevent scratching on hard floors.
Position the bench near your home entryway or mudroom to create a stylish and functional nook!