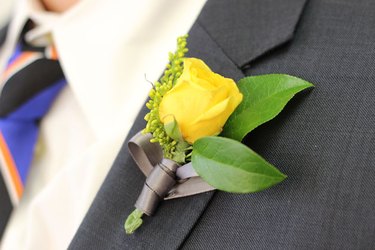
For formal occasions like weddings and proms, the well-dressed gentleman's ensemble is not complete without a boutonniere. The type of flower used in a boutonniere will depend on the event's color palette or the wearer's personal style, but the basic technique to assemble one is the same. They're so easy to make, you'll wonder why florists charge so much for them.
Gather Materials
Video of the Day
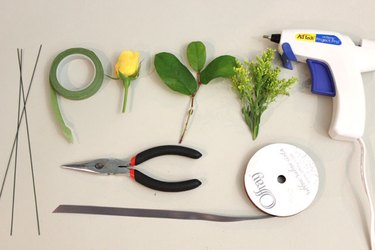
- Flowers
- Filler foliage
- Floral wire
- Floral tape
- Wire cutters or pliers
- Ribbon
- Hot glue gun
Video of the Day
Popular Flowers for a Boutonniere
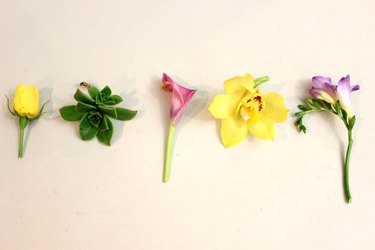
You can use practically any flower in a boutonniere, as well as many non-floral objects, but there are certain flowers that are tried-and-true favorites. A rose is the most classic choice. Also popular are calla lilies and orchids because they hold their moisture and can look fresh for hours, or even days. Freesias also came into vogue in recent years. Another big trend is using succulents and ferns.
Filler Foliage
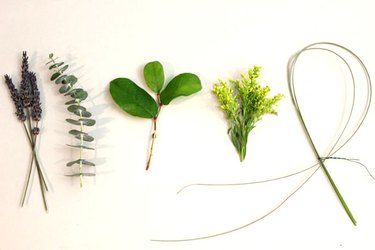
The list of filler to accent your flower is also endless. Popular options include lavender, eucalyptus leaves, lemon leaves, solidaster and bear grass. Even baby's breath, once frowned upon, is coming back into fashion.
Step 1: Wire the Flower Bud

After you've chosen your flower, cut the stem to about 1 inch. Insert a 4-inch piece of floral wire in the stem just below the bud.
Step 2: Reinforce the Stem with Wire

Bend the wire so you have two wire ends on either side of the stem, about 2 inches long. This wire will reinforce the stem and prevent it from snapping.
Step 3: Wrap the Stem with Floral Tape
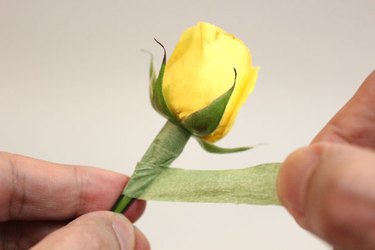
Starting at the top, wrap the wire and stem with floral tape, spinning the flower to move the tape down the stem. Floral tape attaches to itself, but it is initially not sticky. You have to stretch the tape as you wrap the stem to activate the adhesive. If the tape breaks when you stretch it (and it will), don't worry. Just continue where you left off.
Step 4: Add Filler
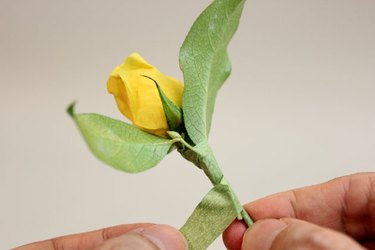
It's a good idea to accent your boutonniere with two different types of filler so there is a combination of textures. The filler does not need to be wired first. Place it on the flower in the desired position and wrap it from top to bottom with floral tape.
Step 5: Adjust the Placement of Filler Elements
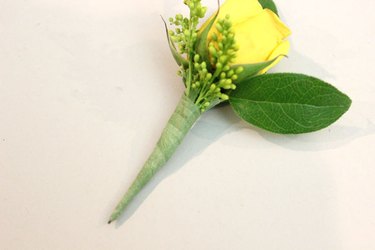
Place the boutonniere flat on a surface so you can see how the flowers will lay on a lapel. Sometimes in wrapping the elements, things get moved around. If you need to adjust anything, loosen the tape and rearrange the elements. When you apply a new layer of tape, everything looks as good as new.
Step 6: Tie a Ribbon Around the Stem
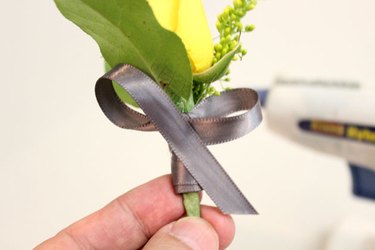
Wrap coordinating ribbon around the stem and secure it with hot glue. Make a couple of loops to form a bow and hot glue that to the back of the boutonniere. You do not need to cover the entire stem with ribbon; just an inch at the base is enough of an accent.
Step 7: Curl the End of the Stem
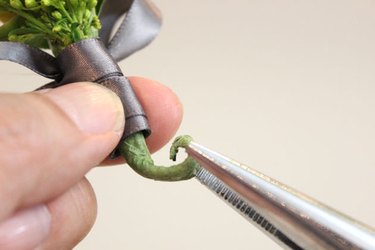
Using pliers, twist the end of the stem to make a curlicue. The curlicue is not only a decorative finishing touch, it prevents the end of the wire from poking someone accidentally. Of course, you can leave the bottom of your boutonniere as is, or even have floral stems coming out of the bottom for a more rustic look. There are no hard-and-fast rules for creating boutonnieres; let your creativity and personal style guide you.