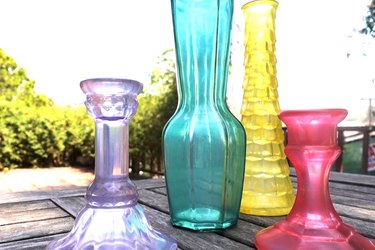
Love the dreamy look of sea glass? it might surprise you to know that you can create a similar effect on glass decor using two items that may already have -- white glue and food coloring. Yep, that's all folks! Sure, there are chemical products you can use that'll create a similar effect, but with a little bit of time and practice, you can master this non-toxic, super-economical alternative.
Video of the Day
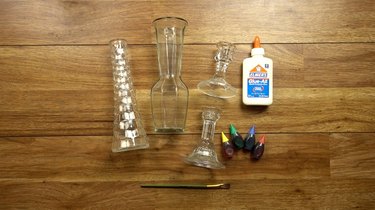
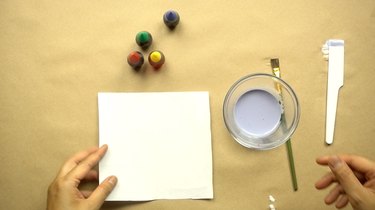
Things You'll Need
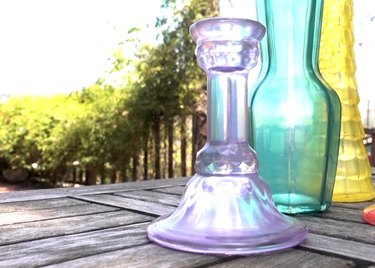
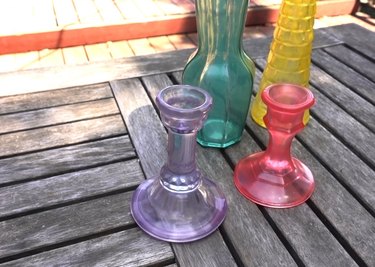
Glass decor items (e.g. vases, candle holders, figurines)
White glue
Food Coloring
Small paint brush
Wax or freezer paper
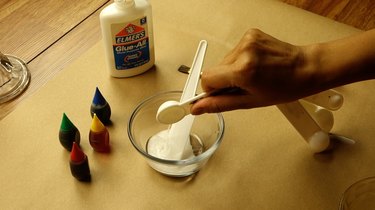
Step 1: Mix Glue & Water
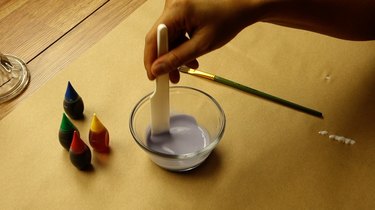
In a small container, mix one part water to two parts glue and stir.
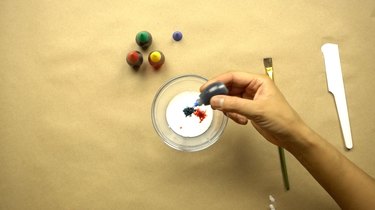
Step 2: Add Food Coloring
Tint your mixture using the appropriate food colors/coloring combos to achieve your desired shades. For info on how to mix primary food colors to create more colors, check out this helpful article. To create the lavender color shown, I added one drop of blue and one drop of red.
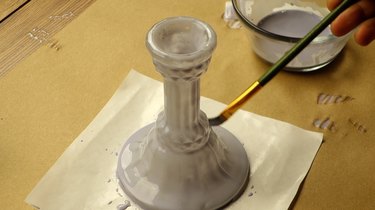
Step 3: Coat Glass with Glue Mixture
Before coating the glass, lay a piece of wax paper on your work surface, just large enough to place your glass decor item entirely on top. If using freezer paper, make sure that you lay it down waxy side up. This will prevent the excess run-off mixture to glue your decor item onto the work surface while the mixture dries. Trust me -- you don't want this to happen! Once dried, your decor will lift easily off the wax paper.
Using your paint brush, coat the glass decor piece with the glue mixture as evenly as possible. This is the step that will take a bit of time and practice (see tip box below). You'll find that some stubborn spots may need to be brushed over several times in order for the mixture to cling to the glass.

You'll also notice that gravity will cause the mixture to pool excessively in certain areas. When you find this happening, use your brush to slowly (and with a light touch) spread and thin out the pooled mixture across a wider surface. Note, though, that some pooling is unavoidable, but once the glue dries, it won't be as noticeable.
Tip
Don't stress too hard -- some pooling and streaking is inevitable, but once the glue dries clear, these won't be as noticeable. The most important things to avoid are large drips and bubbles as these will be very apparent in your final product. You can avoid bubbles by painting the mixture on slowly, as painting over too quickly will create more bubbles. Should bubbles form, use the tips of your brush bristles to pop them and/or brush over them slowly until they're gone. You can also use a pin to pop them if necessary. Work quickly, as it will be harder to fix problems once the glue mixture begins to congeal. If it already has, though, it might be helpful to dip your brush into a bit of water to thin it out -- though be careful not to thin it out too much. Practice makes perfect!
Step 4: Let Dry (But Check On It Often!)
Once you've coated your glass piece as evenly and thoroughly as possible, let it dry. However, you should check on it's progress frequently during the first half hour, as dripping and excessive pooling may occur during this time. Should you find this happening, at a tiny bit of water to your brush, then slowly and lightly run it over the affected to achieve more even coverage.
Tip
If you really don't like how your glue coating has dried, you've got the option of starting over! Simply get the piece wet, and the mixture will peel right off. Having said that, please read the "Warning" below.
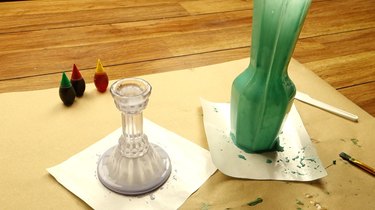
You'll be surprised at how some of the inconsistencies in coverage become far less noticeable once the mixture dries, leaving you with a lovely milky, lightly-tinted finish. Also, don't fret if your final finish isn't entirely uniform. This project is best for those who love weathered-looking decorative pieces that are perfectly imperfect!
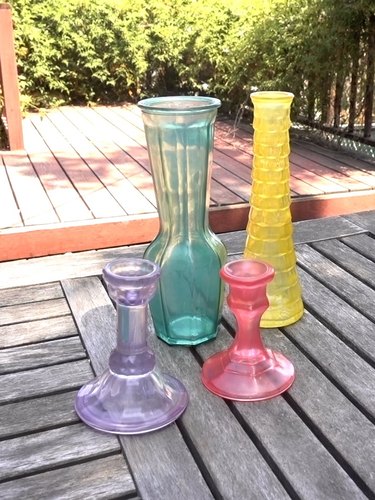
Pretty, eh? They'd look especially lovely if placed near a sunny window.
Warning
The glass decor you create using this method should be used for display purposes only and will not stand up to heavy use. Do not get the treated surface wet, as this will dissolve the glue mixture. For candle holders, we advise you to extinguish the flame before it gets too near the treated glass portion -- or simply use them as display items exclusively. You may choose to coat the items using a protective sealant (if so, we recommend something non-toxic and non-flammable), though we haven't tried this so cannot speak to the efficacy of this method.