Things You'll Need
Circuit tester
Phillips screwdriver
Double electrical box
Drywall saw
Hammer
White wire
Black wire
Bare copper wire
Wire cutters/strippers
Wire nut
Pliers
Double-terminal face plate
Normally, wall outlets are installed in your house singly. This means you have two plugs per outlet that you can use. However, this may not be enough outlets for some rooms, such as a kitchen or a garage, where you want to plug in multiple electronics at once. Switching a regular outlet to a double outlet is a project any homeowner can take on. It is imperative that you have basic wiring knowledge and an understanding of appropriate safety precautions when doing electrical work. If you aren't trained in this area or are not confident in your abilities, you should contact a professional for help.
Warning
If you are not trained at doing electrical work, you should not proceed with this project. Electrical work can be incredibly dangerous, particularly if you do not properly understand the process. Contact a professional for assistance if you don't know what you are doing.
Step 1: Turn off power
Turn off power to the outlet you will be working with at the main power supply.
Video of the Day
Step 2: Use a circuit breaker tester
Use a circuit tester to be sure power has been turned off. A circuit tester is a device that is used to test the functionality of a circuit breaker. The tester sends a small electrical current through the breaker to test its response. To use a circuit breaker tester, check again to be sure that the breaker is turned off. Then, connect the tester to the breaker using the appropriate adapter. Finally, turn on the tester and wait for the results. If the breaker is working properly, the tester will indicate that the circuit is open. If the breaker is not working properly, the tester will indicate that the circuit is closed.
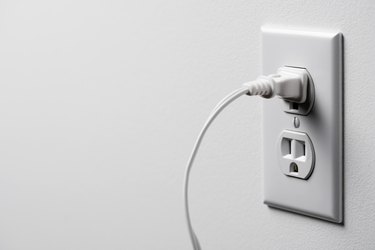
Step 3: Remove the outlet's face plate
Remove the screws holding the outlet's face plate to the outlet box. Remove the screws holding the outlet to the electrical box and pull it out. Reach inside the electrical box and feel to determine whether it is a single box or a double box. If it is a single box, loosen the screws on the outlet's side and unwrap the wires. Loosen the screws on the top and bottom edges of the electrical box and pull the box out of the wall. If it is a double box, leave the outlet and the box in place.
Step 4: Trace the outlet box
Hold a double electrical box flat against the wall, over the previous outlet box's opening, with the opening facing the wall. Trace around the outlet box, excluding the screw mounting tabs.
Step 5: Cut the traced section
Cut out the traced section of drywall, using a drywall saw. If you have a double box, cut away the drywall covering the box's other half so you can fit another outlet inside.
Step 6: Remove the knockout
Place a screwdriver on the new electrical box's wire knockout hole. Tap the screwdriver's handle with a hammer to remove the knockout.
Step 7: Insert the wiring
Insert the new double electrical box into the hole. Feed the wiring from the first outlet through the knockout hole. Skip this step if you already have a double electrical box in the wall.
Step 8: Cut and strip the wire
Cut two 6-inch-long pieces of white, black and bare copper 12- or 14-gauge wires, using wire cutters or strippers. The gauge you use depends on the gauge of wire coming from the power source. Strip 1/2 inch of coating from both ends of the black and white wires. Hold one end of both black wires against the end of the black wire entering the electrical box. Screw a wire nut over the three wires. Repeat with the white wires and the bare copper wires.
Step 9: Add the wires
Loosen the screws on the sides of both electrical outlets. Bend the ends of a black, white and bare copper wire to form a hook, using pliers. Wrap the hooked ends around one of the outlet's loosened screw terminals. Tighten the screws. Repeat with the remaining black, white and bare copper wires and second outlet.
Step 10: Push wires into the box
Push the wires into the electrical box. Line up the outlets' mounting screws with the electrical box's screw holes and tighten the screws to secure the outlets in place.
Step 11: Add a face plate
Put a double-terminal face plate over the outlets. Secure the face plate to the electrical box with the supplied screws. Restore power to the electrical outlets.
Video of the Day