Things You'll Need
Wood working pencil
5-by-4-inch piece of hard wood
Hammer
Gouging chisel
1/8-inch carving chisel
1/16-inch carving chisel
Drill
Sand paper
Stain
3-inch long wooden dowel
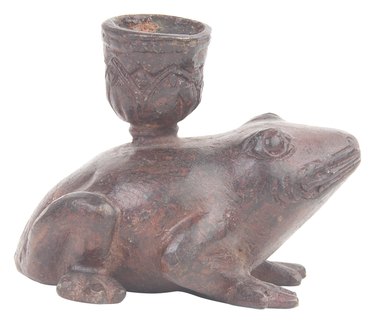
Percussion instruments help keep a beat in compositions. Some percussion instruments can even add different tonal sounds to a piece of music. A wooden frog percussion instrument creates a "croak" sound by running a small wooden stick up and down its back. These frogs are available for purchase at carving shops or instrument stores. However, you can also carve your own frog if you want. Creating a wooden frog percussion instrument out of wood requires a solid understanding of carving that goes beyond a beginner.
Step 1
Sketch your frog shape onto your piece of wood before carving. Include details such as the front legs, back legs, mouth, eyes, nostrils, back and stomach of the frog. Use the drawing as a guide to your roughing in carving.
Video of the Day
Step 2
Place your piece of wood on a surface you don't mind getting dirty. Use a hammer and gouging chisel to break in your piece of wood.
Step 3
Put your chisel on the front of the piece of wood and begin carving out the shape of the head. Carve the curve of the mouth, including the sides, top and bottom. Don't worry about details or how smooth it is at the moment.
Step 4
Carve back and up from the mouth to create your eye bumps. Carve the back of the frog by carving down at an arch. Mimic the shape of a frog with your carving.
Step 5
Use your hammer and gouging chisel to remove wood underneath the frog's mouth to create the belly. Carve small front legs about 1 inch from the bottom of his mouth, and stretch them to the ground. Remove the wood from underneath its belly with your chisel.
Step 6
Carve the front of your frog's back feet at the bottom of the belly. Make each take-up half the width of your frog. Make them rounded, but don't worry about being very detailed just yet.
Step 7
Pick a side of the wood to carve the side of your frog. Make this flat, so it is easier to hold in your hand. Carve both sides in this method, from the top to the bottom. Carve the sides of its feet.
Step 8
Finish the basic frog shape by carving away the wood on the back. Continue slopping the back down to the bottom of the wood. Carve out the back of the feet. Switch to your 1/8 chisel and carve lines around the tops of the feet to give them details.
Step 9
Add details to your frog's body, including eyes, mouth, nostrils and other features using your 1/8-inch and 1/16-inch chisels. Include whatever details you feel comfortable crafting. Round off the parts of the body more accurately with these smaller, more detailed chisels.
Step 10
Create a series of 1/8-inch spikes along the center of your frog's back by using your 1/16-inch chisel. These spikes should all be lined up perfectly. Run it from the back of the frog's mouth to the bottom of its back.
Step 11
Put a 1/8-inch drill bit into the drill. Drill a hole 1 inch back from your frog's mouth, and at about the same height as the middle of the mouth. Keep drilling until you go all the way through the wood.
Step 12
Drill through the same hole using a larger drill bit. Widen the whole repeatedly with larger drill bits, until your hole is about 1 to 1 1/2 inches in diameter. This is your sound hole.
Step 13
Sand all the rough spots on your frog to get rid of splinters, and to give the grain a nice smooth look. Stain the wood with several coats and let it dry.
Step 14
Run the small wooden dowel up and down the spikes on the frog's back to create the croaking sound. Widen the whole if it isn't loud enough for you.
Tip
Stray from your drawn image if necessary. It should serve as a basic guide to your carving. Change your design if you are inspired, but remember you can't replace wood you carved away.
Video of the Day