How to Cook Fall-Off-The-Bone Ribs: Oven-to-Grill Method
Ask a professional chef how to cook fall-off-the-bone ribs and you'll likely hear the same principle twice, even if the equipment in their kitchens looks nothing alike. The Kitchn talked to two working chefs, Mika Leon and Toni Chapman, about the best way to cook ribs this week, and despite one leaning on an oven and the other on a grill, they described the same underlying method (The Kitchn, this week).
The method has two stages. First, low, gentle heat, held for a long time, breaks down the tough collagen in the meat. Second, a short blast of high heat chars the surface and sets the sauce. Leon braises her ribs at 300°F for 2 to 3 hours, then moves them to a hot grill (The Kitchn, this week). Ina Garten describes a similar oven-then-grill approach as a way to avoid overcooking the exterior, calling it her "cheat" for ribs that haven't tenderized yet (Food & Wine, last week). The two methods described here do not require a smoker.
This guide walks through the most accessible version of that method: oven-braised pork ribs, start to finish. It also covers how to decide between a fall-apart texture and a cleaner bite off the bone, plus when beef short ribs or sous vide need different timing and technique altogether.
Why ribs need gentle heat, then hard heat
Video of the Day
The chemistry is straightforward. Connective tissue in ribs starts converting to gelatin once it hits roughly 130°F and holds there; the lower and more sustained the heat, the slower that conversion happens, but the more moisture the meat retains along the way (Serious Eats, 11 months ago). Turn the heat up to hurry things along, and the exterior can dry out or char before the interior tenderizes. That tradeoff is why one cooking temperature can't do both jobs at once.
Garten's quote captures the problem in practical terms: by the time ribs are tender on a hot grill alone, the outside is already overcooked (Food & Wine, last week). Splitting the process solves it. Chapman's version proves the principle isn't tied to an oven at all: she cooks over indirect heat for several hours until the ribs are tender, then finishes over direct heat just to caramelize the sauce (The Kitchn, this week).
A covered oven braise and an indirect grill setup aren't identical, though they follow the same logic. Chapman reaches for the grill specifically because indirect heat still lets in a smoky flavor a covered oven can't match (The Kitchn, this week).
Video of the Day
Decide your texture before you start
Figuring out how to make tender ribs starts with knowing which texture you're actually after. "Fall-off-the-bone" isn't one fixed endpoint: Leon's braise is built to hit fall-apart tender, while Chapman deliberately pulls hers earlier, aiming for meat that "pulls cleanly from the bone without falling apart" (The Kitchn, this week). Those are two different goals, not two degrees of the same doneness, and the choice affects how long to cook and what to check for before finishing.
If the goal is classic fall-apart pork ribs with minimal equipment, the covered oven route below is the simplest path. If a cleaner bite with more smoke character sounds better and tending a grill isn't a chore, swap in indirect heat for the oven and pull the meat a little earlier. Anyone who wants to cook ahead with precise, repeatable texture control should look at sous vide, covered near the end of this guide.
How to cook fall-off-the-bone ribs in the oven
This is the default, most accessible version of the method: oven-braised ribs, no grill or smoker required. All that's needed is one rack of pork ribs, either baby back or St. Louis-cut, kosher salt, and a pan large enough to hold the rack flat with foil to seal it.
Leon keeps things simple with a sturdy roasting pan or baking dish sized to hold the rack in a single layer, sealed tightly with foil so moisture can't escape during the braise (The Kitchn, this week). Chapman's oven-day workaround is a sheet pan fitted with a wire rack, which lets heat reach the ribs from underneath as well as above (The Kitchn, this week). Either setup works.
-
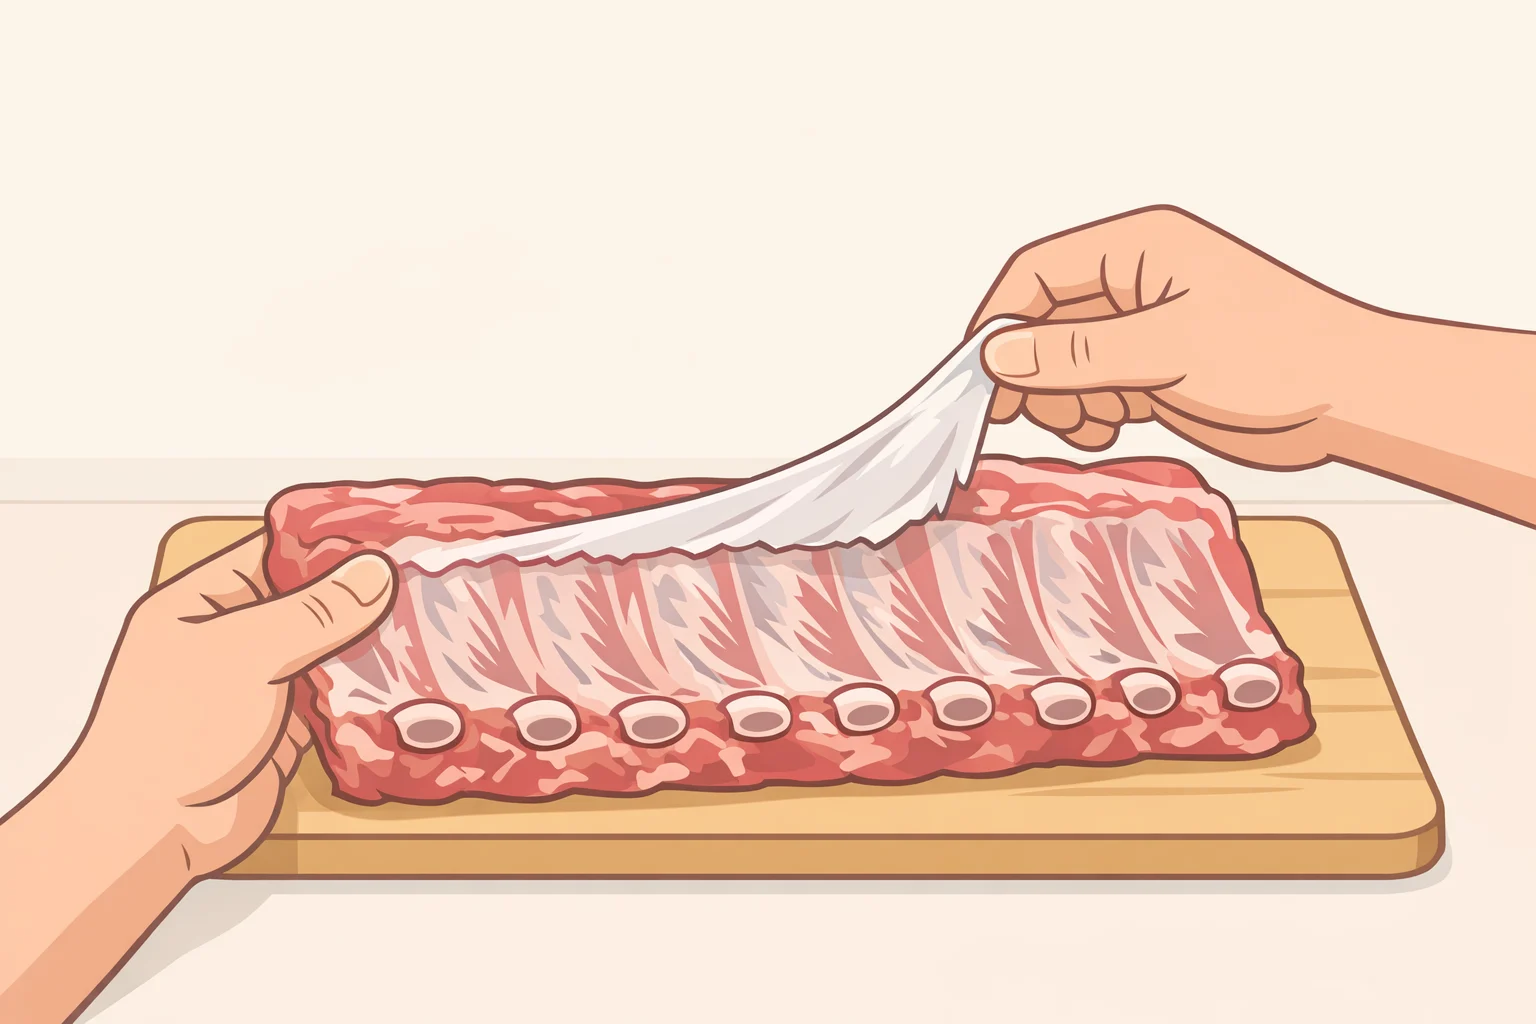
Remove the membrane. Flip the rack bone-side up, loosen a corner of the thin membrane with a knife tip, grip it with a paper towel, and pull it off in one motion. This is standard kitchen practice for ribs rather than something either chef called out specifically, but skipping it leaves that side tough and chewy.
-
Salt the rack ahead of time. Given time in contact with the meat, salt breaks down some muscle proteins, which helps the ribs hold onto moisture as they cook (Serious Eats, 11 months ago). In Serious Eats' side-by-side test, ribs salted and rested overnight in the fridge came out visibly juicier than unsalted ones, though curing longer than a day started giving the meat a hammier texture (Serious Eats, 11 months ago). AmazingRibs recommends the same 24-hour window for its beef ribs, using roughly a half teaspoon of kosher salt per pound (AmazingRibs, last month); that ratio is a reasonable starting point for a pork rack, coated evenly on both sides.
-
Build a braising liquid, if you want one. Leon's version is a mojo-style mix of garlic, citrus, oregano, and cumin, with a splash of vinegar-forward hot sauce added for brightness (The Kitchn, this week). Pour in just enough to keep the pan moist without submerging the rack; setting the ribs bone-side down keeps the meat side clear for saucing later. A few drops of liquid smoke can stand in for real wood smoke: Serious Eats uses four drops, about ⅛ teaspoon, per bag in its sous-vide recipe, and in its taste tests, most people couldn't tell it apart from the real thing (Serious Eats, 11 months ago). That dose is for a sealed bag, not an open braising pan, so treat liquid smoke as optional here and use a light hand.
-
Cover tightly and braise. Set the oven to 300°F and cook for 2 to 3 hours, sealed tightly with foil (The Kitchn, this week). St. Louis-cut racks run meatier than baby backs, so give them the higher end of that range. The foil is doing real work here, trapping the steam that's tenderizing the meat, so resist peeking too often.
-
Check for doneness. For Leon's fall-apart target, the meat should shred easily under light pressure from a fork. For Chapman's cleaner-bite target, pull the rack a bit earlier and test by tugging gently near a bone end instead. If it's not there yet at the three-hour mark, reseal the foil and check again every 30 minutes rather than guessing.
-
Let it rest before moving it. A few minutes out of the oven lets the rack firm up slightly, which matters most for fall-apart ribs. Lift with two spatulas, or tongs plus a spatula, supporting the middle rather than one end, so the rack makes it to the grill or broiler in one piece.
How to cook ribs on the grill (or under the broiler) to finish
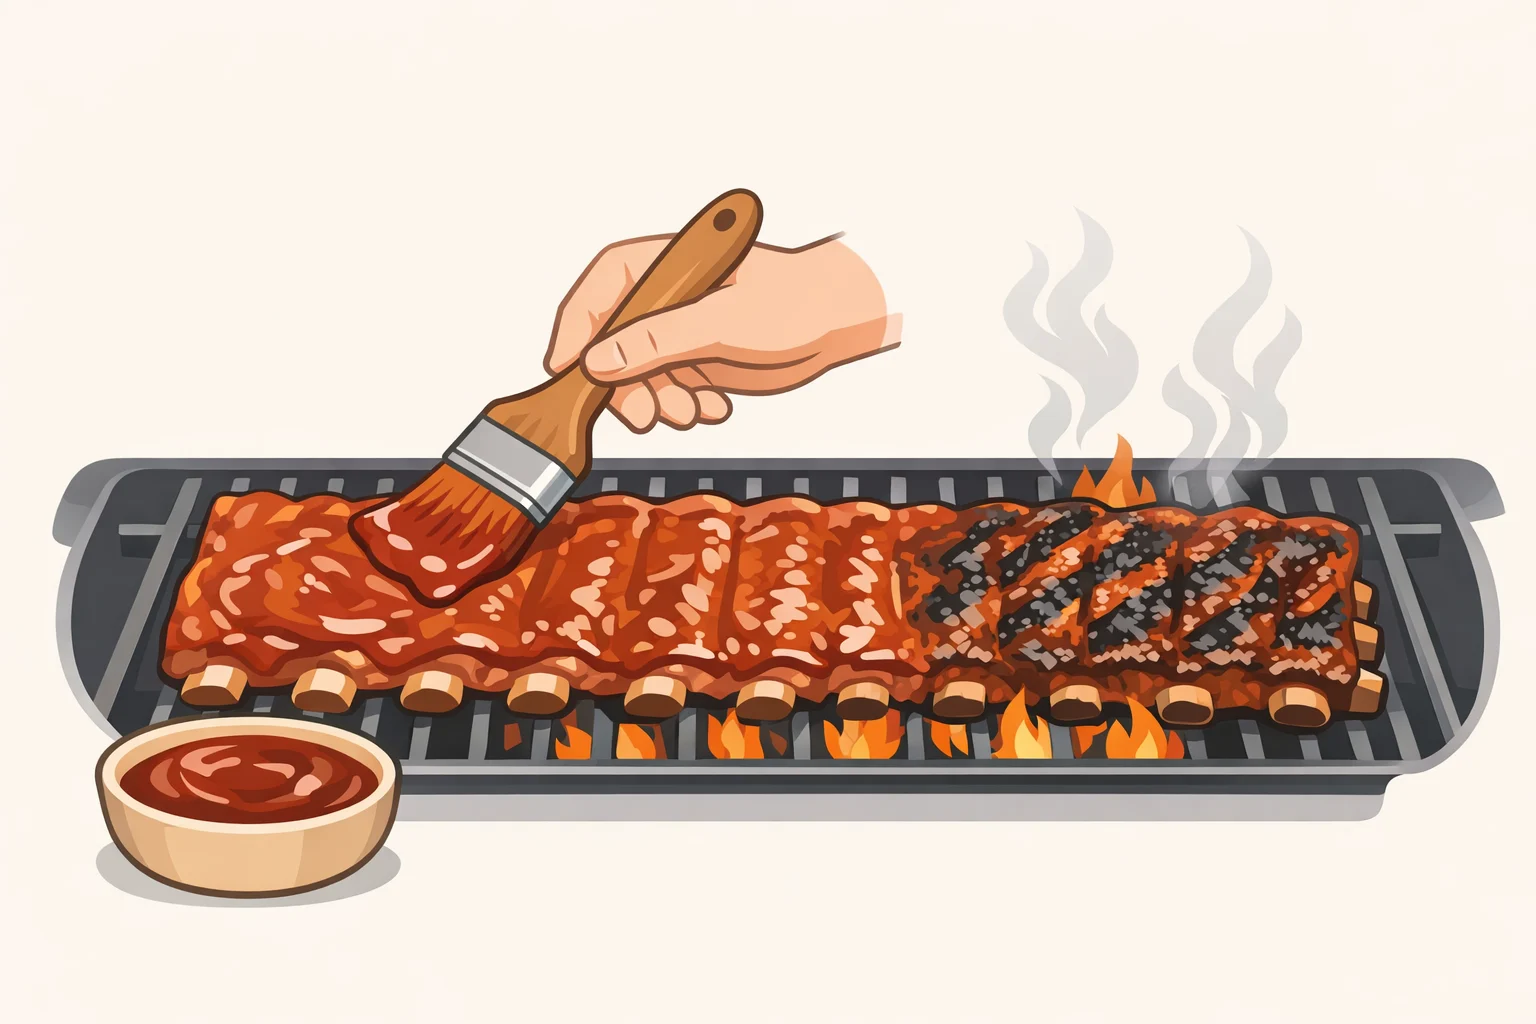
Only move ribs to high heat once they've hit the texture from the step above. This is the stage where both chefs actually agree on technique, not just philosophy: Leon brushes hers with guava barbecue sauce and finishes on a hot grill until charred, while Chapman finishes over direct heat for a sticky glaze (The Kitchn, this week). High heat caramelizes the sauce fast and gives the surface those charred, smoky edges without pushing already-tender meat past done (The Kitchn, this week).
Hold off on the sauce until this point rather than brushing it on earlier. Sugar burns fast, and applying it only at the finishing stage lets it caramelize instead of scorch during the long, low cook.
No grill on hand? A broiler does the same job. Position the ribs close to the heating element, brush with sauce, and stay in the kitchen the whole time: sugar-based barbecue sauce can go from caramelized to burnt quickly under that kind of direct heat, so watch closely and check every minute or so rather than walking away. Once the sauce is bubbling and lightly charred, pull the ribs, let the rack rest a few minutes, and slice between the bones.
When this method doesn't apply: beef ribs and sous vide
Beef short ribs are a different animal, literally. The bones run 6 to 8 inches long, the meat on top can be up to 2 inches thick, and a single bone with meat can weigh a pound and a half raw (AmazingRibs, last month). None of the pork-rib times or temperatures above apply here.
AmazingRibs' Texas-style method calls for indirect heat at 225°F until the meat hits roughly 203°F internal, and how long that takes depends heavily on thickness: about 5 hours for 1-inch meat, 7 hours for 1.5-inch, and up to 10 hours for a full 2-inch top (AmazingRibs, last month). If the goal is authentic Texas smoked beef ribs, skip sweet barbecue sauce entirely; AmazingRibs suggests a thin, beef-stock-based mop instead if a sauce is wanted at all (AmazingRibs, last month).
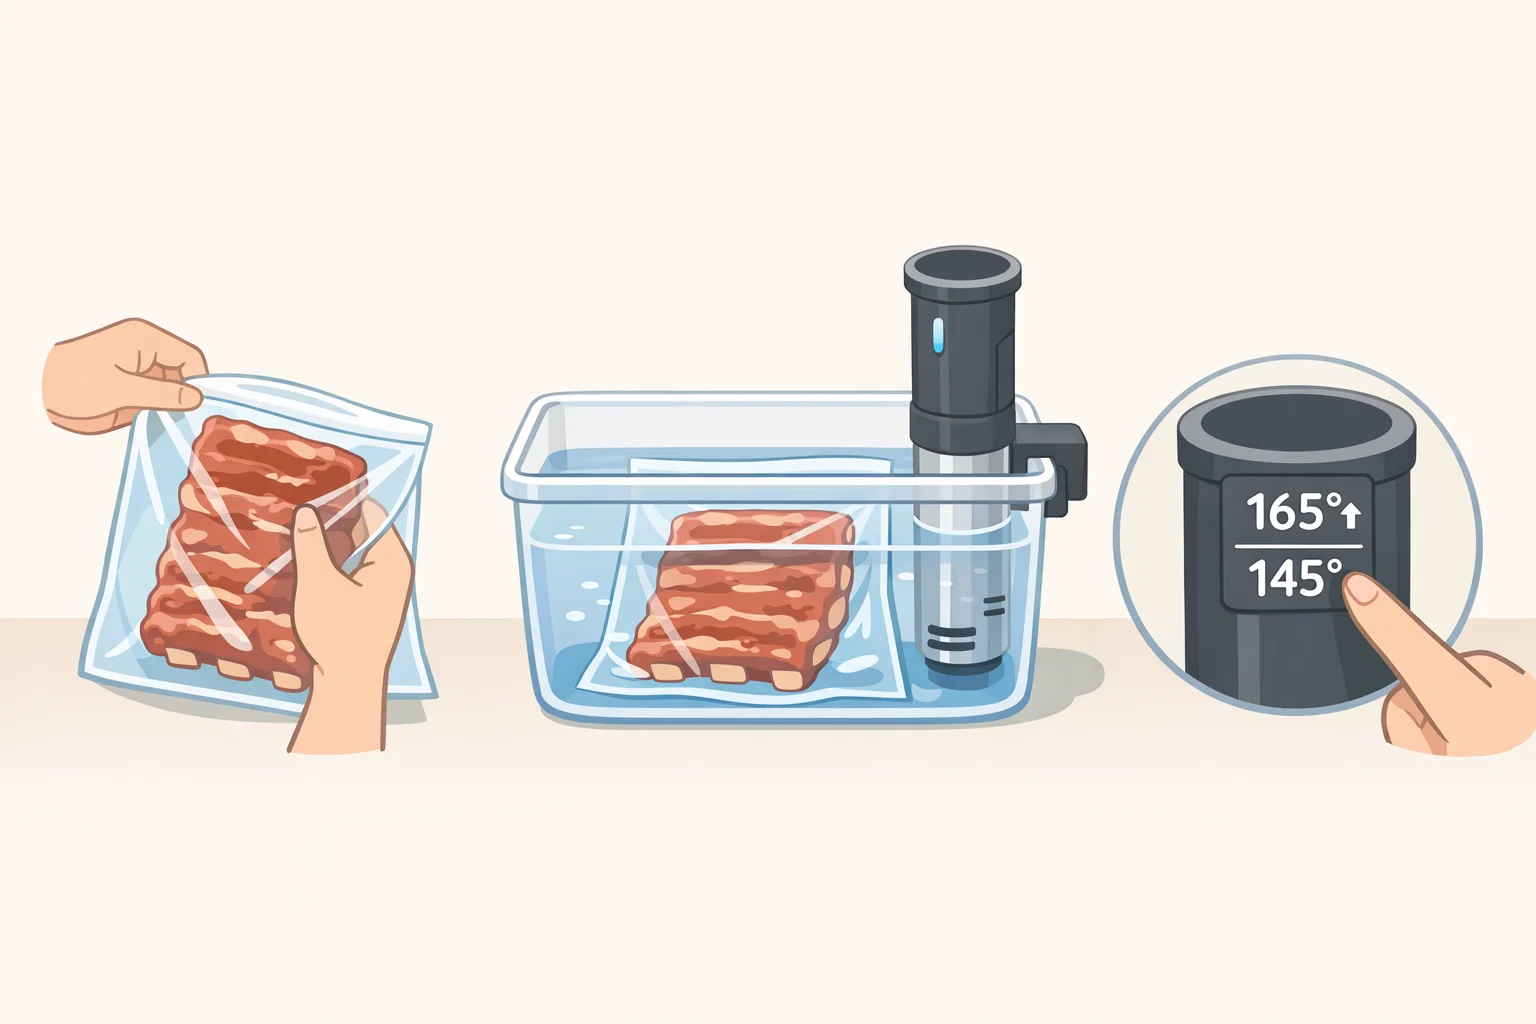
Sous vide is a separate track altogether, not a substitute oven or grill temperature. It's a make-ahead method built around water-bath time rather than air heat. Serious Eats tested dozens of racks between 130°F and 180°F and found two reliable sweet spots: 145°F for 36 hours produces extra-meaty, steak-like ribs, while 165°F for 12 hours produces a more familiar, shreddier barbecue texture (Serious Eats, 11 months ago). Ribs cooked this way can be chilled and refrigerated for up to five days before their final finish (Serious Eats, 11 months ago), which is useful for anyone whose real obstacle is weeknight timing rather than technique.
Which of these three tracks makes sense depends on what's on hand and how much time there is. The covered oven route is the one to reach for on a weeknight with a bare pantry. Indirect grilling rewards the cook willing to babysit a fire for a smokier, cleaner-bite result, and sous vide is worth exploring once repeatable, exact texture matters more than convenience.