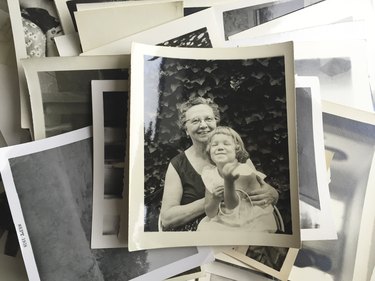
Are you interested in digitizing photos and videos but unsure where to start? We get it. Tackling dusty shoe boxes full of old photos and tapes from the attic and sorting through hundreds of precious memories can be overwhelming. But converting photography and film to digital formats keeps your media safe from time, natural disasters, accidents — not to mention family feuds over who gets custody of your great-grandparent's single-copy wedding photo.
By setting aside a bit of time to organize and learn how to digitize photos and film now, you can preserve memories for generations of future family members to enjoy, stress-free. We've broken down the best practices for building your digital archive. You don't have to be a tech expert to follow our guide on how to digitize photos, which includes input from experts.
Video of the Day
Video of the Day
Tip
Always handle old photos and videos with care! Eric Niloff, CEO and founder of the photo, video and audio digitization company EverPresent, cautions readers to handle their old photos and films delicately.
For photos, signs that you might break something include crinkling sounds when opening an album or a photo resisting when you try to take it out of the frame. “When it comes to images, the real counsel I would give is to be careful—because you will likely be the person who damages your own stuff by being too aggressive in the physical handling of something,” he says.
Make a Plan for Digitizing Photos

The biggest enemies to the quality of your photos and videos are aging and poor storage practices. When considering digitizing family photography and films, it's best to start as soon as you can. Physical photography and film are sensitive to heat, light, and humidity. Most standard scrapbooks and cases are not enough to keep them safe from the elements. So whether you're handling 60-year-old black-and-white images or your standard drugstore prints, the time to start is now. Consider these tips to begin the process.
1. Get rid of duplicate photos
Before you begin digitizing, pare down your photo collection by getting rid of duplicates. Posterity doesn't call for 10 shots of the family reunion where no one was looking at the camera! Settle on the one image where everyone was, then set aside the rest.
What to Do When You Have Too Many Photos
Eric Niloff of EverPresent has excellent advice for slimming video and photo collections. “If someone is in a bind and has to make hard choices, I ask people, ‘Can you find it on Google images or not?’ If you have to pick between a picture of your family gathering that's truly unique and a picture of a beautiful scene that elicits incredible memories from that trip, I say pick photos of people over stuff or a place.’” The same advice works when paring down your photos and videos on your smartphone.
2. Pick a theme for your photos
Next, consider the story you're trying to tell with your collection. Are you painting a full picture of your extended family? Documenting the life of a beloved pet? Sharing a fondly remembered trip or a milestone event (such as a wedding)? These questions will all help you determine which photos add to your collection and which ones are redundant.
3. Consider emotions
Weigh the emotional meaning of each photo or clip. Not all photos or clips carry the same weight. For example, if you have many photos of a family member at a certain age, you might not need to digitize every single one.
4. Go for quality
Finally, consider quality. Are you looking to house photos and videos for easy access on your phone or to create high-quality, archival-level media? Desired quality will help you choose how to proceed. Generally, there are three options when digitizing old photos and video: using your smartphone, using a scanner/video converter, or using a professional service.
How to Digitize Photos

1. Photo digitization apps
The easiest way to take photos is by using your smartphone — and it's the easiest way to digitize older photo prints. If you're low on time, download an app such as Adobe Scan or Photomyne. These photo-scanning apps will help digitize images using your phone camera.
Make sure you're in a room with a good light source and that your shadow isn't casting onto the image below while you take each picture. Keep in mind that while this is the fastest way to digitize old photos, you might be compromising on quality. If you're interested in printing, enlarging, or capturing archival-quality copies of your family photos, smartphones might not be ideal.
How to Digitize Photos with an iPhone
If you have an iPhone, you can use your camera app to digitize your photos. “On iPhones, there are little crosshairs that you’ll see when you hold your camera over something,” says Rachel Jenkins, CEO and founder of the photo digitization company Photo Archivers. “When those crosshairs both change to the same color, then your camera is level. It’s good later from a cropping standpoint. Your photo won’t be all wonky.”
2. Photo scanners
For the best quality at-home photo digitization, you'll want to scan photo prints. While photo scanning can be very time-consuming, it's worthwhile if your goal is to create archival-quality images that capture all the fine details so you can create new photo prints in the future. Use a good photo scanner from a trusted brand like Canon or Epson — the latter offering a high-speed scanner that works well for your average drugstore photo prints. When using a scanner, make sure there's no dust on the glass, ensuring streak-free copies.
How to Choose the Right Photo Scanner Settings
Rachel Jenkins of Photo Archivers cautions that it's imperative to select the right settings when scanning your photos. Otherwise, you might not be able to reprint or reuse them at the same quality as the originals. “On scanners, you usually have options for 72 PPI, 300 PPI or 600 PPI,” she says. “Typically, we recommend that you try to achieve a 600 PPI because that enables you to enlarge the photo later if you want to.”
3. Professional digitization services
When digitizing old photos, sometimes the project is too much to tackle on your own. You'll want to seek professional photo digitizing services for large-scale projects, for help converting delicate images or film and if you're uncomfortable or unfamiliar with technology the project requires. Consult services like EverPresent or Photo Archivers, which offer options to drop off your collections in person or mail them in based on your location and preferences. Another option is LegacyBox, a mail-in conversion and scanning service.
How to Convert Home Videos to Digital
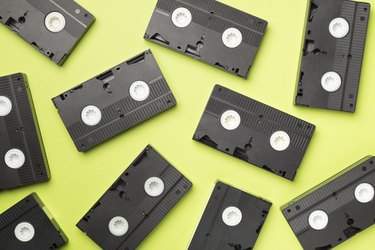
1. Hardware and conversion packages
Options for DIY video digitization depend on the video format you're working with and which equipment you already have on hand. At a minimum, you'll need a working VHS player or camcorder. You'll then need to download hardware and purchase conversion cables to connect your device to a modern computer.
Amazon offers full digital conversion packages, like the highly rated VIDBOX, for less than $100. This set includes requisite red, white and yellow cables to attach your device, a converter, a USB cable to connect the converter to a computer and hardware for completing the digitization process. For older formats, like 8mm or 16mm film, you'll likely need to consult a professional service.
2. Professional video conversion services
Much like photo digitization, video conversion sometimes calls for professional assistance. If you're feeling overwhelmed by the technical specs required to DIY your home video conversion or if you're working with especially delicate film, consider services like the aforementioned EverPresent and LegacyBox.
Expert-Approved Tips and Tricks for Digitizing Photos and Videos
As you're converting old photos and videos to digital or building your digital archive, keep these tips in mind from expert Eric Niloff of EverPresent.
1. Use what’s already there
Niloff notes that the top organizational mistake he sees people make is not transferring valuable written material from VHS tapes and backs of printed photos to digital copies. “There will never be a more efficient and appropriate time to transcribe that stuff into the metadata or file name of your files than when you’re scanning,” he says.
2. Keep categories broad
Creating complex categories and subcategories can keep you from finishing your digitizing project. “When it comes to organizing the digital archive, I’m a huge fan of big categories,” Niloff says. “If you get too organized, you get into mutual exclusivity issues, and your collection becomes impossible to organize."
3. Create a highlight reel
“If you have 7,000 images, the best thing you can do for your family is create a quick highlight of the hundred best images and share them — as opposed to going overboard with face-tagging and topic-tagging and making your collection Google-able,” says Niloff. The same philosophy applies to videos. He recommends finding three excellent 30- to 45-second clips of each video to share with family. “It’s something you can do in a few hours versus something that’s going to take years,” he adds.
How to Back Up Photo & Video Collections
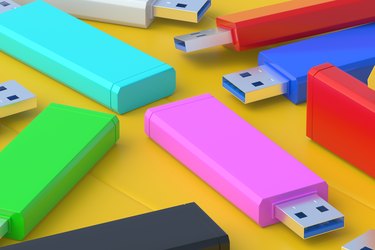
It's best to back up your collection in three separate ways to ensure it's safe if something happens to one version. Ways to save digital files include a cloud storage system (such as Google Photos or Apple's iCloud Photo Library), a physical backup like a flash drive or external hard drive, and one more of your choosing (either the physical photos themselves or another hard drive stored in an off-site location).
Make sure to keep physical photos and tapes at least until you double-check to ensure digitization work has been done correctly and is backed up. Whether or not you ultimately choose to hold on to physical photos and tapes after you digitize them is a matter of personal preference. The age of the photo factors in, as well — you might want to keep the 100-year-old black-and-white image but toss the CVS photo prints.
What to do After You've Digitized Photos and Videos
Keep the creativity going by sharing your digital library or creating lasting gifts for loved ones.
Share the digitized files: For large collections of digital images and video, consider sharing digital files via a cloud system (such as Google Drive or Google Photos), uploading media, creating an album, or sending desired recipients a private link. Another option is to create flash drives for family members, which they can take home and access at their leisure. You can also share favorites on social media. Create a private family Instagram or Facebook page, invite loved ones to join, and post photos with important details in captions.
Create photo books: You simply can’t beat this modern take on older, clunky photo albums. Use newly curated digital photos to create a stunning photo book to gift to family members (or yourself!). “It doesn’t require technology to look at them,” says Rachel Jenkins of ScrapMyPix. “You can design one copy and print four copies. You have the opportunity to tell stories with text — even if it’s something as simple as telling who that person was and adding a date. You can fit a lot in a book like that, and it doesn’t take up that much space.”
Display digital photo frames: The ultimate space saver, digital picture frames are a great option for the daily enjoyment of a smaller selection of photos. Jenkins recommends digital photo frames from the brand Nixplay. “I have one at my mom’s house and at my in-laws’ house,” she says. “Multiple family members can remotely upload photos to each digital frame, so we don’t even have to be at their houses to share images with them.”
Whether this photo and video digitization guide helps you get rid of clunky analog media or simply leads to a digital backup of your cherished prints and tapes, it's a worthwhile undertaking with benefits that will last for generations.