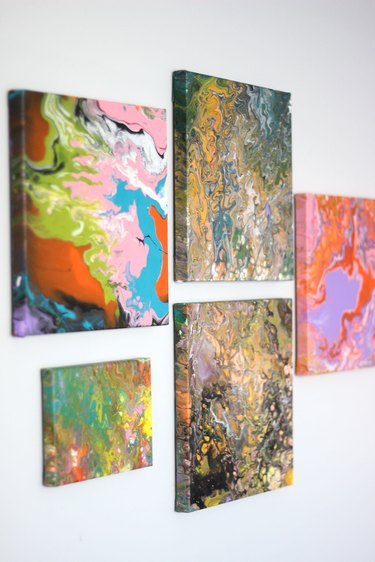
Acrylic paint pouring is all the rage among artists, professionals and amateurs alike. With paint mixed to a thin consistency and poured onto a canvas, gravity does all the work as you tilt the canvas in different directions to create one-of-a-kind patterns. Sometimes, the artwork looks like marble, and other times, it looks like geodes. No two pieces are ever alike. There are countless ways to do paint pouring, and this tutorial will show you three basic techniques to get you started. These paintings are so fun to create, and the results are so magical that you'll be totally addicted.
Video of the Day
Things You'll Need
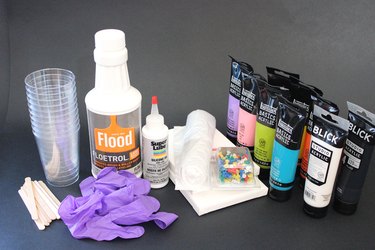
Plastic tarp
Pouring medium (like Floetrol)
Acrylic paint
Plastic cups
Scale
Popsicle sticks
Water
Silicone oil
Stretched canvas
Push pins
Plastic gloves
Palette knife
Step 1: Cover Your Work Space
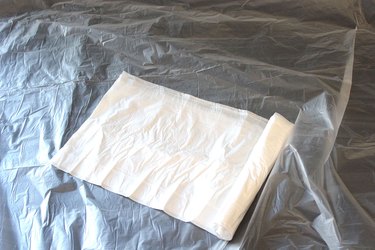
Paint pouring is a very messy endeavor, so be sure to line your work space with plastic tarp. If you're working on the floor, block off your work space from curious pets that may step all over the dripped paint. (I learned this the hard way.)
Video of the Day
Step 2: Mix Your Paint
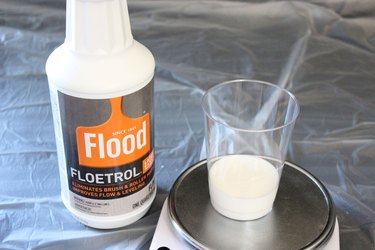
To mix the paint so it spreads easily around the canvas, you will need to add a pouring medium and some water. Art stores sell products specifically labeled as pouring mediums, but these tend to be overpriced. I recommend a product called Floetrol, which you can find at any hardware store. It is used as a paint additive to prevent brush marks when painting houses, but it works wonders as a pouring medium at a fraction of the price.
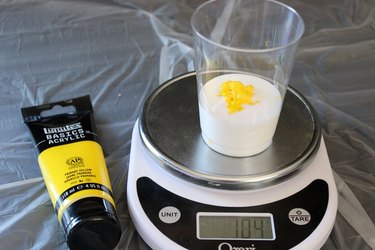
The proportions of paint, pouring medium and water needed are approximately one part paint, one part pouring medium and one-half part water. However, these are just estimates because different paints have different viscosities, even within the same brand. Start by adding some pouring medium to a plastic cup.
Then, add an equal amount of acrylic paint. It's hard to tell how much paint you're adding since it sinks into the pouring medium, so I use a scale to help determine the amount. Mix the two parts with a popsicle stick.
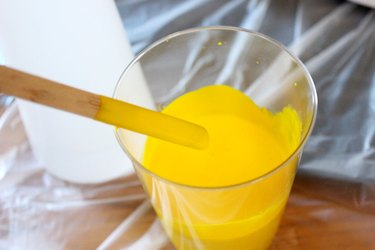
Gradually add water and mix until the paint has the consistency of a melted, runny milkshake. One way to test the paint is to see if it runs smoothly off the end of the popsicle stick and lands in the cup of remaining paint without making a mound.
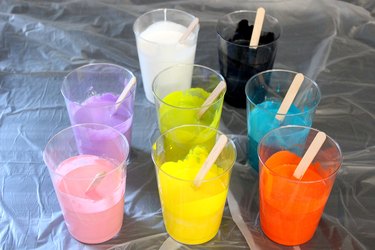
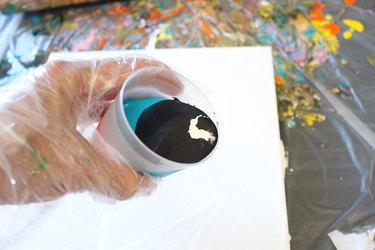
Repeat for all your colors and include some white and black paint as well. They create contrast that sets off the other colors.
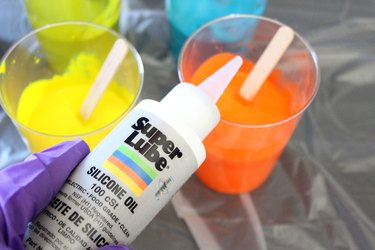
Step 3: Add Some Silicone Oil
Silicone oil helps to create all the little amoebalike shapes in the patterns. They're appropriately called "cells." You can use basic silicone oil you would find at the hardware store. Add three drops in each paint cup and stir well.
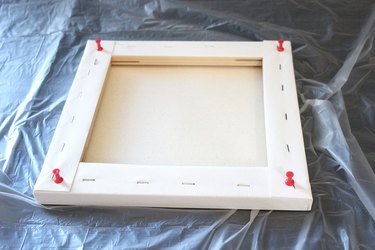
Step 4: Prepare Your Canvas
Flip your stretched canvas over to the back side and insert push pins in each corner. You may need to tap gently with a hammer or mallet to secure the pins. The push pins elevate the canvas so paint can drip onto the tarp, preventing the canvas from sticking.
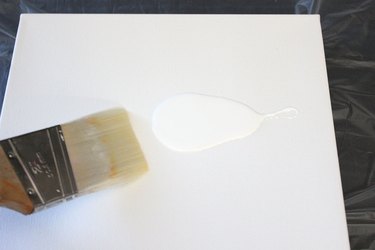
Brush some of the white paint mixture over the canvas to prime it. This first layer of paint acts as a lubricant, helping the paint spread even more easily. Now comes the fun part: pouring the paint.
Straight Pour Method
Step 1: Pour the Paint
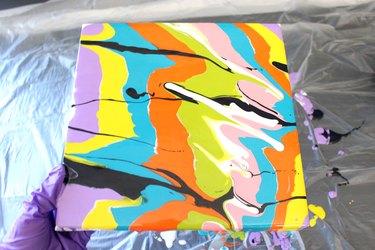
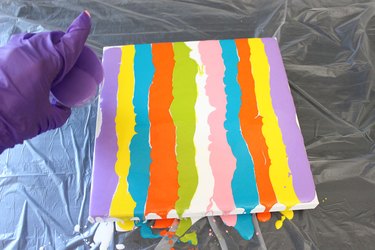
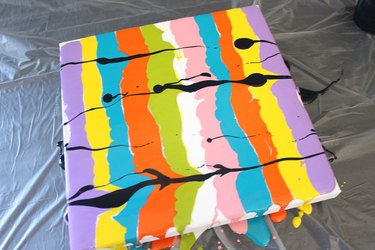
With the straight pour method, you simply pour the paint from the cups directly onto the canvas. In this example, I am pouring the paint in stripes of alternating colors.
Tip
Things are about to get messy. Be sure to wear plastic gloves and have plenty of extra gloves handy.
Step 2: Add Contrast
For some dramatic contrast, pour a few thin strands of black paint across the canvas.
Step 3: Tilt the Canvas
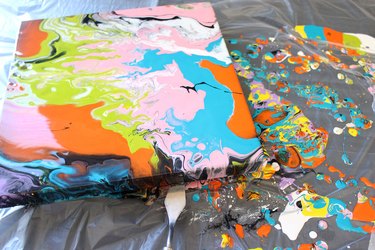
Tilt the canvas in different directions to spread the paint all over the canvas. Keep tilting the canvas up and down and back and forth to keep the paint moving until you are happy with the pattern.
Step 4: Clean the Edges
Use a palette knife to scrape any excess paint on the bottom edges of the canvas. You can also use the knife to fill in any areas along the edges that didn't get any paint.
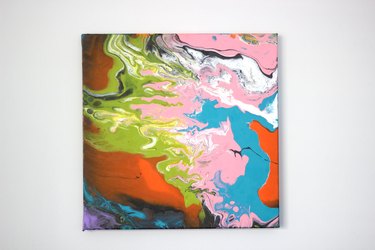
Allow the canvas to dry for 24 to 48 hours.
Dirty Pour Method
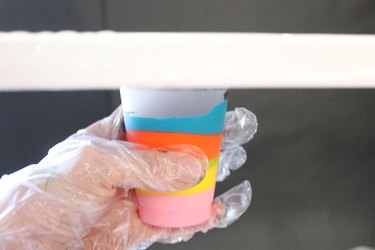
Step 1: Pour Layers of Paint in a Cup
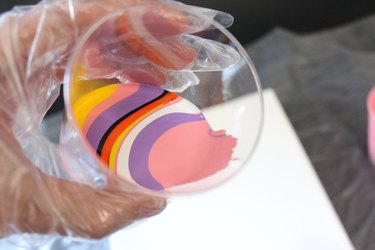
With the dirty pour technique, you first take a new cup and pour layers of color into the cup instead of onto the canvas. When adding layers of paint in the cup, hold the cup at an angle and pour the paint onto the side of the cup rather than straight down. This way, the layers of paint remain distinct.
Step 2: Pour the Contents of the Cup
Pour the layers of paint from the cup onto the canvas in any pattern you wish. You can pour it all in the middle at once or disperse it around the canvas.
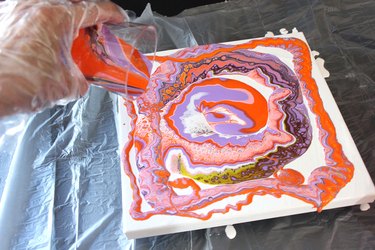
Step 3: Tilt the Canvas
Tilt the canvas, moving it in all directions to spread the paint layers until the canvas is completely covered and you are happy with the pattern.

Clean the edges with a palette knife and let the canvas dry for 24 to 48 hours.
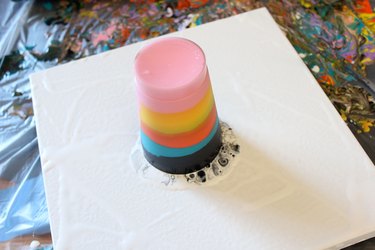
Inverted Cup Method
Step 1: Pour Layers Into a Cup
As with the dirty pour method, pour layers of different colors of paint into a cup.
Step 2: Place the Canvas On the Cup
Turn the canvas upside down and place it on top of the cup. The front of the canvas should be facing down toward the paint.
Step 3: Flip the Cup and Canvas
Holding the cup steady against the canvas, flip them both simultaneously so the cup is now inverted on top of the canvas. Then, lift the cup to release the layers of paint.
Step 4: Tilt the Canvas
As with the other methods, tilt the canvas in different directions to create your pattern.
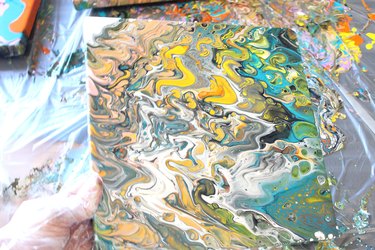
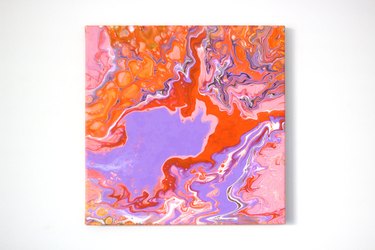
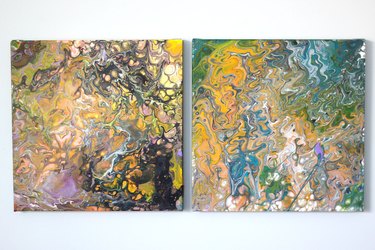
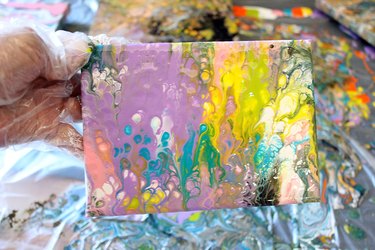
Clean the edges with a palette knife and let the canvas dry for 24 to 48 hours. Here are two different examples of paintings using the inverted cup method.
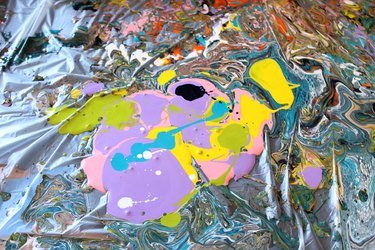
A Bonus Technique: The Dip
Step 1: Press the Canvas Into Paint Drippings
You'll undoubtedly have a lot of extra paint accumulating on the plastic tarp as you tilt the canvases and the paint drips off. Don't waste that paint. Use it to create more art. Just turn a canvas upside down and press it into the paint drippings. Make sure you press down on all sides so every part of the canvas makes contact with paint.
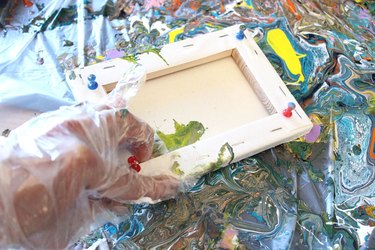
Lift the canvas and your artwork is revealed. Tilt the canvas in different directions if you desire. Clean the edges and let it dry for 24 to 48 hours.
Acrylic paint pouring is so fun and easy. It will make an "artiste" out of anyone. Hope you have plenty of wall space!