
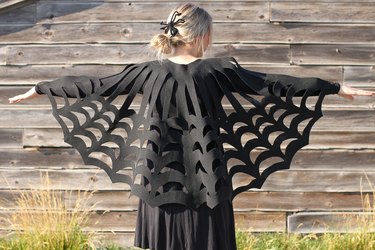
Some of the best Halloween costumes are those that are easy to make but look like you spent many hours toiling over their creation. This DIY spider web poncho is a case in point! Despite looking quite elaborate, it's fairly straightforward to make, and best of all, no sewing skills are required.
The poncho serves as the main focus of the costume and can be made from black felt or black fleece if you prefer a warmer costume. Then, all you need to do is dress in all black and add some accessories to complete the look.
Video of the Day
Things You'll Need
28 1/2 by 57-in. piece of black felt (or black fleece)
Tape measure
Chalk
Sharp scissors
1 yard of ribbon
Hot glue gun

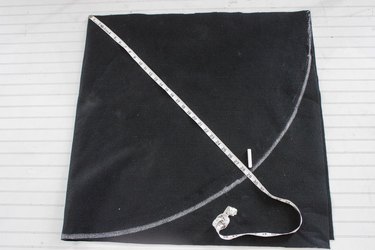
1. Fold and mark the felt
Fold the felt in half widthwise with the fold on the left. Put the tape measure on the top of this edge and use chalk to mark a quarter-circle with a 28 1/2-inch radius.
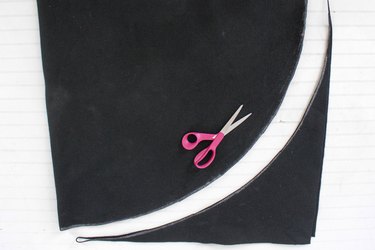
2. Cut through the fabric
Use scissors to cut through both layers of the fabric along the quarter-circle you just drew.
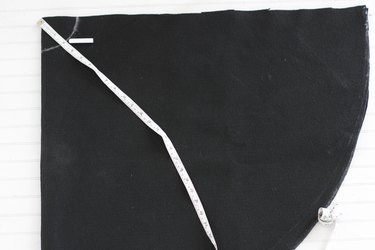
3. Measure a head hole
Use the chalk and tape measure to mark a semicircle with a 3-inch radius in the top left-hand corner of the fabric. This will be for a hole for your head at the center of the poncho.
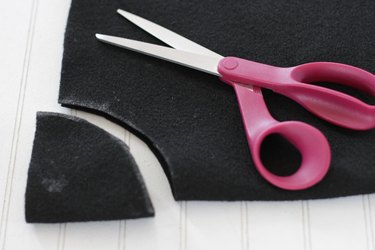
4. Cut out the head hole
Use scissors to cut along the chalk line you've created. Once you've finished cutting, unfold the fabric and make sure that the hole is big enough for your head (or the head of the spider web costume wearer). If it's not, enlarge the circle carefully, making sure to keep it in a circle shape.
Warning
Never cut while the costume is around someone's neck. Instead, make an effort to estimate the additional size needed and then remove the costume, cutting on a table or elsewhere.
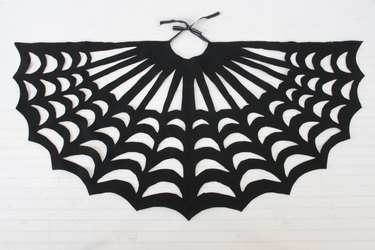
5. Draw scallops
Using chalk, draw scallops along the curved bottom of the material.
Tip
You can use a bit of creativity here to make the edge look like that of a spooky spider’s web, though it does work best if you follow a pointed, scalloped pattern.
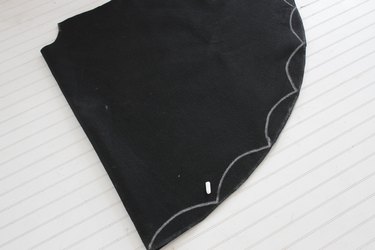
6. Cut out the scallops
Using scissors, cut out the scallop shapes that you've drawn.

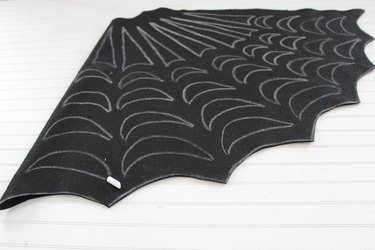
7. Draw the spider web pattern
Use chalk to draw a spider web pattern on the poncho. You'll be cutting out the negative spaces later. You can copy the pattern shown in this tutorial.
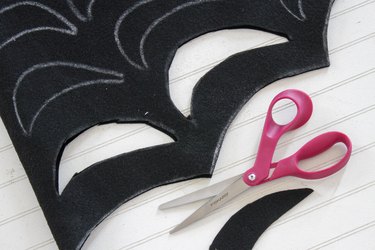
8. Cut the spider web pattern
Use scissors to cut the spider web pattern.
Tip
For best results, use a very sharp pair of scissors and take your time.
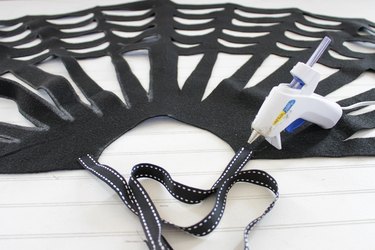
9. Add the ribbon
Once the cuts are finished, snip the ribbon in half. Then, open the poncho and glue half of it to each side of its neckline.
10. Make any additional cuts
Open the poncho fully and make more cuts if needed.
Tip
It is helpful to set the poncho on a large, flat surface so you can see the whole thing at once and make any needed alterations.
11. Try on the poncho
To put on the poncho, drape it around yourself and tie the ribbons together.
12. Add the finishing touches
When you're ready to wear the poncho, put on a long-sleeve black T-shirt, black pants or leggings, and a pair of black shoes. If you live in a colder climate and will be outdoors during your Halloween festivities, you can wear a black jacket underneath as well.
Tip
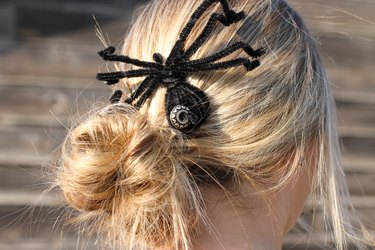
You can also use a hot glue gun to attach plastic spiders to the poncho and to a headband. Consider using spiders in bright colors to make them stand out against the black material or go all black for a classic look. You can also make a spider for your hair using pipe cleaners to create realistic fuzzy legs.
And there you have it! A simple DIY Halloween costume that can be thrown together at the last minute while still looking elaborate and chic. Wear it to your next Halloween party, around the house, or while trick-or-treating.
