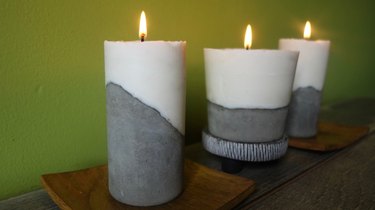
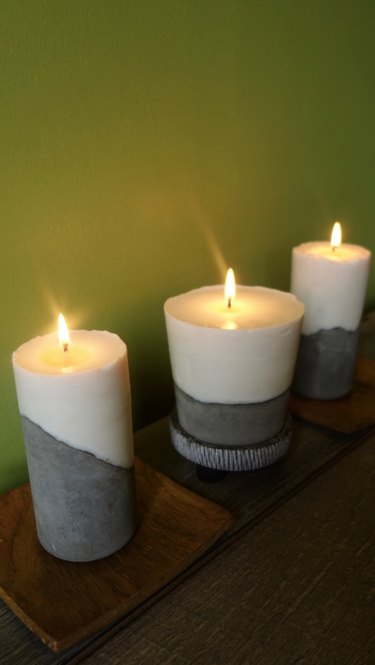
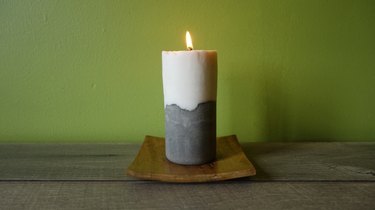
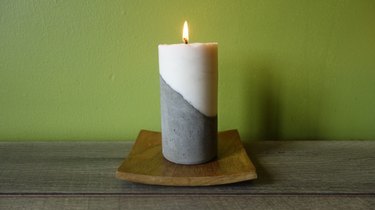
Looking for ultra-modern decor to go with your minimalist style? We're guessing that this candle with a cement base is probably just what you're after. It's the right balance of understated and eye catching. You'll also love that the materials are simple to find and very affordable, especially if you buy them in bulk. This also means that you can get enough materials to churn out a bunch at a time, so these unique candles would make perfect handmade party favors or gifts.
Video of the Day
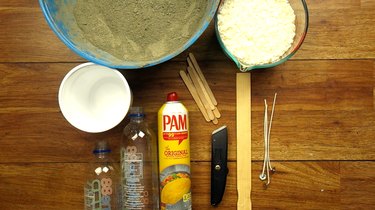
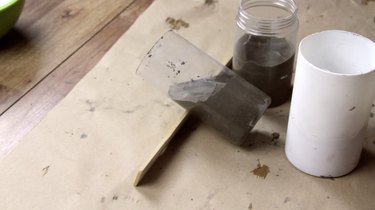
Things You'll Need
Cement or concrete mix (we used quick setting cement in this tutorial)
Wax flakes/melts (we used soy)
Very lightweight empty plastic food containers (see tip below)
Mixing bowl
Mixing tool (we used a paint stir stick)
Popsicle sticks (or pens, pencils, chopsticks, etc.)
Needle nose pliers (if needed)
Colored dye chips (optional)
Fragrance oil (optional)
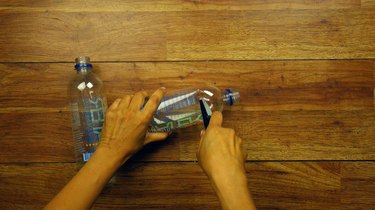
Step 1: Remove Narrow Container Openings (If Needed)
If using a container with a narrow opening, use a utility knife or scissors to cut a wider opening. This will make it easier to add concrete and wax to your mold.
Tip
The containers should be thin enough to be easily cut with a utility knife and torn apart with hands. Examples of appropriate containers include thin plastic water bottles and yogurt or sour cream containers. Disposable plastic water bottles are ideal for this project, and the bottle tops can also be used as funnels in Step 3.
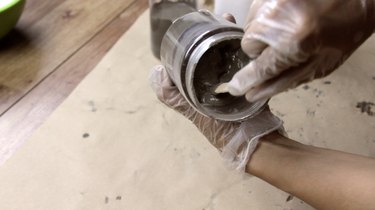
Step 2: Mix Cement or Concrete
Add water to your cement or concrete mix. Any quick-setting cement mix will do for this project. Your candle base will be the standard gray color of cement, though you can also buy white cement to yield a lighter, brighter look. Add enough water to the mix to create a thick cake batter consistency.
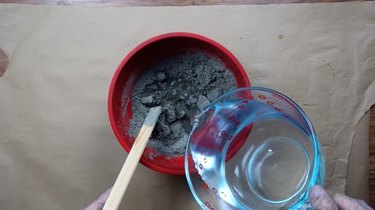
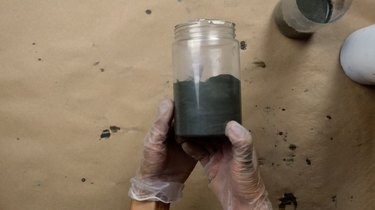
Step 3: Add Cement Base to Molds
Before putting the cement mix into your containers, coat the inside with non-stick cooking spray as a release agent. This will make it much easier to remove the cement from the mold.
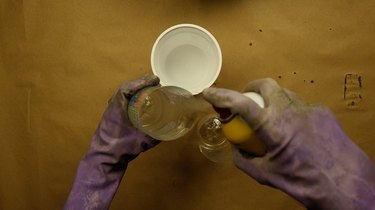
If using a plastic water bottle as a mold, invert the bottle top and insert it into the cut edge to make a funnel.

Fill the containers one-quarter to one-third full.
To force out bubbles that may be trapped within the wet cement, agitate the container by firmly hitting the bottom against your work surface. You'll know to stop when you no longer see any bubbles rising to the surface.
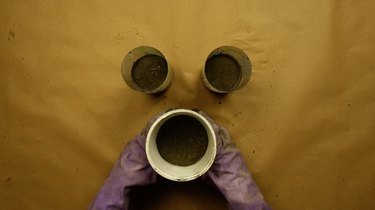
Step 4: Shape Cement Base (Optional)
Before leaving your cement to set, select your desired cement base styles. You can create a basic (straight wax-cement border) base, or choose from two style options: 1) uneven wax-cement border 2) diagonal wax-cement border. Scroll down to the bottom of this tutorial for an explanation of and directions for these options.
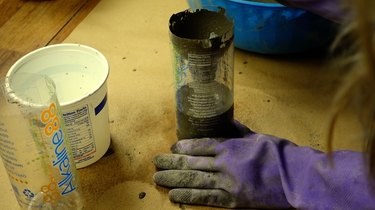
Step 5: Let Cement Set Completely
The time it takes for your cement or concrete to set completely depends on the materials you use, the ambient temperature, and how much water you mixed in. This can be between 24 to 48 hours.
Step 6: Melt Wax
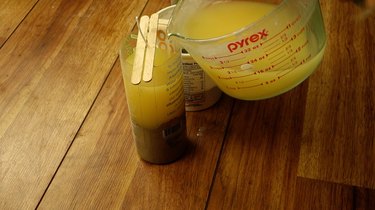
Once your cement has set, melt enough wax using the double boiler method to fill your candle molds. Use soy wax flakes that are easy to measure out and quick to melt. We used a 2-cup Pyrex measuring cup to melt the wax over a pot of simmering water. The handle hooks over the top of whatever pot you use, making this kind of container easy to remove safely from the hot water. Stir the wax with a wooden paint stirrer or popsicle stick.

Step 7: Add Color and Scent (Optional)
Take the melted wax off the heat and stir in any add-ins you want to use. Tint the wax by stirring in colored dye chips. Stir in your chosen fragrance oil if you want to create scented candles. The industry standard is to add about 1 ounce of fragrance for every 16 ounces of wax. (Feel free to skip this step; plain white wax is a striking contrast with gray cement, so you can certainly pour melted wax straight from the measuring cup into the mold.)
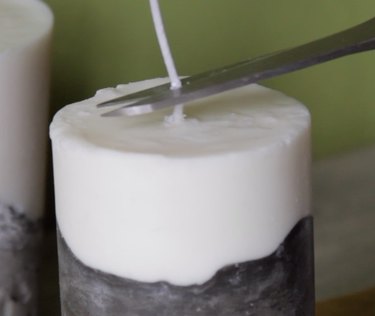
Step 8: Place Wicks and Pour Wax
Before placing the wicks, carefully check the sides of your containers to see if any flecks of cement have hardened there. If so, scrape them off to make sure you have a clean mold for your wax.
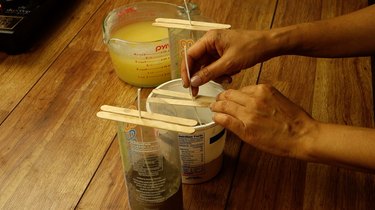
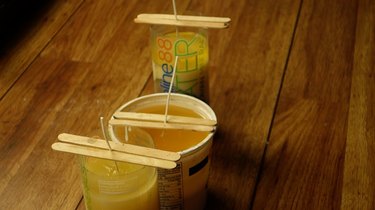
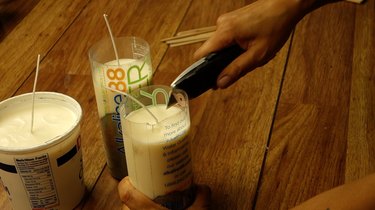
Place each candle wick in the center of the mold, and hold the wick upright by placing two popsicle sticks (or pencils, pens, chopsticks, etc.) on either side of the wick upon the top edge of the container as shown below. It's also worth investing a few dollars in a wick centering clip, which easily holds the wick upright, if you plan to make candles again in the future.
Pour the wax into each container atop the hardened cement until about two inches from the top edge. Leaving two inches of empty space at the top is important for easy removal once the wax is set.
Let the wax cool completely.
Tip
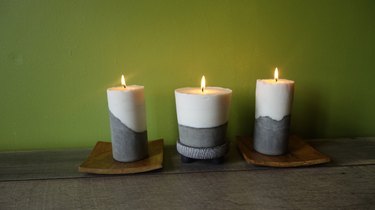
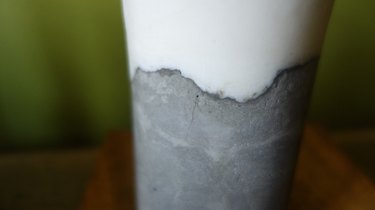
Note that depending on the container you choose, the wax may seep into the space between the top edge of the cement and the container, which may cause the cement to darken in that area and/or it can coat the area with a thin layer of wax. You can choose to leave it as is which can create a cool stratified look or you can sand it down to achieve a cleaner look like the candles shown in the main image above.
Step 9: Remove From Mold
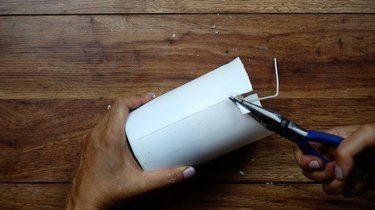
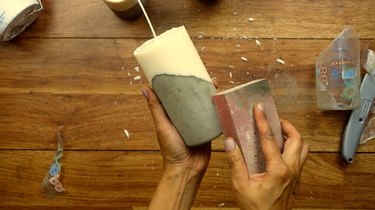
Once the wax has completely cooled and hardened, cut 1-inch slits all around the top edge of the plastic container as shown below. This is why it was important to leave some empty space at the top of the container.
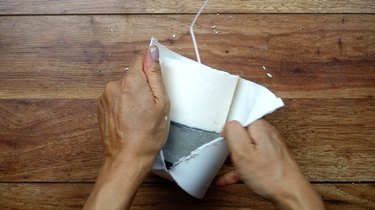
Tear off the container in sections, using the slits at the top as starting points.

The cooking spray you used should make the concrete base easy to remove from the mold.
If the plastic container you used is too tough to tear open using just your hands, use your utility knife to score down the side of your container (not so deep that you score through the candle!) and use a pair of needle nose pliers to help you to tear off the mold.
Step 10: Finishing
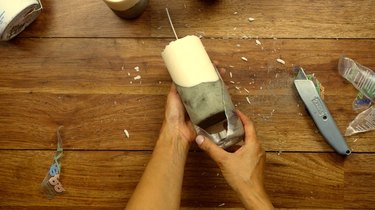
Use a sanding sponge to sand the cement if you'd like a smooth and more even-colored surface and to remove any marks you may have made when tearing/cutting off your mold. Clean the surface of the candle using a paper towel or rag.
Trim the wick to about one-eighth of an inch.
Light your chic new candles, put on some chill tunes and enjoy the ultra-modern ambience.
Cement Base Options
Option 1: Basic Cement Base / Straight Border
This is basically the default, do-nothing style, which you may prefer for its simplicity and clean look. After shaking out the bubbles in Step 3, simply wipe the sides of the container clean, set it upright, and let the cement do its thing.

Option 2: Uneven Border
For an uneven border, wait for the cement to partially set so that it has firmed up a bit, but is still moldable. Then, use a popsicle stick or similar disposable object to make a well in the center of the cement base and push the cement slightly up the sides of the container to create an uneven border as shown below.
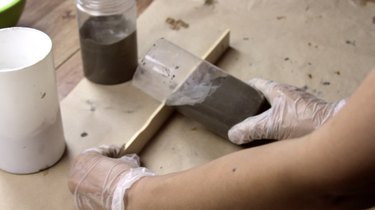
Option 3: Diagonal Border
To create this effect, prop up your container at an angle so that the cement will set at an angle. A paint stir stick works well for this.
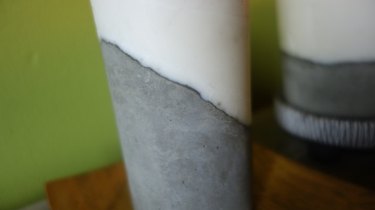
Allow the cement to set this way about halfway through. If the cement base has set long enough, it should still maintain its diagonal shape when you place it upright. If it doesn't maintain its shape, leave it to set at an angle for a bit longer.
Once it's set long enough to keep its angled surface (but is still moldable), use a popsicle stick to create a shallow well in the center bottom of the partially set cement. This will give you an area in the diagonal surface where you can set your wick later. Now, let the cement set completely.