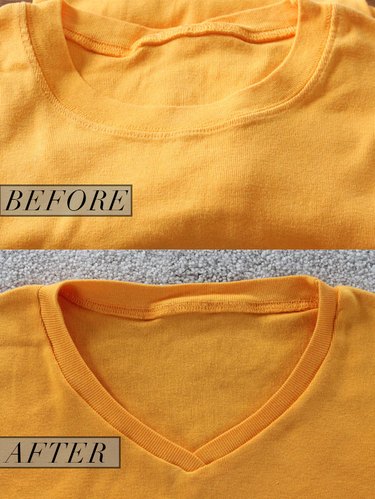
Many women choose a v-neck because it draws the eye up toward the face and creates a heart shape. It can also create an illusionary effect that elongates the body — and who doesn't want that? Even if you're not an experienced sewer, you can transform your crew necks into flattering v-neck shirts in just a few simple steps.
Video of the Day
Things You'll Need
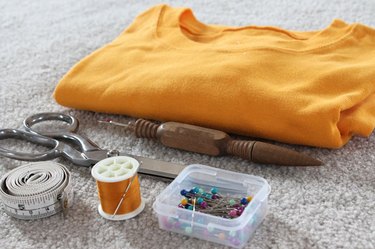
One of the secrets to professional looking hand-sewn or refashioned clothing is using the right tool for the job. Just as construction tools are made to decrease the amount of effort put into a job, sewing tools are also made for a specific purpose. Choosing the appropriate tool will help you get the job done correctly. For this project, using a good seam ripper will make all the difference in the world. Some of my favorites include this Lighted Seam Ripper or this LED Magnifier Seam Ripper which will make tearing out all of those little stitches a breeze. Sharp sewing scissors are also a must have item to pull off this project with a profession finish. Try using these Fiskars 9" Razor Edge Fabric Scissors or these Fiskars RazorEdge Tabletop Fabric Shears to help bring a polished look to your shirt. You'll find investing in solid, well-made sewing tools will make a huge difference and they will become your best friends when it comes to creating all of your fabric masterpieces.
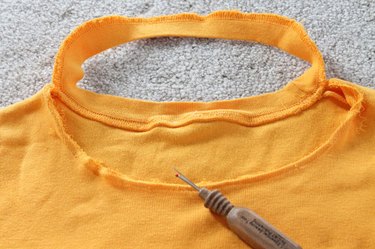
Step 1
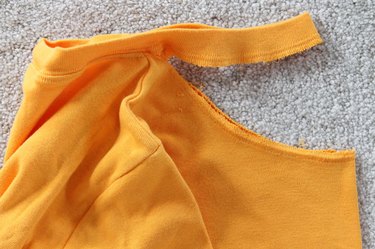
Use a seam ripper to remove the neckband on the front of the crew neck shirt. Stop when you get to the shoulder seams and leave the back of the neckband attached.
Step 2
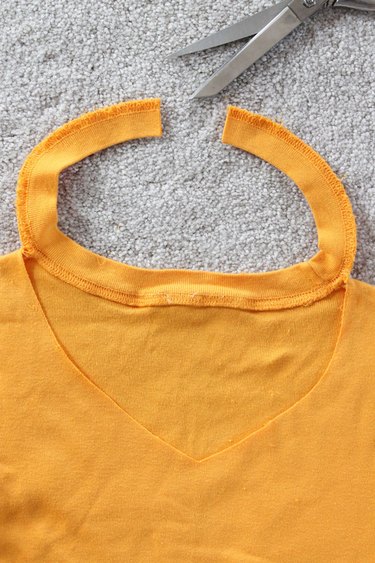
Fold the shirt in half lengthwise, matching up the shoulder seams and folding it along the center front.
Step 3
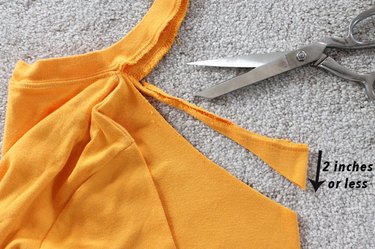
Use a sharp pair of scissors to cut the new neckline. Angle the cut down from the shoulder seams and be sure not to cut more than 2 inches down on the center front fold. If you cut more than 2 inches, you will need to buy more fabric for the neckband. If you make your cut less than 2 inches, the existing neckband will be enough.
Step 4
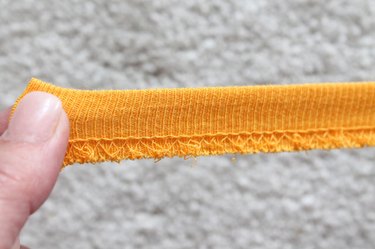
Cut the center of the original neckband piece in half with a sharp pair of scissors.
Step 5
Stretch the neckband a few times before pinning it back onto the shirt.
Step 6
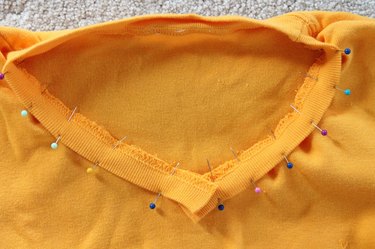
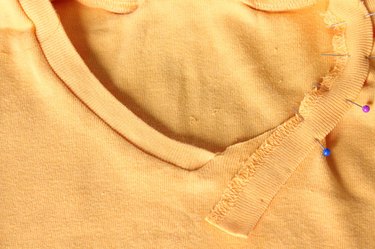
Pin the neckband back onto the right side of the shirt, along the newly cut neckline, with the raw edges together. Be sure to overlap the ends to form a V-shape.
Step 7
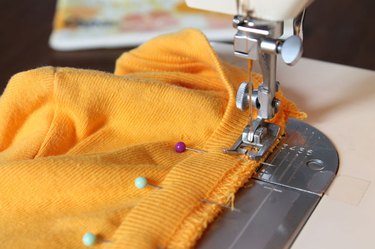
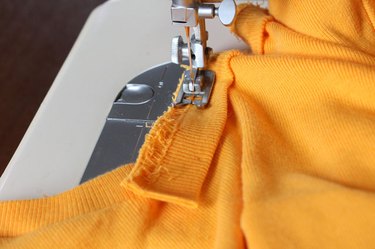
Starting at one of the shoulder seams, stitch one side of the neckband onto the new neckline with a 1/4-inch seam allowance. Be sure to remove the pins as you sew.
Step 8
Stop sewing when you get 1 inch away from the V-end of the neckband.
Step 9
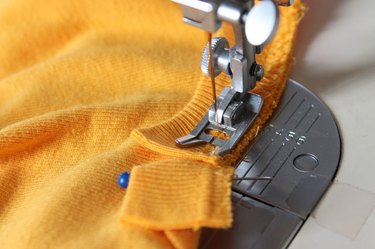
Take the shirt off the sewing machine and turn the neckband so the end is aligned with the raw edge on the other side of the V.
Tip
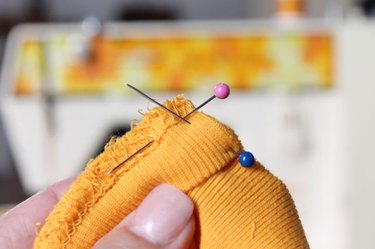
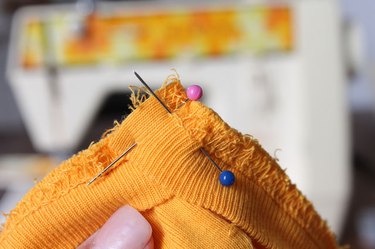
Note where the edges are marked with pins in the above photo, as you will continue to sew along these edges in the next step.
Step 10
To continue, sew down the edge until you get 1/4 inch from the end. Leave your needle in the fabric, lift the presser foot, and then turn the fabric so you can sew down the edge of the neckband marked with the blue pin. Be sure to remove the pins as you sew.

Step 11
Turn the neckband portion that you just sewed right-side out. This is what it will look like.
Step 12
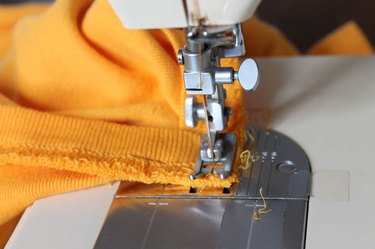
Now starting at the other shoulder seam, stitch the other side of the neckband to the other side of the neckline with a 1/4-inch seam. Again, stop when you get 1 inch from the bottom of the V.
Step 13
Take the shirt off the sewing machine again and turn it slightly so the raw edge of the neckband is aligned with the sewn edge on the other side of the neckband. Pin the corner in place.
Tip
Again, note the placement of the pins in the above photo, as you will continue to sew a 1/4-inch seam along the pin lines.
Step 14
To continue, sew until you get 1/4 inch away from the end. Leave the needle in the fabric, lift the presser foot, turn the shirt so the other edge is facing forward, put the presser foot back down and continue to sew a 1/4-inch seam along the other edge. Be sure to remove the pins as you sew.
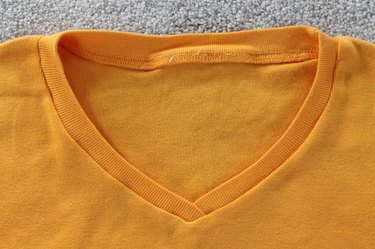
Now your shirt will have a much more flattering and feminine neckline.