Things You'll Need
Nylon skin-colored sock
2 same colored buttons and one brown button
2 fistfulls of cotton batting
Yarn
Scissors
Needle and light brown thread
Red and pink permanent markers
Styrofoam craft ball
Skin colored acrylic paint
Paint brush
Loopy chenille stems
Hot glue gun and hot glue
Two googly eyes
Red felt
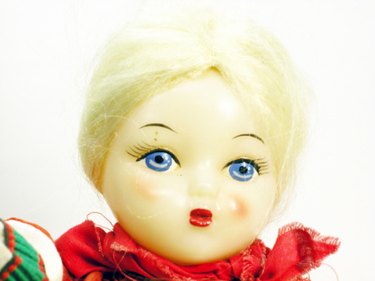
By making your own doll head, you can decide on the details of the doll's facial characteristics. Choose what color hair and eyes you want on your doll's face. You can make a soft doll head or a hard doll head using basic craft materials and techniques, and then add the face of your choice. Make a doll face as the beginning of your own doll creation.
Nylon Head Doll Face
Step 1
Sew two same colored buttons about an inch apart just below the toe of the nylon. Sew one light brown button between and below the two eyes if you want a the nose on your doll.
Video of the Day
Step 2
Stuff a knee high skin colored nylon with two hands worth of cotton batting. Stuff the cotton to the toe of the nylon where the eyes and nose of your doll face are. Tie a knot below the cotton so that the cotton stays in the toe.
Step 3
Cut yarn into several 12-inch strips. Thread a needle with brown thread. Hold the middle of two pieces of yarn and place them on the toe of the stuffed nylon. Center the yarn so that the middle of the yarn, which creates the beginning of the hairline is lined up with the nose, between the eyes. Once centered, sew on the two pieces of the yarn with four tight stitches. Line up to more pieces of yarn behind the first two pieces and sew them with four tight stitches in the middle. Keep adding hair until you reach the desired thickness of hair for your doll head. Once you have reached the desired thickness for your doll's hair, cut all the yarn that is hanging down so that it is even.
Step 4
With a red permanent marker, draw a smile below the nose. Draw circles with a pink permanent marker on the cheeks of your doll face.
Styrofoam Doll Head Face
Step 1
Paint a Styrofoam craft ball with skin colored acrylic paint. Let the paint dry.
Step 2
Paste loopy chenille stems with a hot glue gun onto the top of a Styrofoam craft ball as doll hair. This is done by cutting the chenille stems to the desired length and pasting them so that they touching at the top of the "head", but hang down opposite sides of the Styrofoam craft ball. Then paste another two behind the first two, and another two behind the second two until the top and back of the doll head is covered with hair and a part in the hair down the middle where they were glued together. Only the top point of the loopy chenille stem needs to be glued; the rest can hang down from the Styrofoam ball on either side of the face. Cut the chenille hair so that it is evenly hanging down as doll hair.
Step 3
Paste two googly eyes below the hairline as eyes with a hot glue gun. Cut felt the shape of lips and paste the lips below the eyes. Draw pink circles for the dolls cheeks with a permanent pink marker on either side of the doll's face below the eyes.
Video of the Day