If you're ready to pick up a sword and reenact the first Scottish War of Independence, or you just want to look stylish for your next Renaissance Faire, a homemade "Braveheart" costume is for you. It's a snap to create your own "Braveheart" kilt, war shirt and arm bracers. These pieces work well with commercial ankle boots and period-styled weaponry. Traditional tartan fabric can be used, or any brown plaid can be substituted for costume purposes.
Kilt and Sash
Video of the Day
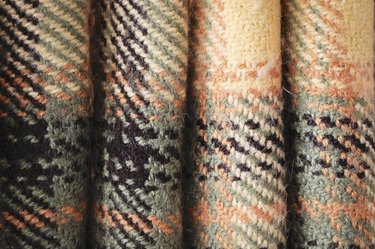
The "Braveheart"-style kilt, or philabeg, is a smaller version of the great kilt. It is made from a single piece of woolen fabric. Measure your waist to determine the exact yardage of fabric needed. All fabric should be 30 inches wide; however, a 38-inch waist requires 6 yards of fabric. Use an additional 3 yards of fabric for sizes between 40 and 50, and 6 yards of fabric for sizes above 50. The most recognizable "Braveheart" kilt is made out of brown plaid wool. The fabric is hand gathered around the waist and secured with a leather belt. The remaining fabric is tossed over the shoulder. A brooch can be used to gather the fabric at the shoulder.
Video of the Day
War Shirt
A traditional war shirt is worn underneath the kilt. It is a one-piece tunic that falls below the waistline, but above mid-thigh. War shirts can be easily designed from a brown T-shirt. Remove the neckband, and if you desire, add a small V-cut into the neck. T-shirt material doesn't ravel, so it requires no sewing.
Arm Bracers
Arm bracers can be constructed out of thermal plastic, leather or felt. A poster board arm bracer pattern should be made first. This is accomplished by fitting a rectangular piece of poster board to the forearm and taping it in place. Leave enough room for your wrists to slide through. Use the pattern to cut out thermal plastic, leather or felt to the right dimensions. Thermal plastic can be heated with a blow dryer to retain its shape. Grommets and leather cord can be added to the leather for fasteners, and self-adhesive hook-and-loop fastener can be used to keep the felt in place.
Face Paint and Hair
Blue face paint is necessary for authenticity of the costume. Before painting the face, mentally divide your face into three sections. Paint the right half of your face (your right) blue. The paint should extend from the forehead to just underneath the chin. Divide the remaining half of you face into halves. Paint the half closest to your hairline blue. The paint should extend across the forehead and over the corner of the eye. Cut back toward the ear, creating a 45-degree triangular shape. At the bottom of the triangle, extend the paint to the edge of the lip and then straight down to the chin. Costume hair may be braided into shorter hair or secured in place with a small, elastic rubber band.