Regardless of the model number and year your Singer sewing machine was made, some basic instructions remain the same. It doesn't matter if you got your Singer sewing machine brand spanking new last week or if you inherited it from your grandmother 40 years ago. The good news is while there have been tremendous changes since the first Singer sewing machine hit the market more than 100 years ago, the basic operating and maintenance instructions are for the most part the same as they were in the beginning.
Video of the Day
Things You'll Need
Lint Brush
Screwdrivers
Soft Cloth
Fabric
Lubricating Oil
Bobbins
Needle Threader
Thread
Threading the Bobbin
Step 1

Place an empty bobbin on the bobbin pin.
Video of the Day
Step 2
Turn the balance wheel toward you to disengage the needle mechanism.
Step 3
Snap the bobbin winder into place. The position of the bobbin winder varies with different models.
Step 4
Wind the bobbin by pressing on the foot pedal. Newer Singer sewing machines will stop automatically when the bobbin is full. If you are using an older Singer sewing machine, you must watch the bobbin and stop it yourself. With very old machines, you will be required to wind the bobbin by hand. If this is the case, you may want to invest in a separate bobbin winder.
Step 5
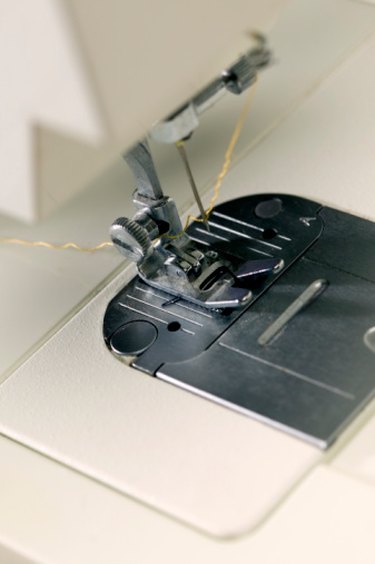
Place the bobbin in the bobbin case and thread it, holding the bobbin case in one hand and drawing the end of the thread through the slit until it is in place. Pull out about six inches of thread. Insert the bobbin case into the bobbin shuttle beneath the needle throat plate.
Step 6
Close the throat plate.
Step 7
Turn the balance wheel away from you until the needle mechanism is once again engaged.
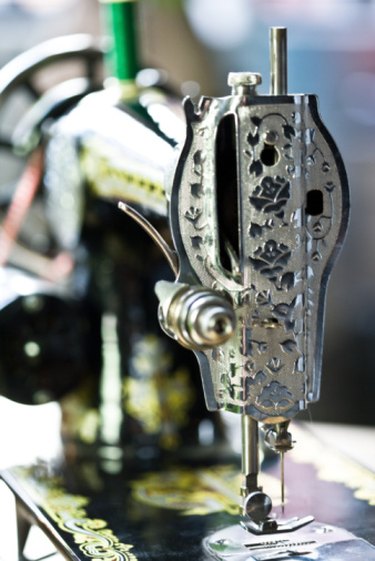
Threading the Needle
Step 1
Place a spool of thread on the thread spindle. Depending upon how old your Singer sewing machine is, the thread spindle will be either vertical or horizontal.
Step 2
Take a minute to look at the placement of thread guides before starting to thread your Singer sewing machine.
Step 3
Carefully pass the end of the thread through each thread guide, making sure to get the thread between the discs of the tension adjuster.
Step 4
Use a needle threader, if necessary, to thread the needle. Most Singer sewing machines require that the needle be threaded from the outside in -- left to right. However, some older models may require that the needle be threaded from right to left. Pay attention to the position placement and positioning of the flat end of the needle. This will be your cue. Always tread your Singer sewing machine with the thread going toward the flat end of the needle.
Step 5
Turn the balance wheel toward you one full rotation to draw the bobbin thread up through the throat plate.
Adjusting Stitch Length and Width
Step 1

Turn the stitch length dial to the desired setting. This setting will be determined by the type of fabric and the specific sewing project you are working on.
Step 2
Adjust the stitch width guide for zigzag stitching. On older machines this option may not be available. Newer sewing machines have a large variety of zigzag stitch options -- the newer the machine, the more options you will have.
Step 3
Remember to return the setting to the straight stitch position when you are finished.
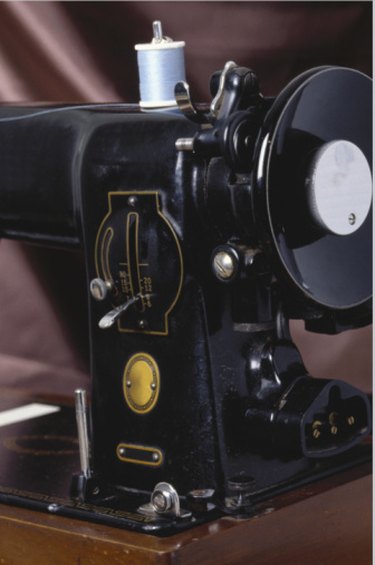
Tension Adjustment
Step 1

Set the tension adjustment dial to the setting that is ideal for the fabric and thread you are using.
Step 2
Adjust the bobbin tension by turning the screw on the bobbin case clockwise or counterclockwise, depending of whether you wish to tighten or loosen the tension.
Step 3
Skip this step if your Singer sewing machine has an automatic tension adjustment feature. Newer sewing machines have an automatic tension feature, making it unnecessary for you to be concerned with adjusting the tension yourself.
Care and Maintenance
Step 1
Use the a brush and soft cloth to clear away dust, lint, thread snips and debris after every use.
Step 2
Use a lightweight oil to lubricate your Singer sewing machine on a regular basis. The oil points on top and beneath your machine are generally easy to identify.
Step 3
Protect your Singer sewing machine when it is not in use by covering it up. Put the needle in the down position and leave it on the straight stitch setting.
Tip
Refer to the owner’s manual for instructions pertaining to your specific machine. If you do not have an owner’s manual for your Singer sewing machine, you can get one online from the Singer Company or any number of online owner’s manual distribution sites.
Warning
Only plug your Singer sewing machine in to an approved outlet or surge protector. Operate your Singer sewing machine only in areas that are free of moisture and heavy amounts of dust and debris.
Cover your sewing machine whenever it is not in use.