Things You'll Need
Tape measure
Crow bar
Pen
Flat-head screwdriver
Hammer
Utility knife
Needle nose pliers
Broom
Vacuum
Double stick tape
Straight edge
Seaming glue

Carpet with attached padding is less expensive than purchasing carpet and separate padding. It's also a money-saving option with regard to installation. Carpet with padding takes less time to install than padding and carpet separately, and it takes less tools. Carpet with attached padding is a project most DIYers are comfortable doing, creating an even bigger savings by skipping installation fees altogether.
Preparation
Step 1
Measure the width and length of the room. Take the measurement to the center of doorways rather than the edges of the walls, and remember to measure the depth of closets in the room as well. Add approximately 5 inches on all sides to determine how much carpet to purchase.
Video of the Day
Step 2
Remove the baseboards from the room using a crow bar to pry them gently from the wall. If you'll be reinstalling the same baseboards, number the backs of each board for easy installation. Take off any doors that open into the room by pulling out the hinge pins on the hinges. If the hinges stick, place a flat-head screwdriver against the cap on the top of the hinge and tap the screwdriver gently with a hammer.
Step 3
Pull up the existing carpet and pad. Cut the carpet and pad into manageable sizes with a sharp utility knife. Pry up the tack strips with a crow bar and pull up all carpet staples with needle nose pliers.
Step 4
Sweep the floor several times, and then vacuum thoroughly.
Installation
Step 1
Lay a line of double stick tape around the parameter of the room with the paper facing up. Add 12 x 12 "X" shapes of double stick tape every four feet in all directions. Leave the paper backing on the tape.
Step 2
Center the carpet in the room. Make sure the excess is enough to run up the wall.
Step 3
Pull half of the carpet back on itself and pull off the paper backing to expose the adhesive on the tape. Place the carpet into position and pull the carpet smooth. Push wrinkles out from the center of the room and walk across the installed side to push the carpet pad securely into the adhesive tape.
Step 4
Pull the other half of the carpet back and remove the paper from the tape on that half of the room. Push the wrinkles out of the carpet from the center, and lay the carpet into position. Walk across the room to push the carpet pad into the adhesive tape.
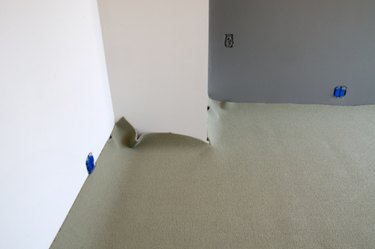
Step 5
Trim the excess carpet with a sharp utility knife at the edge of the walls. Walk around the edges of the room to make sure the carpet pad is secured to the adhesive tape.
Seaming
Step 1
Create a straight edge when cutting the carpet to seam. Place a straight edge along the first section of carpet and cut with a sharp utility knife.
Step 2
Make sure the section of carpet being seamed to the first piece runs the same direction. Lay the first piece over the second piece and use it as a guide to cut the second piece. This ensures the two cut pieces are identical.
Step 3
Lay a line of double stick tape on the floor so the seam is centered on the tape. Use tape that's at least 3 inches wide.
Step 4
Apply seaming glue to the edges of the two pieces being seamed. Pull the paper backing off of the adhesive tape and lay the carpets into place, pushing the seams together with your fingers at the same time.
Video of the Day