There's no need to settle for bland, overpriced bows when you can make your own wow-worthy creations. From simple to ornate, these DIY bows come dressed to impress.
1. Simply Stunning
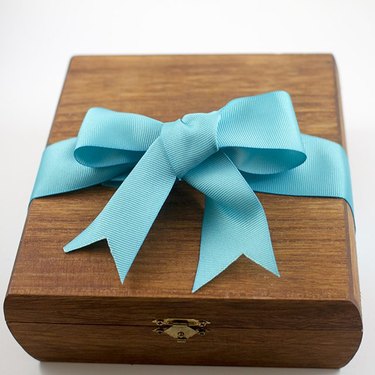
Even the most simplistic bow style can add a touch of elegance to a gift. Choose ribbon that looks lovely to you -- thick or thin -- then cut off a piece and tie it in a bow shape, just like tying your shoes. Trim the bow ends into double points for a special touch.
Video of the Day
Video of the Day
2. Magnificent Multiple Loops
Multiple loops equal multiplied sophistication. A multiple-loop ribbon may appear complicated to make, but in reality, it's all about the folds. A long piece of ribbon, folded accordion-style, serves as the bow itself. A smaller piece of ribbon, secured through slits cut into each side of the folded ribbon, holds the bow together. Shhh, it's a secret.
3. Tiny Treasures
Both compact and cute, a tiny ribbon bow adds a special touch to a small gift or a treat for a special someone. The thinner the ribbon the better for these little bows that are big on style. After tying a basic shoelace-style bow, secure the bow to the cadeau with hot glue or a glue dot.
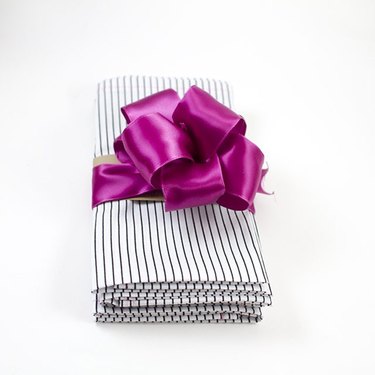
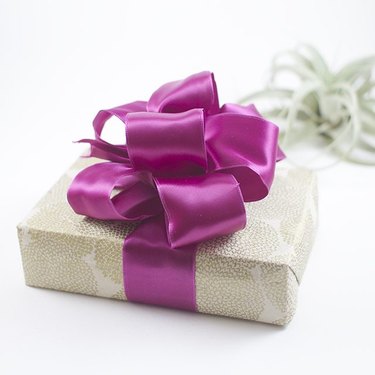
4. Gorgeous Gift Bows
A beautiful gift bow makes any present feel a bit more special for the recipient. Select a ribbon that goes well with the wrapping paper, then tie it around the package, leaving excess ribbon at either end of the knot. A longer piece of ribbon, wrapped around your hand, forms loops for the bows. Tie the loose ribbon ends from the package around the loop stack, then tug to create the loops to create the bow.
5. Organza Opulence
Organza offers innate elegance, before you even form it into a bow. It's equally ideal for decorating the dining hall for an elegant affair and embellishing extra-special gifts. Wrap a large, thick piece of organza around your hand several times, snip notches through the stack on each side, then tie a smaller bit of ribbon around the wrapping. Tug the ribbon on either side to create bow shapes.
6. Large Decorative Bows
Large and in charge, these handmade bows add a decorative touch to otherwise nondescript items around the house. Use the widest ribbon you can find -- one that goes well with the room's color scheme.
7. Meshing With Your Style
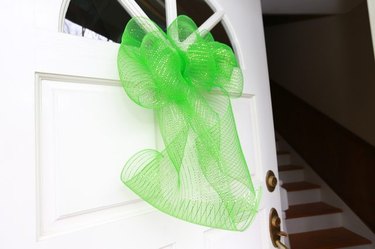
Wide mesh bows offer an impressive, out-of-the-ordinary material for decorating doors, porch columns or even large gifts. Select a wide mesh -- 10 inches across isn't too wide -- then roll it into a loose tube 2 layers thick. Fold layers of mesh accordion-style beneath it, then tie a piece of twine or craft wire through the tube to secure the bow. Tug gently on the folded mesh to make the bow's loops.
8. Wired and Wonderful
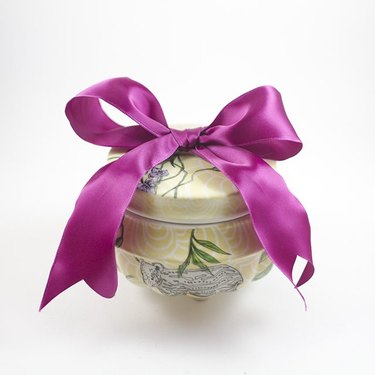
Wired ribbon offers optimal control when it comes to making bows, as the wire retains its shape as you bend it into loops. Cut a length of wired ribbon, then tie it into a knot in the center. Fold the ribbon to form two loops, cross the loops, then pull one end through the space between the loops and the knot. Tug the ribbon to adjust the two bow loops and it's finished.
9. Beautified Baskets
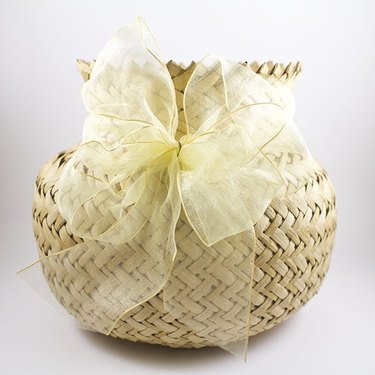
A thick, elegant ribbon offers a beautiful embellishment to any type of gift basket. Fold the ribbon over itself, accordion-style, six or more times to create an abundance of loops. Twist the center of a piece of floral wire loosely around the center of the ribbon pile, then tug the ribbon loops to form the loops of the bow. Use the other ends of the floral wire to attach the ribbon to the basket.
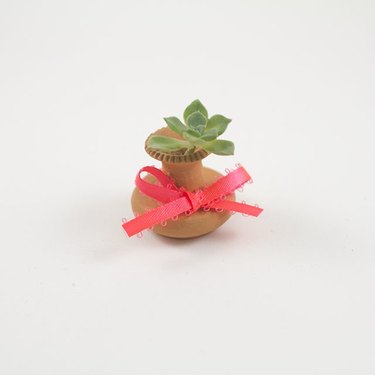
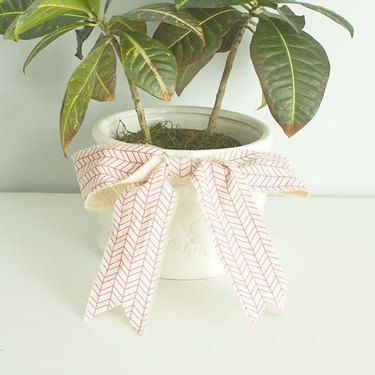
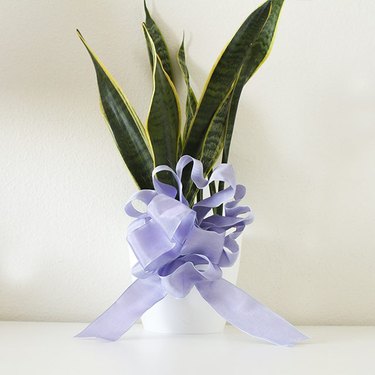
10. Fantastic Floral Bows
Dress up any plant pot or vase with a special bow that enhances the display. Select a ribbon that pairs well with the planter or vase, then fold it into loops in your hand with the largest loops in the center, successively smaller loops on either side. Secure the loops near the bottom with a twist tie or craft wire, leaving ribbon tails at each end. A small piece of ribbon tied around the loop base hides the twist tie. Tug the loops gently to create a bow that looks a bit like a flower as well.
11. Fab and Fancy
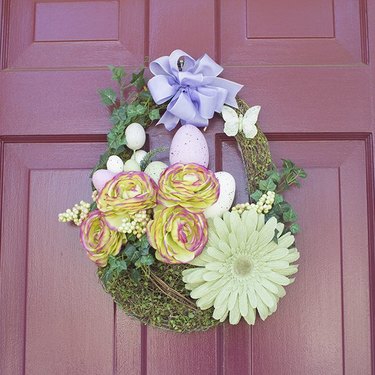
Wire ribbon is the key to creating a fabulous, fancy bow that keeps its form no matter how long you display it. Keep the ribbon on the roll, unwinding quite a bit. Fold the ribbon in your hand to create loops on the top and bottom until you've gathered a hearty handful of ribbon. Secure a twist tie in the center of the structure, then trim the end of the ribbon from the roll. Fluff up the loops, bending the wire a bit to make the bow as lush and luscious as possible.
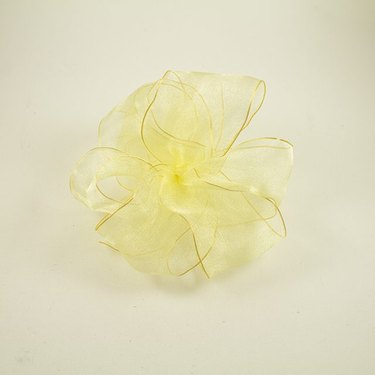
12. Tie a Yellow Ribbon...
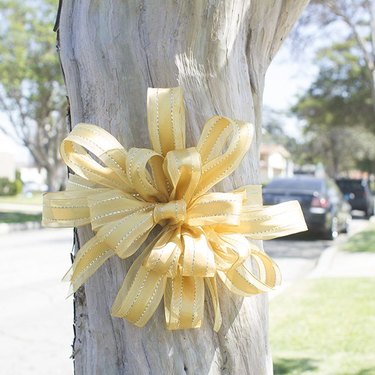
Even if you've never heard the Tony Orlando song, "Tie a Yellow Ribbon," a large yellow bow adds an air of elegance to a tree for an outdoor occasion or as a sign of celebration. Select an ornate, wide yellow ribbon that looks pretty enough to display on its own. Unroll 8 or more feet of ribbon -- you can always unroll more as you work -- then fold the ribbon into loops in your hand, with some loops facing up, some facing down. Form some loops larger than others for a layered look. Tie the center with a twist tie, snip the ribbon, then fluff up all the loops in the bow. Use another large piece of ribbon, knotted around the tree, to tie the bow in place.