Things You'll Need
DuPont concrete primer
Paintbrush
Tape measure
Chalk line
Masonry hammer drill
Carbide bit
Can of compressed air
Tapcon fasteners with 2-inch plastic caps and anchors
Drill
Phillips head drill bit
Tyvek Sheeting
Tyvek flashing tape
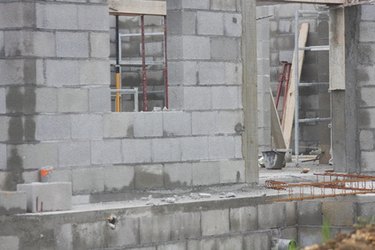
Tyvek sheeting is a synthetic building material that is used to wrap the exterior of a home or commercial building. The Tyvek wrap serves two functions: as a water barrier to prevent rain from seeping into the walls and as an airflow inhibitor to increase the R-value of the building's insulation. According to the manufacturer, DuPont, Tyvek sheeting can be installed over a variety of building materials including masonry products such as concrete, brick and cinder block construction.
Step 1
Apply primer to the masonry with a paintbrush. Allow the primer to dry according to the manufacturer's instructions.
Video of the Day
Step 2
Mark a grid along the entire masonry surface using the chalk line. The vertical lines of the grid should be 18 inches apart and the horizontal lines should be 24 inches apart.
Step 3
Drill pilot holes at each axis on the grid using a carbide tip hammer drill. The pilot hole should be at least 1 inch deeper than the length of the Tapcon anchors you are using to fasten the Tyvek to the masonry.
Step 4
Blow any dust out from each of the pilot holes using compressed air.
Step 5
Insert Tapcon anchors into each of the pilot holes.
Step 6
Begin wrapping the Tyvek sheeting around the building starting at a corner. Be sure to leave a 6 to 12 inch overlap at the corner's edge.
Step 7
Screw the Tapcon fastener screws with 2-inch plastic caps through the Tyvek sheeting into the Tapcon anchors with a Phillips head drill. The screws will grip the anchors and expand in the pilot holes, securing the Tyvek to the masonry.
Step 8
Continue wrapping and fastening the Tyvek sheeting along the bottom row of the building until you complete the row. If one roll of Tyvek runs out before the row is complete, be sure to leave a 6 to 12 inch shingled overlap when starting a new roll.
Step 9
Continue wrapping successive rows of Tyvek sheeting until you reach the roof line of the exterior wall. You should overlap the sheeting in a shingle pattern by 6 to 12 inches vertically.
Step 10
Seal all Tyvek sheeting seams with Tyvek flashing tape to ensure a weather tight membrane around the building.
Video of the Day
- Dupont: How DuPont Tyvek Makes Your Insulation Work Better
- The Conspectus, Inc: Air and Moisture Barrier Applications
- Dupont: Tyvek Weather Barrier Commercial Installation Guidelines
- Tapcon Concrete Screws: Installation Instructions for Tapcon Concrete Screws
- Dupont: Product and System Specifications DuPont Tyvek HomeWrap