Things You'll Need
Black shirt
Black pants
Black flat-soled shoes
Hair paint (optional)
Scissors
Fabric tape measure
1 yard of fabric
1/4 yard of fabric
1/4 yard of fabric
1 yard of lining
Fusible interfacing
Scissors
Iron
Sewing machine
Coordinating thread
Erasable fabric marker
Ruler
Pins
Hairdressers or hair stylists typically stick to an all-black dress code while working, which makes it sound like a simple costume for Halloween, a costume party, a play or career day. The problem lies in portraying the idea of who you are without lugging around heavy hair products and accessories. Craft a handy utility apron to go with your black ensemble to carry around your props.
Costume Basics
Step 1
Dress in a black outfit. Wear a black top with a pair of black pants or skirt.
Video of the Day
Step 2
Select a pair of black shoes that have flat soles. Hairdressers are on their feet most of the day, so follow their example and wear sensible, comfortable shoes.
Step 3
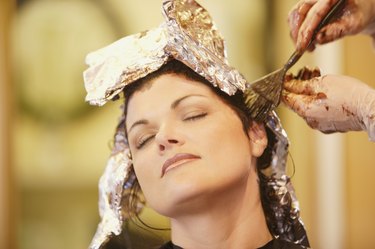
Style your hair in a modern style as opposed to wearing it plain. Spike it up, braid it in an intricate braid or curl and pin it into an updo. As models for their own hairstyling techniques, hairstylists enjoy showcasing up and coming looks. For an edgy look, add streaks of colorful, but washable hair paint to your hair.
Utility Apron
Step 1
Measure and cut the apron fabric into a 12-by-19 inch piece of fabric. Mark, measure and cut a piece of lining fabric the same size. Measure and cut the fabric and lining for the large pocket 8 1/2-by-19-inches long. Do the same for the small pocket, 6-by-19 inches long.
Step 2
Circle your waist with the fabric tape measure; add 2 feet to the waist measurement. Mark and cut a piece of fabric that length and 4 inches wide. This becomes the waist band and ties for the apron.
Step 3
Measure, mark and cut the fusible interfacing to match each of the fabric pieces. With the adhesive side facing the fabric, iron the interfacing onto the fabric ensuring the iron is set to the temperature listed on the package. Follow the manufacturer's instructions for adhering the interfacing to the fabric. Interfacing provides the fabric with body to make the individual pieces stronger and stiffer.
Step 4
Place the smallest pocket rectangle on top of the lining with the right sides together. Sew along the top long edge using a straight stitch and a 1/4-inch seam allowance. Turn the fabric right side out, so that the sewn seam is on the inside between the two layers, and iron the seam flat that you just stitched. Top stitch across the seam with a straight stitch 1/4 inch from the edge of the seam to give it a nice finish. Repeat the process for the larger pocket. Do not sew the sides and bottom edges of these pockets.
Step 5
Line the open bottom of the small pocket up with the bottom of the larger pocket, placing the smaller pocket over the top pocket. Mark three vertical lines down the smaller fabric with a pins or an erasable fabric marker to create individual pockets. You can make the pockets any size you like -- you can make three even-sized pockets and a skinny pocket for pencils or the handles of combs. Sew a straight stitch over the lines you made to make the pockets.
Step 6
Take the sewn pockets and set them onto the 12-by-19 inch rectangle, lining them up with its bottom edge. Lay the apron lining face down over the top; align its outer edges with the outer edges of the 12-by-19 inch apron body and the pocket edges and bottom and pin in place. Sew the sides and along the bottom edge with straight stitch using a 1/4-inch seam allowance, leaving the top unsewn. Turn it right side out, leaving 1/2-inch unsewn at the top sides to attach the waistband. The lining now should not sit on the inside with the pockets displayed on the outside of the apron.
Step 7
Fold the 4-inch waistband in half with the right sides of the fabric facing each other. Sew both ends with a 1/4 inch seam allowance. Turn the waistband right side out to iron the fold and the end seams flat. Mark the center point with a pin. Find the center point in the middle of the apron by folding it in half lengthwise. Attach the waistband to the apron at that point with right sides together, lining up the raw edges of both the waistband, the apron and the lining. Pin the inner edge of the waistband to the apron body, leaving both the apron's lining and the outer waistband fabric unpinned.
Step 8
Sew the waistband's inner edge to the apron body using 1/4 inch seam allowance. Flip the waistband over, and then pin its outer edge under 1/4 inch to the inside, sandwiching the sewn edges behind the folded edge of the waistband. Pin in place every 5 or 6 inches. Finish pinning the ties of the waistband that extend beyond the apron together, folding them in 1/4 inch. You will sew this shut with a 1/8 inch top stitch.
Step 9
Start at one end of the tie, sewing a top-stitch 1/8 inch in from the outside edge of the pinned seam of the tie, removing the pins right before you reach them to ensure you sew the edges of the tucked in fabric. Continue sewing along this edge across the front of the apron to the other side of the tie. Stop sewing once you reach 1/8 inch in from the edge, but leave the needle embedded in the fabric. Lift the foot to turn a 90-degree corner and continue top-stitching along the end, turning another 90-degree corner to finish sewing along the top edge of the tie and waistband in the same manner. When finished, you should have a sewn line that outlines the waistband and tie all around its edges with no raw edges showing. Iron the apron to smooth out any wrinkles and sewn edges.
Step 10
Put the apron on over your black clothes and fill the pockets with the accouterments of the trade: rat-tail combs, a hair dryer, pieces of foil, hairdresser shears or a brush. Add silver clips -- the kind used to hold hair in place while cutting -- to the pocket edges
Tip
Prewash and dry the fabric before you cut it to preshrink it and to set any of the dyes in the fabric, as new fabric sometimes bleeds a bit during its first wash.
Choose fabric patterns reminiscent of a hair salon, such as pink with black geometric designs or with pictures of miniature women on the fabric. Bright fabrics for the apron add color to your costume.
Clip-on hair clips to the edge of your apron.
Wear face makeup, as most hairdressers also have a sense of beauty flair. To take the costume over the top, overemphasize your makeup when you add color streaks to your hair.
For an over-the-top hairdresser, dress in a black turtleneck sweater and black tight fitting pants like Johnny Depp from the movie "Edward Scissorhands." Add a black belt with a large silver buckle and black suspenders with silver adjustments. Spray paint your hair black with temporary hair paint and pull it into spiky strands about your face. Cut out long knife-like extensions from cardboard, paint them black and tape them them to your fingers with black electrical tape to represent your scissor fingers and hands. Wear thick black goth-type boots to finish the look.
Warning
Remove the pins as you sew, sticking them into a pin cushion. You can break a needle if it accidentally hits a pin.
Video of the Day