Things You'll Need
1/2 to 1 yard knit fabric
1/3 yard ribbed knit fabric
T-shirt
Freezer paper
Pencil
Ruler
Scissors
Pins
Sewing machine
Thread
Iron
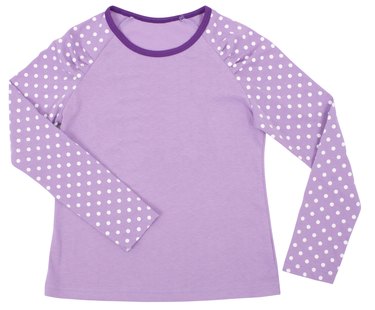
T-shirts are a staple of every wardrobe and make simple sewing projects. A raglan, or baseball, T-shirt is a variation on the standard T-shirt style that uses a different fabric for the sleeves. Raglan T-shirts are well suited for both boys' and girls' casual or athletic attire. Whether you're just learning to sew or are already an experienced seamstress, once you know how to make a basic T-shirt, you creative options are endless.
Creating a Pattern
Step 1
Find a T-shirt pattern that you like, or create your own pattern using a T-shirt you already wear. Select a T-shirt that fits well, taking into consideration the length of the shirt and the shape of the neckline. Fold the front of the shirt in half lengthwise and trace the shape of the back of the shirt, including the sleeves, on a sheet of freezer paper. Refold the shirt in half facing the other direction and trace the front of the shirt on a separate sheet of freezer paper.
Video of the Day
Step 2
Alter the pattern as needed if you want to change the shape of the T-shirt or length of the sleeves. Use a ruler to extend the sleeve lines. Taper the lines slightly to create more fitted look, or widen them on the ends for a flared opening.
Step 3
Add a 1/2-inch seam allowance to the sides, neckline, and top and bottom of the sleeves of your patterns. Add at least a 1-inch seam allowance to the bottom of the shirt and the ends of the sleeves. Cut out the traced pattern pieces, mark which is for the front and back and make a note to place the long side of the shirt on the fold of the fabric. Line up the two pattern pieces. The neckline curve should be slightly lower on the front of the shirt but other than that, they should match up closely.
Step 4
To create a pattern for raglan, or a baseball, T-shirt where the sleeves are made from a different material, use the ruler to draw a dotted line from the armpit to the neckline of both pattern pieces before cutting them out. Cut the sleeves off, and the retrace all the pattern pieces onto more freezer paper with the added seam allowance on all sides. Cut the pieces out, mark the patterns as above, and add an additional note to place the top of the sleeve patterns on the fold of the fabric.
Sewing the Shirt
Step 1
Fold your knit fabric and place the patterns along the fold. Cut out a front and back from this fabric. For a raglan T-shirt, place the sleeve pattern pieces along the fold of your ribbed knit fabric and cut out two sleeves.
Step 2
Pin the front and back pieces along the top and down the sides of the shirt with the right sides together. Sew the shoulders and top of the sleeves, then sew the bottom of the sleeves and down the sides of the shirt. If you like an unfinished look, leave the sleeves and bottom of the shirt unhemmed. If you want a more professional-looking finish, turn the raw edges under 1/4 inch, and then again by 1/2 inch, or more. Sew the hem in place.
Step 3
Pin and sew the front of the raglan sleeves to the front shirt piece with the right sides together, then pin and sew the sleeves to the back of the shirt. Finish by sewing the bottom of the sleeves and the sides of the shirt. Hem the sleeves and bottom of the shirt.
Step 4
For the neckline of the shirt, the easiest approach is to simply hem the raw edge of the neckline by folding it under once or twice by 1/4 inch and sewing it in place. To add a collar to the shirt, cut a strip of the knit fabric -- for a raglan T-shirt, use the ribbed knit fabric -- so that the ribbing of the fabric is vertical. You can vary the width of the strip, depending on how much of a collar you would like. Note that the strip will be folded in half, and you'll lose at least 1/4 inch from the seam allowance; a 1 3/4-inch strip is a good standard width.
Step 5
Fold the strip in half and iron it flat. Pin the raw edges of the ribbed strip along the right side of the neckline of the shirt. Sew the strip in place, stretching it taut as you go, but don't stretch the fabric of the shirt. When you are finished, there should be excess fabric; trim it, overlap the ends of the strip, and sew them together. Press the ribbing up with the iron to finish. If your collar is folding over, sew over the seam allowance on the inside of the shirt to hold it in place.
Tip
When selecting a knit fabric for your shirt, look for fabrics that will be comfortable against your skin, especially if you are making a child’s shirt. Pay attention to how the fabric hangs; a stiff or thicker fabric will create a boxier look for your T-shirt. Knits can be expensive and hard to find in fabric stores, so look online for a wider selection, or browse for old T-shirts that can be repurposed at thrift stores.
Because knit fabrics stretch, use a longer straight stitch or a long, narrow zigzag stitch to give your thread a little stretch. This prevents the thread from breaking when the shirt is worn. Stretch or polyester thread is also recommended for knit fabrics.
If you are having trouble with your knit fabrics getting pulled into your sewing machine, place tissue paper under your fabric to stabilize it. Also, consider investing in a ball point needle specifically designed for sewing the knit fabrics.
Video of the Day