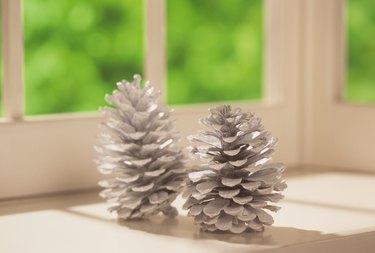
Craft a pine-cone Christmas tree -- or a series of them -- for a nature-inspired adornment for the holiday table, bookcase or even a corner of the room. Pine-cone trees may be as small as a single pine cone or several feet tall -- size is limited only by the amount of pine cones and time you are willing to invest in the project. Select pine cones that are completely dry, clean and sap-free for best results.
Simple, Single-Cone Christmas Trees
Video of the Day
The smallest pine-cone Christmas tree projects are as simple or complex as you'd like -- on the simple side, even young children can make them as their contributions to holiday decor. Paint an entire pine cone with acrylic craft paint in green, blue, gold or white for a simple holiday tree; an adult may use spray paint in a well-ventilated area, using a cardboard box as a spray booth. Brush the pine cone edges with white for a snow-capped look, or sprinkle glitter into the wet paint for a sparkly accent.
Video of the Day
An adult or a child with more nimble hands can take the tree decorating a little further, adding strands of metallic beads as garland, or crafting a tree topper out of an origami-style paper star or an angel-shaped bead. Use modeling clay to create a trunk or base for the tree, or place the pine cone in a candlestick for a look reminiscent of a Christmas tree stand.
Foam Pine-Cone Trees
Foam in a cone shape serves as an ideal form for a pine-cone Christmas tree. Choose a cone at least a foot high so the shape of the cone is evident even when covered in pine cones. Wrap the cone in green or brown construction paper or card stock -- or another color that matches your plan, if you're painting the pine cones -- and glue it in place. Hot-glue the pine cones to the paper-wrapped cone, starting at the bottom or wide end of the cone. Place a skewer through the flat end of the cone, and stick the other end of the skewer into a block of floral foam or inside a stem vase to make the gluing more manageable.
Paint the finished cone as desired, or brush school glue over it and sprinkle an opalescent white glitter atop it for an elegant snowy effect. Paint the tree white first to enhance the effect. Keep the skewer in the tree as a tree trunk, if you like. Place the skewer in a small plant pot containing river rocks to stand the tree upright.
Wire Form Pine-Cone Trees
For an alternative take on a pine-cone Christmas tree, start with a cone-shaped wire form such as an upturned basket, or make your own cone shape out of hardware cloth, wearing heavy work gloves and using wire cutters to bend and snip the metal. Wind a bit of floral wire or thin craft wire near the top of each pine cone, then wrap the other end of the wire onto the cone form so the pine cone dangles like an ornament. Wrap the wires snugly up against the form if you prefer that the pine cones stay close against the form, rather than dangling a bit.
Work your way around the entire form with wire-wrapped pine cones until the entire form is covered. Spray paint the pine cones before adding them to the form, if you like, or paint the entire structure afterwards. Paint the entire structure silver or gold and add a spray-on fake snow for a glitzy effect. Wear eye protection when working with wire. Spray paint only in a well-ventilated area and cover nearby surfaces to prevent overspray.
Free-Standing Pine-Cone Trees
Create your own towering Christmas tree, building-block style, out of pine cones if you have an abundant supply of them. Start with a plywood disc at least 12 inches in diameter as the base or widest part of your tree. Hot-glue your largest pine cones around the perimeter of the disc. Glue on a second layer using the same size or slightly smaller cones, angling them all slightly inward.
Continue layering, angling each layer in slightly. By the third or fourth row, the shape should start to resemble a cone or tree. Keep building until the tree reaches a point at the top with a single pine cone. Paint the entire structure, or leave it in its natural state, decorating the faux tree with strands of dried cranberries, popcorn or any ornaments you prefer. For a light-emitting tree, cut a hole in the center of the disc base before building the tree and add a battery-operated LED spotlight, uplight or color-changing mood light. LED lights emit very little heat; avoid using incandescent bulbs, as they get hot.