Things You'll Need
Backing
Batting
Quilt top
Tape measure
Pins
Needle
Embroidery thread, floss or yarn for tacking
Scissors
Buttons

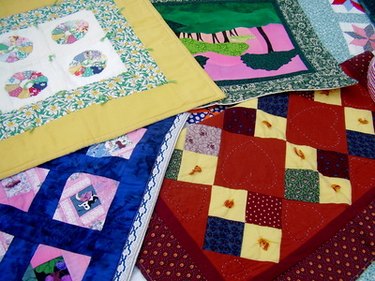
In sewing, the technique of tacking -- also called basting -- is to make a quick, temporary stitch that will be removed after a permanent stitch can be made. This gives you the ability to move your quilt around freely without worrying about whether it will fall apart. Most tacking is done using a heavy thread, embroidery floss or yarn, although it can also be done with a thin ribbon.
Step 1
Pin together your quilt sandwich. A quilt sandwich consists of the backing, the batting and the quilt top. Lay the quilt top on the floor upside down, being sure it lays flat with no bumps or wrinkles in it. Lay the batting on top, again smoothing it out. Lay the quilt back on top of the stack with the right side facing up. Smooth the entire stack and place pins through all three layers. The pins should be spaced about two to three inches apart over the entire quilt.
Video of the Day
Step 2
Thread your needle with the thread, yarn or floss you are using to tack the quilt. Leave it at least 36 inches long so you can do many tacks before re-threading your needle.
Step 3
Locate the top middle of the top end of the quilt and use it as your starting point. Measure where your tacks will go to secure the quilt layers together, keeping them no more than five inches apart. Mark them with pins.
Step 4
Push your needle through the quilt from the top all the way through the batting and then back where you want your first tack. Pull the needle back up through all three layers right next to where your needle went down.
Step 5
Cut off the thread so you have about one inch on each side of the stitch. You can leave longer tails, if you wish, especially if you have trouble tying knots with short tails.
Step 6
Tie a basic knot with the two tails. Make sure it is tight and secure.
Step 7
Repeat the tacking over the rest of the quilt. You can do this in a pattern, on only certain areas of the quilt, or randomly scattered over the top.
Step 8
Remove the pins and bind the quilt as you normally would.
Tip
Tacking a quilt is often faster than quilting.
It is difficult to mess up tacking a quilt, so it is a good way for a beginner quilter to finish her quilt.
Sew buttons in the place of the knots and tails for a difference look.
Tacking can be done by machine if your sewing machine has a tacking stitch function on it.
When tacking, the most comfortable methods are to drape the quilt across your lap or use a quilting frame.
Video of the Day