When it's time for the holidays, you may want to keep things simple and get an artificial tree for your home rather than dealing with the hassle of a live pine. You'll be delighted and possibly relieved to learn that most artificial trees, including pre-lit models, are easy to assemble.
Artificial trees won't shed needles or get sap on your hands, and they don't need to be watered every day. In addition, you can box it up when the season is over and keep it until next year, and you won't have to buy a new tree. It shouldn't take much time at all before your Christmas tree is completely assembled and you're enjoying the holiday ambiance.
Video of the Day
Video of the Day
Choosing an artificial tree
First, you'll want to decide whether you want your tree to come with or without pre-installed lights. Since most people get an artificial tree for the convenience, many people choose one that comes pre-lit.
- Artificial Christmas trees come in a number of styles and sizes to fit your home or yard.
- You can choose from different styles and colors for the boughs of the tree.
- You can look for longer needles, sparser branch tips or even trees decorated to appear laden with snow.
- The pre-strung lights also come in options of multicolor, all white or bulbs that change color in a pattern or by remote.
Assembly instructions for a pre-lit artificial tree
Most trees come with artificial Christmas tree assembly instructions included on or in the box that spell out how to assemble your artificial tree. Yours may also come with a pre-lit Christmas tree plug-in diagram.
Tip
If you’ve misplaced the instructions, it should still be easy to put things together with a little investigative work for your Christmas tree setup.
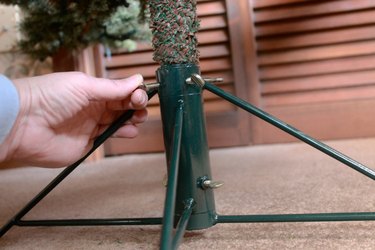
Find the stand
Your first step is to sort through all the components and locate the tree stand. Most artificial trees have a fold-out stand, so extend it until it's sturdy and open the bolts in the center of the base.

Find and attach the tree base
Next, locate the bottom section of the tree. This will be the widest section. The pole stem should align with the opening in the base.
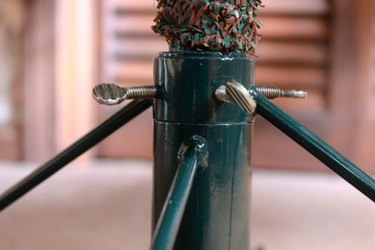
Tighten the bolts
Finger-tighten the bolts in the base until the bottom of the tree can stand.
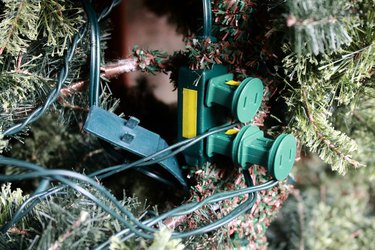
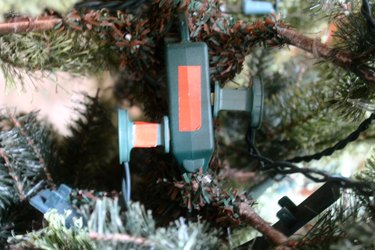
- The bottom of the tree is usually where you plug in the prearranged lights, so arrange the base so that the plug is accessible and convenient.
- You should be able to follow the cord emerging from the bottom section of the tree to your next section. Some trees come with two sections, while others have three.
- Insert the trunk pole into the trunk opening of the section below and slide it into place. Your model might have grooves that need to be aligned or tabs that will click into place as you join the sections of the tree.
- If there are additional plugs for the lighting, check the owner's manual to make sure it all connects properly.
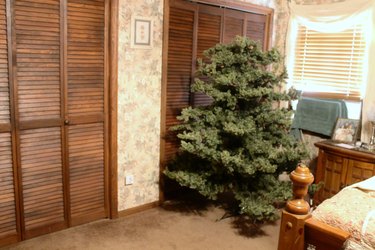
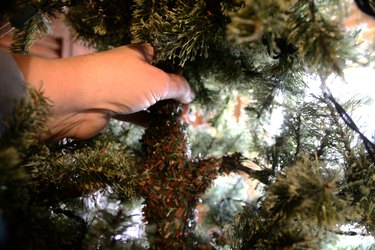
Shaping the tree
Since your tree has spent most of its time in a box, you'll need to shape it to help it look more natural. Always start from the bottom. If you prefer, you can shape each individual section before adding the portion above it or do the entire tree at once.
- Starting from the pole at the center of the tree, work outward along each individual branch, spacing out its minor branches and pieces like a fan.
- Add some depth by curving groups of tips upward or downward randomly. This gives the tree more volume and makes it look more natural. You'll want the ends of the branches to aim outward to better imitate a living tree.
- Move upward from layer to layer, spreading and tweaking branches to fill in all of the visual space.
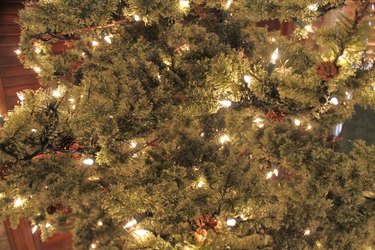
Locate lights as you go
Take note of where the bulbs are located as you assemble the tree. You can plug in the lights temporarily to check if they work, but the compressed material of an unshaped artificial tree can be a fire hazard around a hot bulb, so be careful.
Tip
It's best to wait until the tree is fully assembled before you plug in all of the lights for good.
Test for sturdiness
Before you begin to decorate the tree, check that it is sturdy. Do this by reaching inside and grabbing the center pole, or trunk. Wobble it back and forth at each junction to make sure it stays in place.
Plug in the lights on the tree
Now that you've finished fluffing the tree and checking for sturdiness, you can plug in all of the lights on the tree.
Finalize the setup
Once the tree is fully fluffed and all set up, connect the power cord from the top section of the tree to the light power cable.
Warning
Pre-lit artificial Christmas trees are meant for indoor use only. Using pre-lits outside invites risk of fire.
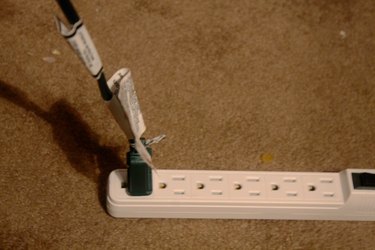
Plug In the tree
Plug the tree's light string into an approved extension cord or wall outlet.
Prepare to be amazed by the glorious illuminated beauty you have created with your pre-lit artificial Christmas tree. We told you it would be easy!