Things You'll Need
Allen wrenches
Chuck key
Hammer
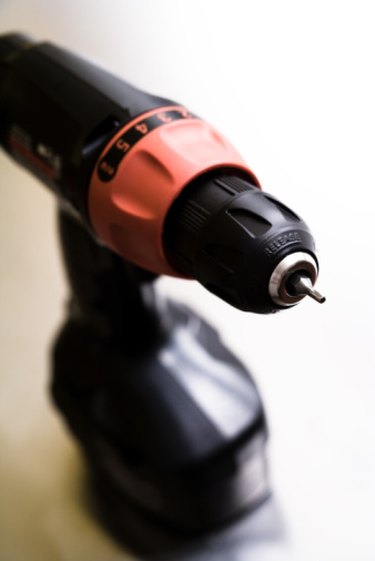
Skil has built a variety of power drills for a number of years, offering both corded and cordless models. While most recent models employ a keyless chuck for holding drill bits, older models came equipped with a chuck that required a chuck key to tighten or loosen the chuck. With aftermarket keyless chucks available, you can easily remove a Skil drill chuck and replace it with a new keyless chuck in a few minutes.
Step 1
Unplug the drill's electrical cord from the power outlet. If the drill is cordless, remove the battery from the drill.
Video of the Day
Step 2
Rotate the chuck collar to open the chuck's jaws to their widest point, and set aside any drill bit that was in the chuck. Use a chuck key to loosen the chuck if necessary.
Step 3
Insert an Allen wrench inside the opened chuck and into the screw in the back of the chuck. Hold the chuck firmly, and turn the screw clockwise to remove the screw.
Step 4
Place the drill flat on a table. Insert the short end of the L-shaped Allen wrench into the chuck and rotate the chuck closed, then tighten the chuck onto the Allen wrench with the chuck key. The long portion of the Allen wrench's L-shape will stick out at a right angle to the drill chuck. Holding the drill firmly on the table, tap the Allen wrench in a counterclockwise direction knock the chuck loose. One or two easy taps should do it.
Step 5
Remove the Allen wrench once the chuck is loosened, then twist it off the rest of the way by hand to remove it from the drill's threaded drive shaft.
Video of the Day