Things You'll Need
Assorted fabrics in dark and light colors
Cutting mat
Rotary cutter
Clear quilting ruler
Scissors
Thread
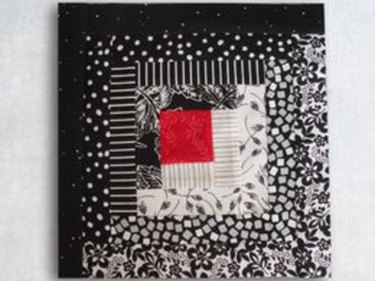
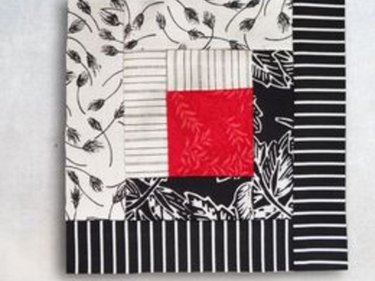
A log cabin block is a traditional quilt block that is a good starting point for a beginning quilter. Since it needs both dark and light fabrics, it is an excellent pattern to use up scraps and small bits of fabric. It works well in the originally used flannels and plaids, or equally well in cotton prints and florals. Although --very few things are quite as cozy as a flannel log cabin quilt. This pattern makes a 10-inch square, but you could easily add a round of logs to make a 12-inch square or leave a round off to make an 8-inch square.
Step 1
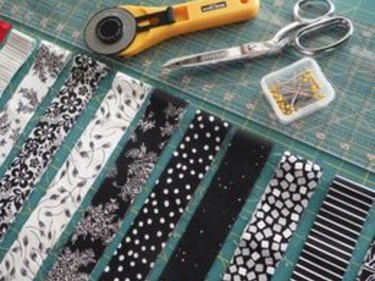
Cut one fabric square 2 1/2 inches x 2 1/2 inches to be the center of the block. Cut the remaining pieces of fabric into 1 1/2-inch wide strips. Keep an even distribution of dark and light colors. Please see the last slide for a list of supplies.
Video of the Day
Step 2
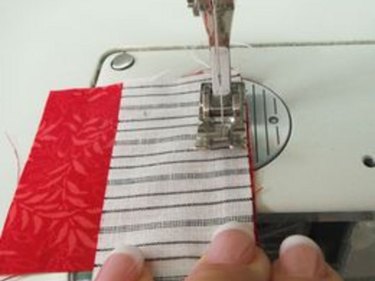
Start with the center 2 1/2-inch x 2 1/2-inch block and choose a light fabric as the first log. Place the strip right side to right side with the center square and sew together with a 1/4-inch seam.
Step 3
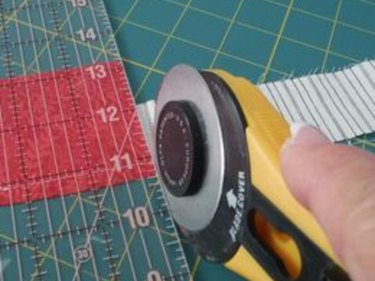
Trim the strip even with the 2 1/2-inch block using a rotary cutter on the self-healing mat and a clear quilting ruler.
Step 4
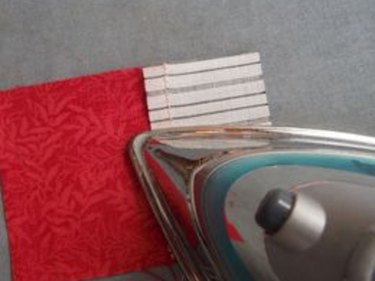
Press the seam allowance toward the darker fabric square.
Step 5
Rotate the piece counter-clockwise 1/4-turn and add another strip from the same light fabric right side to right side and sew a 1/4-inch seam. Trim the excess as in step 3 and press the seam toward the center square.
Step 6
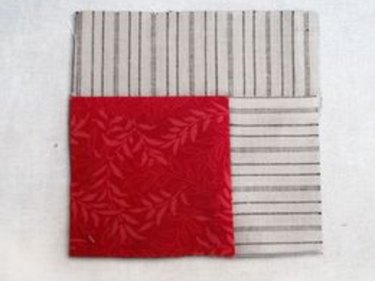
Rotate the piece again counter-clockwise 1/4-turn and add a dark strip sewing with a 1/4-inch seam as always. Trim the excess and press always toward the darker fabric. Rotate another 1/4-turn and add another log of the same strip. Trim the excess and press.
Step 7
Check the back of the piece occasionally to be sure that you have not caught any seams the wrong direction.
Step 8
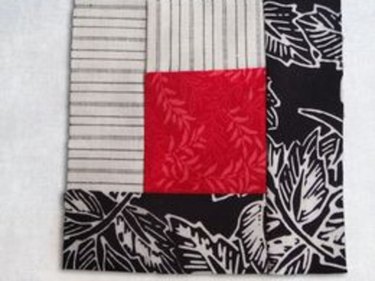
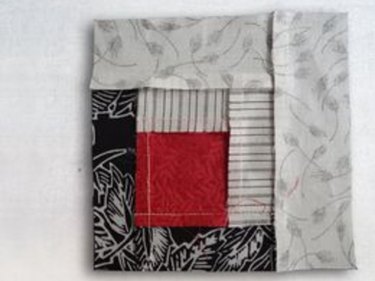
Continue in this manner adding two logs of light fabric and then two logs of dark fabric until you have four logs of each light and dark fabrics on each side of the center square.
Tip
Traditionally the center square of a log cabin quilt is red. It represents the chimney.
Even though the final square measures 10 1/2 inches square, it is considered a 10-inch block because you will use up the extra 1/2 inch in seam allowance when you put the quilt together.
Video of the Day