Things You'll Need
Thread
Bobbin
Bobbin case
Scissors
To those unfamiliar with the machinery involved, even a simple function like threading a sewing machine can seem confusing. Threading the machine is a two-step process: winding and threading the bobbin and threading the main spool through the mechanism and needle. While subtle differences exist in the threading of different brands and models of sewing machines, the procedure is largely the same in all of them, including those made by Kenmore.
Bobbin Thread
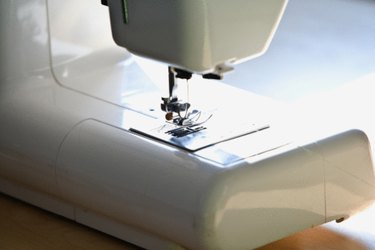
Step 1
Face the front of the machine with the needle assembly on your left.
Video of the Day
Step 2
Wind the bobbin, which is the thread that provides tension for the main thread when sewing. Begin by placing the bobbin on the bobbin spindle, the shorter of the two spindles at the far top-right of the machine -- when looking at the machine from the front. Place a spool of thread on the taller spindle, in back of the bobbin spindle.
Step 3
Pull the thread from the spool on the taller spindle and route the thread around the hook at the far top-left of the machine.
Step 4
Bring the thread back to the right of the machine and wrap the thread eight times around the bobbin spool with your fingers. Push the bobbin spindle to the right with your thumb until the bobbin spool snaps into place against the tension reel.
Step 5
Step on the foot pedal to activate the machine's motor. The bobbin spool will begin winding and stop automatically when the bobbin spool becomes filled with thread. Remove the bobbin spool from the spindle and cut the thread with scissors.
Step 6
Pull the end of the thread from the bobbin spool. Insert the bobbin spool into the bobbin casing. Slide the thread under the lip of the slot at the bottom of the bobbin casing and work the thread into the L-shaped slot in the casing. Pull on the end of the thread to ensure the thread feeds freely though the slot in the casing.
Step 7
Open the cover at the bottom of the machine, under the needle assembly, with your hand. Insert the bobbin casing into the bobbin housing with the hook on the case facing outward and pointing towards the needle. Push the bobbin casing in until you hear a "click."
Needle Thread
Step 1
Wrap the thread from the main spool around the hook at the far top-left of the machine. Bring the thread down the front of the machine and around the bottom of the wheel immediately above the needle assembly.
Step 2
Bring the thread back up through the vertical slot that runs vertically up the front of the machine above the needle assembly.
Step 3
Locate the hook in the top of the slot and slip the thread over the hook. Bring the thread back down through the slot and around the back of the needle tension adjustment knob at the top of the sewing needle. Bring the thread down through the guide, adjacent to the needle tension adjustment knob.
Step 4
Pull the thread down and insert the thread through the eye of the needle. Continue the thread down through the slot in either side of the foot at the bottom of the needle assembly. Pull the thread towards the back of the machine.
Step 5
Rotate the hand wheel at the side of the machine towards you manually until the needle goes all the way down into the baseplate and then comes back up; the needle will pick up the bobbin thread.
Step 6
Pull both threads to the back to the machine. Replace the cover over the bobbin casing.
Tip
Most Kenmore sewing machines have diagramed threading directions on the back of the machine.
Video of the Day