Things You'll Need
Standard 8 1/2" x 11" black card stock or construction paper
Cutting surface
Ruler
Pencil
Utility knife
Sticky tack
Scissors
Clear contact paper
Tissue paper in a variety of colors
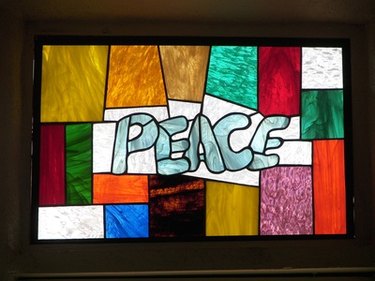
The spectacular colors and patterns of stained glass have been enchanting people for hundreds of years. From towering cathedral windows to decorative sun catchers, stained glass designs range from ornate scenes to crisp geometric forms. The cut glass and lead solder of real stained glass work certainly aren't kid-friendly materials, but with an at-home paper alternative project even the littlest tykes can make their own "stained glass" art.
Prepare the Window
Step 1
Place the contact paper backing-side-up on a safe cutting surface. Place the black paper on top, aligned with the straight edges on the top and one side of the contact paper. Use the black paper as a template to trace the other two edges with your pencil.
Video of the Day
Step 2
Cut along your pencil edges with the utility knife. Use the ruler as a straight edge for the cleanest lines possible. You should now have an 8 1/2" by 11" piece of contact paper. Set it aside.
Step 3
Lay the black paper on a safe cutting surface. Align the bottom edge of your ruler with the bottom edge of the paper. Draw a straight line along the top edge of the ruler, creating a band the width of your ruler at the bottom of the page.
Step 4
Repeat Step 3 on the other three sides of the paper. You should now have a frame as wide as your ruler, creating a smaller rectangle in the center of your paper.
Step 5
Cut the smaller rectangle from the center of the frame using your utility knife. Use the edge of the ruler as a guide to achieve nice straight edges. You now have a rectangular black paper frame. Set the frame aside.
Step 6
Secure the contact paper face down on your work surface with a pinch of sticky tack in each corner. Peel the backing paper from the contact paper, being careful not to lift it off the table.
Step 7
Align the black paper frame with the contact paper, pencil-marked side up and press securely onto the contact paper. You now have a black frame around a "window" of sticky contact paper.
Step 8
Repeat steps 1 through 7 to create a work station for each child.
Make the Window
Step 1
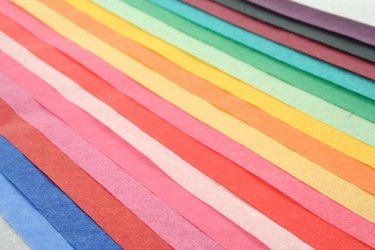
Cut a variety of 1" to 3" shapes from each color of tissue. Random, angular shapes work best.
Step 2
Press the colored tissue pieces onto the contact paper one at a time. Cover the entire surface of the contact paper with tissue pieces. Overlap edges to create new or deeper colors, but be sure each piece is affixed securely to the contact paper at its center.
Step 3
Peel the completed "window" from your work surface. The working surface of the contact paper has become the back side of the window.
Step 4
Remove the sticky tack from the contact paper and use it to hang your "stained glass" in a window so the light shines through the tissue. Enjoy your creation!
Tip
Older kids can help with the preparation and cutting, but prepare the windows ahead of time for younger children and have them stick pre-cut shapes onto the sticky surface.
Tissue paper is translucent, inexpensive and readily available, but for a more realistic, glass-like look, colored cellophane can be used.
Instead of cutting a simple rectangular frame for your window, create the look of a leaded glass panel by cutting intricate patterns from the black paper, or add strips of black paper or shaped paper punches in with the tissue shapes.
Use the overlapping tissue effects as a lesson in color mixing or images of real stained glass windows to teach design or history.
Video of the Day