
The tutu has persisted as a beloved silhouette for hundreds of years. Even though the tutu originally belonged to ballerinas, those who yearn for a little romanticism can now add a tutu to their wardrobes. Handmade tutus are fun costumes or gifts, and they can be made in any color in less than an hour. Watch the video tutorial here!
Things You'll Need
Video of the Day
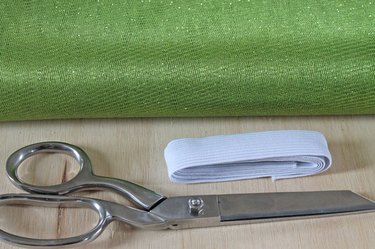
- 1/2 inch elastic (enough to go around your ballerina's waist)
- Sharp scissors or a rotary cutter and mat
- Sewing machine with a 90/14 universal needle
- Coordinating thread
- Round bowl or large can
- 5 yards of tulle for a child-size tutu (7 yards for a teen or adult size)
Video of the Day
Step 1
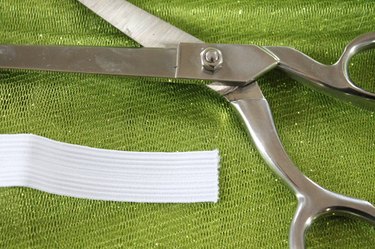
Measure around your ballerina's waist and subtract 2 inches from that number. Cut a strip of elastic to this measurement.
Tip: If you're making this as a gift for a child and don't happen to know the ballerina's waist size, you can use her age to determine the elastic size (in this case, don't subtract 2 inches):
- 0 to 6 months: 14 inches
- 6 to 12 months: 16 inches
- 12 to 24 months: 18 inches
- 2T to 3T: 19 inches
- 4T to 5T: 20 inches
- 5 to 6: 21 inches
Step 2
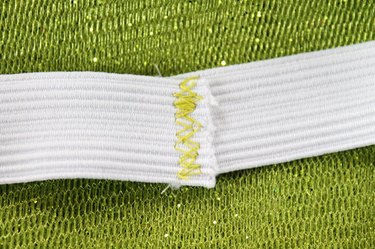
To create the waistband, overlap a 1/2 inch on the ends of the elastic and sew them together using a 90/14 needle and a medium zigzag stitch. You can hand-stitch the elastic together if you don't have a sewing machine.
Step 3
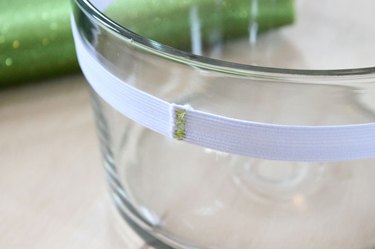
Place the elastic waistband around something round, such as a glass bowl or a coffee can.
Step 4
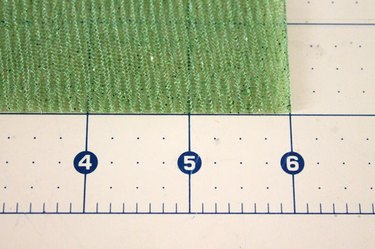
Decide how many inches long you'd like your tutu to be, multiply that number by two, and then add 2 inches. Cut strips of tulle to be 6 inches wide by your length measurement. You multiply by two because you will be folding each tulle strip in half. Use a rotary cutter to cut the tulle if you have one, but scissors will also work. You will need to cut at least two strips of tulle for every inch of your waistband. For example: if your waistband is 20 inches, then you'll need 40 strips.
Tip: Again, if you're making this as a child's gift and don't happen to have your ballerina close by, use the following measurements as a guide for determining length:
- 0 to 6 months: Cut the tulle 16 by 6 inches
- 6 to 12 months: Cut the tulle 18 by 6 inches
- 12 to 24 months: Cut the tulle 20 by 6 inches
- 2T to 3T: Cut the tulle 22 by 6 inches
- 4T to 5T: Cut the tulle 24 by 6 inches
- 5 to 6: Cut the tulle 26 by 6 inches
Step 5
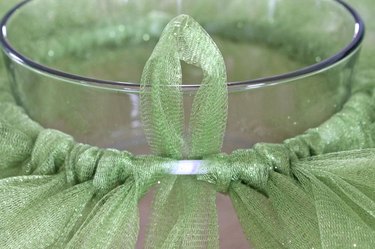
Fold a tulle strip in half and place the fold under the elastic waistband, from the bottom up, so it forms a loop at the top.
Step 6
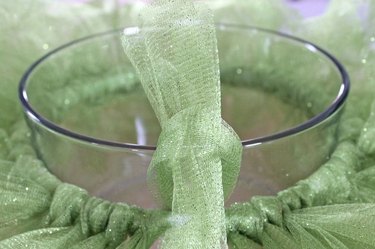
Pick up the ends of the tulle strip and thread them through the loop of the tulle.
Step 7
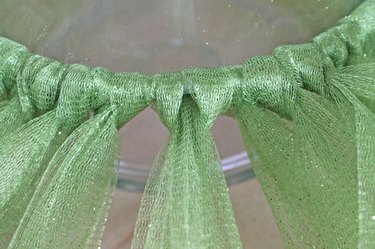
Pull the ends of the tulle strip gently through the loop. Continue looping the strips of tulle around the entire elastic waistband until you get back around to where you started.
Finished Tutu

Enjoy the magic of wearing a tutu...
Finished Tutu

...because tutus aren't just for dancing anymore.