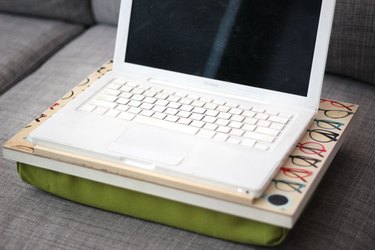
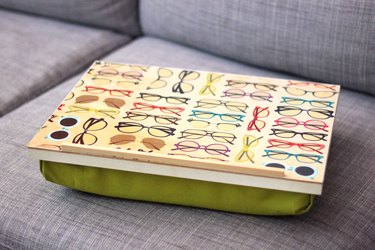
Anyone who has used a computer on their lap knows how hot it can get. One solution for keeping cool is this DIY pillow lap desk. The thick, comfortable cushion keeps the heat away while the desktop provides a stable work surface. You can even customize the top with decorative paper to reflect your own unique style.
Video of the Day
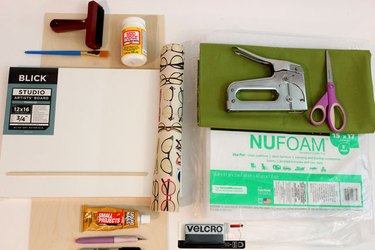
Things You'll Need
Cradled artist's board, 12 inches by 16 inches
12-inch wide plywood
Wrapping paper
Decoupage medium
Brayer
Brush
Permanent adhesive
Hobby knife
Saw
Marker
3-inch thick foam
Fabric
Staple gun
Scissors
Hook and loop fastener
1/4-inch square wood dowel
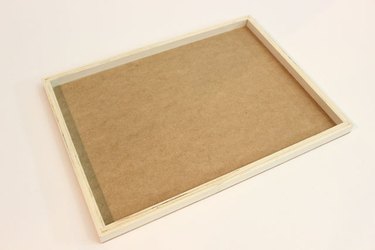
Step 1: Choose a Top
Most lap desks that you see are made with a top that is a flat piece of wood or fiber board. I recommend an artist's board with a cradle. An artist's board, available at art supply stores, is a ready-to-paint panel that has a ledge on all four sides of the back; this ledge is called the cradle. The cradle is very useful because the cushion added later can sit right inside of it, providing extra stability while hiding imperfections in the cushion section.
Video of the Day
The artist's board is an ideal size for a lap desk, as it fits most laptop computers (as well as most laps). There are larger sizes than 12 inches by 16 inches, but the bigger you go, the more difficult it is to balance on your lap.
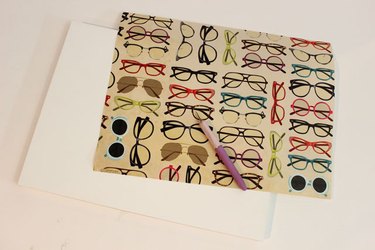
Step 2: Cut the Paper to Fit
Turn the artist's board to the front side. (The front is usually white.) You can leave it as is, paint it or decoupage it, which is what we are doing. Decoupage, which is the art of applying paper to a surface, gives you endless options to customize your top. Choose some decorative paper and cut it to the size of your top (12 inches by 16 inches) with a hobby knife on a cutting mat. I used some fun wrapping paper.
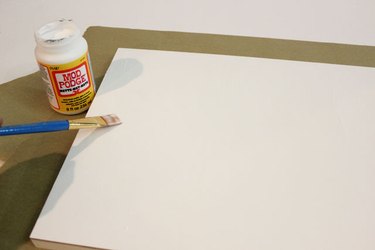
Step 3: Apply Decoupage Medium
Using a paint brush, apply an even layer of decoupage medium to the top of the artist's board. Decoupage medium looks a lot like glue, but it has added sealing properties that glue alone does not have.
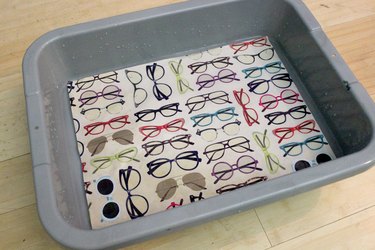
Step 4: Soak the Paper in Water
Immerse the paper in a tub of water to relax it. This makes it easier to work with. When the paper is wet, you can reposition it on the work surface without tearing. The paper only needs to be in the water for one to two seconds. Not all papers are created equal, however. Some are very thick and need to be in the water longer, and some are very thin and disintegrate as soon as they touch the water. It is best to cut a small piece of the paper and do a test first to see how it withstands the moisture. If you can handle the wet paper without it crumbing, you're good to go.
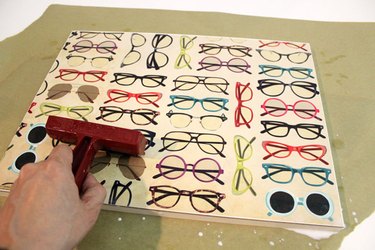
Step 5: Position the Wet Paper
Carefully place the wet paper on top of the surface that has been painted with decoupage medium. Make sure your hands are wet, as dry fingers will tear the wet paper. Start at the bottom, lining up the edges, and work your way up.
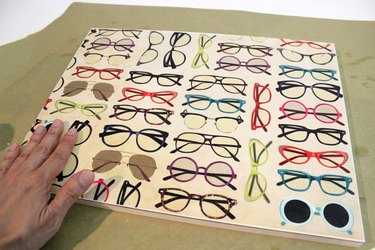
When the paper is lined up evenly, run a rubber brayer across the surface to remove excess water. Let it run off the sides; you can wipe off the excess with a towel later. Make sure the brayer is wet so it doesn't tear the paper. Keep rolling until all the water and air bubbles are gone.
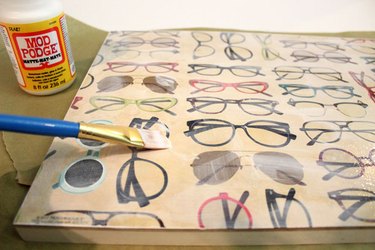
Step 6: Seal the Paper With More Decoupage
Once you've removed the air bubbles, apply another layer of decoupage medium to the top of the paper. Let it dry and then apply one more coat.
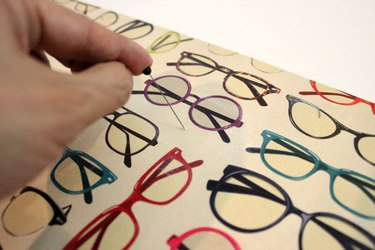
Step 7: Remove the Air Bubbles
Even though you removed all the air bubbles with the brayer, one or two might reappear while the paper is drying. Don't worry about them. Take a needle and puncture the paper, press down on the paper with your fingers to let the air escape and the it will be flat again. Then apply more decoupage medium over the hole. The top is now finished, and we can begin working on the cushion.
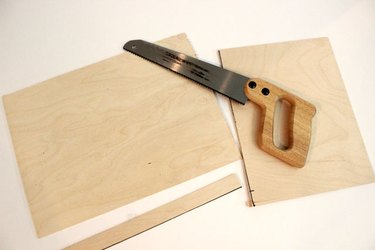
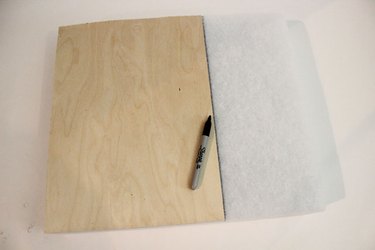
Step 8: Cut the Plywood to Fit
Because the cushion will be sitting within the cradle of the desktop, you will need to cut a piece of plywood to fit the area inside the cradle. Measure the dimensions of this area and mark the measurements on a piece of plywood. You can find 3/8-inch plywood that's 12 inches by 24 inches at arts and crafts stores.

Use a saw to cut along the lines you've marked. The cuts do not have to be precise, as the edges of the wood will be covered with fabric as well as the cradle of the desktop.
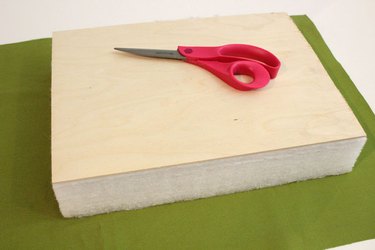
Step 9: Cut the Foam to Size
For this lap desk, we used a piece of foam that was 15 inches by 17 inches, and 3 inches thick. To cut it to the exact size as the piece of wood, place the wood on top of the foam and trace it with a black marker. The wood shown here happened to be the exact length as the foam, so only one side needed to be cut. Use a pair of scissors to cut along the line. Because the foam is thick, it will take a bit of effort using the scissors, but keep at it – you will eventually cut through to the other side.
Step 10: Cut the Fabric to Cover the Wood and Foam
Line up the wood on top of the foam and place both on top of a piece of fabric. Trim the fabric so it extends about 4 inches on all sides. Fold the fabric over the sides of the foam to make sure the fabric will cover it. Look for upholstery-grade fabric, which is thicker and will hold up better. The fabric used here is duck cloth.
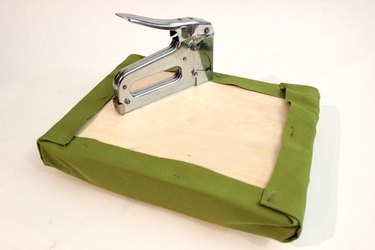
Step 11: Wrap the Wood and Foam
Wrap the fabric around the wood and foam as if you were wrapping a present, making sure your fold lines at the corners are even. Use a staple gun to attach the fabric to the wood. Press down firmly on the wood and cushion as you are stapling the fabric so that the staples go all the way through the wood.
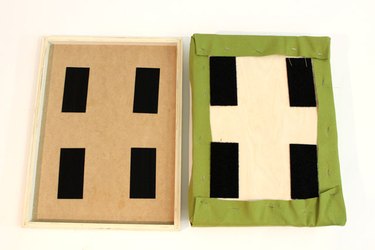
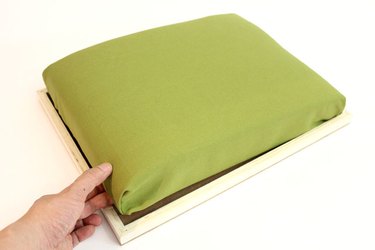
Step 12: Connect the Top and Bottom
Now it's time to insert the cushion into the cradle of the desktop. But rather than gluing the two pieces together, we will use hook and loop fasteners. The advantage of hook and loop fasteners is that they will allow us to change out the top or bottom in the future. Place a strip of the fuzzy side on four corners of the cushion section and four strips of the rough side on the corresponding area of the desk. Then insert the cushion into the cradle, pushing down on the cushion so the hook and loop fasteners make contact. The cushion should be nice and snug in there.
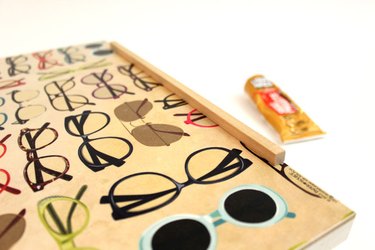
Step 13: Attach the Tablet Ledge
For the finishing touch, we'll add a tablet ledge to the front of the desk. This ledge will keep a laptop or tablet from sliding off as you're using it. (Yes, we've thought of everything.) Purchase a square dowel from a craft store. They typically come in 3/8-inch, 1/4-inch and 1/2-inch thicknesses at a length of 12 inches. The one used here is 1/4-inch thick. Apply a small amount of permanent adhesive to one side of the dowel and center the dowel – adhesive side down – at the front edge of the desk.
Tip
Apply only a thin layer of adhesive to the dowel. Wipe off any excess with a paper towel so that excess adhesive does not run out the sides.
After the adhesive on the dowel dries completely, you're done. Now you can take your pillow lap desk for a test drive. And here's a fun fact: this tutorial was actually written using the lap desk in the photos. Isn't that so meta?