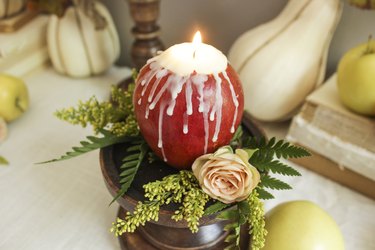
Turning an apple into a candle or candle holder takes only a few minutes and adds a whimsical, functional and natural variety to table centerpieces or mantel decorations. Since apples are already in the autumnal color palette, they work well for fall decor, but would also be festive for back-to-school events or even teacher appreciation gifts.
Video of the Day
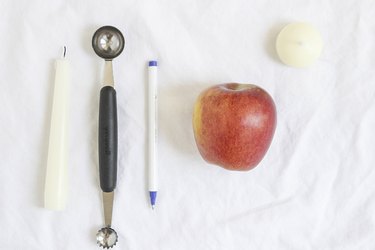
Things You'll Need
Floating light candles or tea light candles
Melon-baller utensil, double-sided
Paper or foam plate
Small taper candle, 6 inches
Lemon juice (optional)
Step 1: Trace the Floating Candle
Remove the apple stem and place a floating candle, centered, on top of where the apple stem was. Trace around the perimeter of the floating candle onto the apple.

Step 2: Make a Cutout
Using the jagged edge of the melon baller, cut into the skin of the apple along the perimeter line drawn in Step 1. Using the larger side of the melon baller, scoop out the apple core to a depth of approximately 1 inch, in the shape of the traced floating candle.
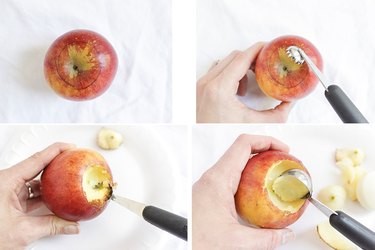
Tip
To prevent browning of the apple inside, pour 1 teaspoon of lemon juice into the hole and swirl it around. Pour out excess lemon juice after all sides of the exposed inside of the apple have been coated.
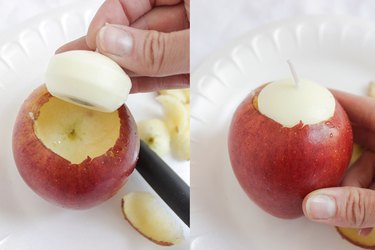
Step 3: Fit the Floating Candle
Place a floating candle in the apple to ensure a snug fit. Carve out more as needed so the floating candle fits with the wick base sticking up 1/4 to 1/2 inch above the edge of the apple.
Step 4: Fit a Taper Candle
For added apple candle variety, use a small taper candle to trace, and core the apple with the small, jagged edged melon baller side to approximately 2 1/2 to 3 inches.
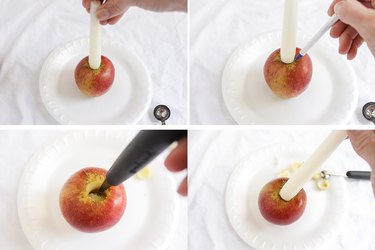
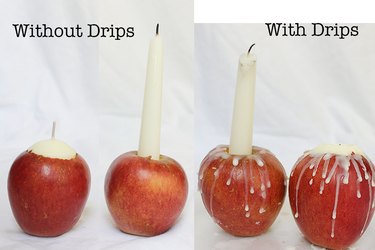
Step 5: Drip Wax (Optional)
Place the apple on top of a paper or foam plate. Light a floating candle that has already been inserted into the apple, and carefully turn the apple at an angle so that the melted wax drips down the side of the apple. Rotate the apple after each drip so all sides of the apple get varied-length wax drips.
Tip
Adding wax drips to the apple candles provides interesting contrast and texture to the apple skin but can be omitted for a cleaner, simpler look.
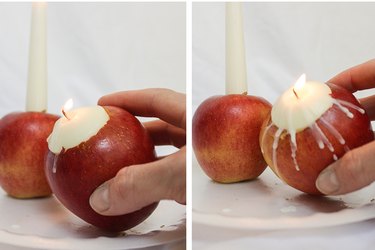
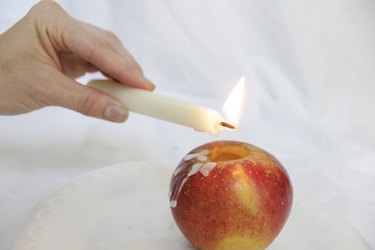
For a taper apple candle, light the taper candle and hold it over the edge of the apple. Position the candle so the wax hits right at the curve of the top of the apple and drips down the side. Rotate the apple and repeat until all sides have drips or until the desired effect is achieved.
Tip
Red apples used to make apple candles left at room temperature keep for about one week before they need to be disposed of. Green apple candles will keep longer at room temperature, up to 10 to 12 days. To prolong the life of an apple candle, consider placing it in a cool place at night, such as a fridge. To prevent the edge of the apple opening from drying out, which will cause the skin to curl after two to three days, seal the opening with melted wax.

Apple candles can be used in a variety of ways, such as placed in a bowl or basket full of plain apples or directly on a tabletop. They also can be placed in a galvanized bucket full of water for floating lights on a porch or patio.
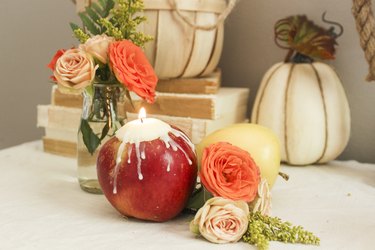
To showcase the apple candles best as a table centerpiece or mantel display, place them on tall candleholders, varying their height and adding fresh flowers and foliage that accent their color and add texture.
