Gather your hard boiled eggs, craft supplies and imagination -- it's time to color Easter eggs. These creative projects will most certainly brighten up your Easter basket.
Related: Tie-Dye Easter Eggs
Video of the Day
Video of the Day
Start with a Richly Colored Base Dye
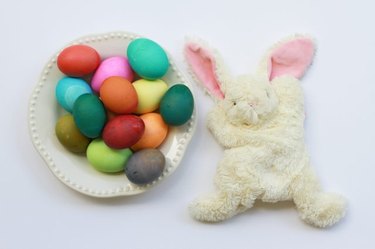
Most egg decorating techniques require a base dye, but its easy to color them too lightly and end up with barely any color at all. This simple how-to results in beautiful, rich colors that make the perfect starting point for creativity, or are pretty enough to stand on their own. You'll get different results depending on whether you use brown or white eggs. Use a few of each for variety.
Related: How to Dye Easter Eggs
Use Kool-Aid
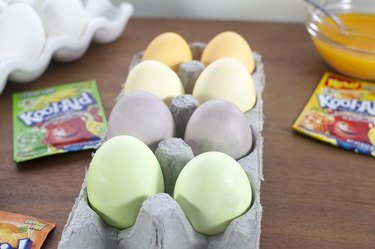
This recipe, which combines Kool-Aid with vinegar, will leave you with simple pastel colors. If you want to go bolder, leave the eggs in the dye longer. This might be a good one if you're working with curious toddlers who tend to put everything in their mouths, since vinegar and Kool-Aid are non-toxic. (Although not recommended and certainly not very tasty!)
Related: Kool-Aid Pastel Eggs
Go for Tie-Dye

These vividly colored eggs are a perfect project for older kids to tackle on their own, or team up with younger siblings for a group effort. Primary colors work together to create a variety of different combinations and shades. The tie-dye effect is so striking, you might want to make extra to showcase on your Easter table.
Related: Tie-Dye Your Easter Eggs
Dye with Ingredients Found in Your Kitchen

If you want to skip commercial dye kits and go the natural route, a little hunting in your kitchen will result in enough ingredients to color eggs. This how-to uses coffee, blueberries, turmeric, paprika, and beets. You could also try leafy greens, tea, vegetables, and fruit peels among other things.
Related: Natural Egg Dye with Mason Jars
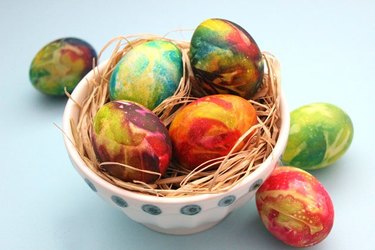
Swirl Them with Shaving Cream

Eggs take on vibrant, colorful swirls by rolling them in a mixture of food coloring and shaving cream. They look most colorful with a base color, but the colors would also stand out sharply if you leave the eggs white. If you're doing this with kids, go ahead and leave the shaving cream out for playing after you do the eggs for a fun sensory activity.
Related: Swirled Easter Eggs
Add a Monogram

Adding a monogram or silhouette will take your egg game to a professional level. Best of all, they are not much more difficult than average egg decorating. Besides letters, you can make a design with any kind of sticker you want. Let your creativity run wild.
Related: Monogrammed Easter Eggs
Decoupage Your Eggs
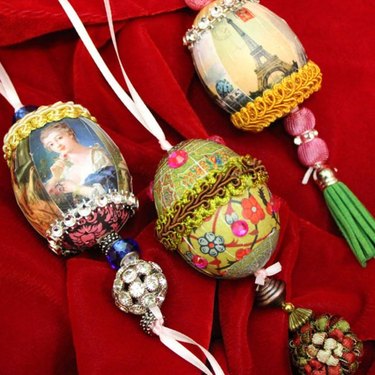
Collect embellishments such as sequins, tassels, and laser printouts to create stunning decorations. Since they require blowing out the eggs first, you can keep them beyond this year, but the fragility of the eggs probably means the kids should sit this one out.
Related: Decoupage Easter Eggs
Make Them Sports Themed

You can make little models of any ball using acrylic paint and permanent markers. If you have athletes or sports fanatics in your family, this idea will score big!
Related: Sports Themed Eggs
Add Scents

Make it a multisensory experience by adding scents. If you use food safe flavor extracts such as lemon or orange for the scents, the eggs will still be edible. Do a basketful of one scent for a strong aroma, or mix and match for fun.
Related: Scented Easter Eggs