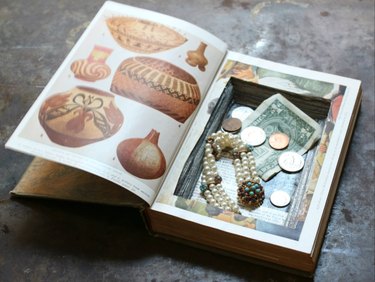
A hollowed-out hardback book can turn into a safe to keep trinkets and valuables out of plain sight. Store it with the other books on your bookshelf to blend in seamlessly with your decor.
Video of the Day
Video of the Day
Things You'll Need
- Hardback book, at least 1½ inches deep
- Box cutter fitted with a new blade
- Ruler
- Kitchen or binder clips
- Fine-grit sandpaper, P100
- Wax paper
- Decoupage medium or a 50/50 mixture of water and white glue
- Paintbrush
- Heavy object
Step One
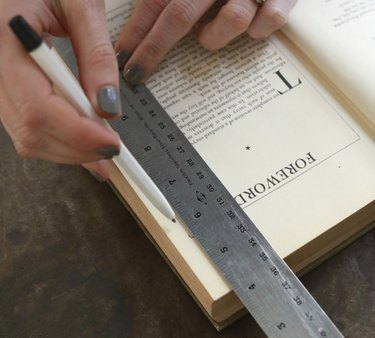
Open the book, keeping three to four pages in the front. Measure and mark the desired length and width of the hollowed-out cavity to use as a template for cutting. Leave at least ¼-inch border to provide a sturdy, stable wall around the opening.
Step Two

Using a box cutter with a sharp new blade, cut along the marked border. Apply pressure to cut through multiple pages at a time, and use a ruler to steady your hand.
Tip: Using a new blade will provide a cleaner and deeper cut.
Step Three
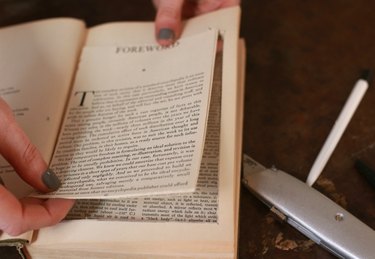
The cut pages will be easily removable with the lift of your fingers. Each cut should remove about 10 pages at a time.
Step Four
Using this first batch of cut pages as a template, retrace the opening onto the page exposed from the first cut with a pen or pencil. Then clip back those previously cut pages to keep them out of the way.
Step Five
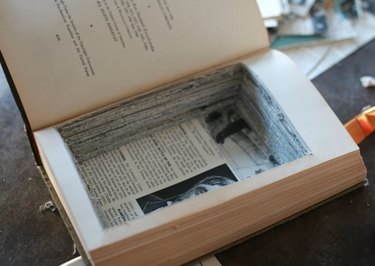
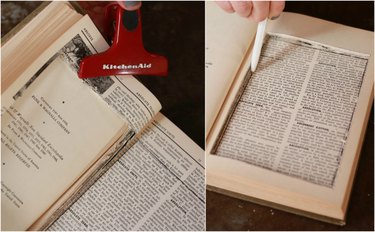
Cut along the newly traced lines, applying pressure and removing pages in batches as you go. Retrace and continue to cut again until you have made a hole 1 inch deep. Test to ensure the contents of goods you'll be keeping safe will fit inside the hollowed opening while the book cover is closed. Cut out additional pages if needed.
Step Six
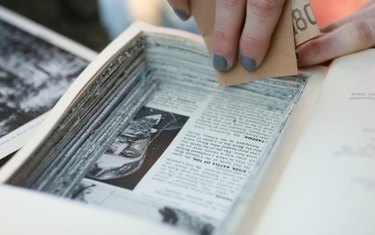
Using a fine-grit sandpaper, such as P100, gently sand the walls of the hollowed-out opening to smooth away any jagged cuts or uneven edges.
Step Seven
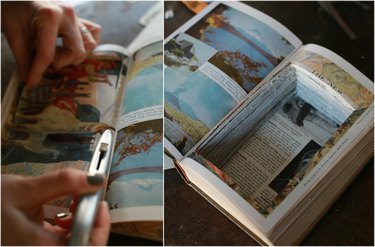
Trace and cut a clean opening from the page you selected as the one to rest on top of the hollowed well. Cutting it separately allows for a clean presentation, free from trace and cutting marks.
Step Eight
Wrap a sheet of wax paper completely around the front book cover and remaining front pages, and then clip in place. The wax paper will create a protective barrier from the glue that comes next.
Step Nine
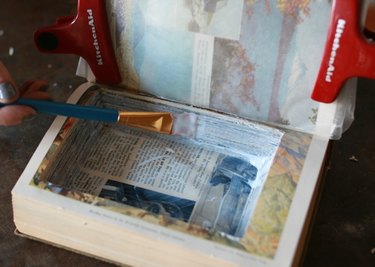
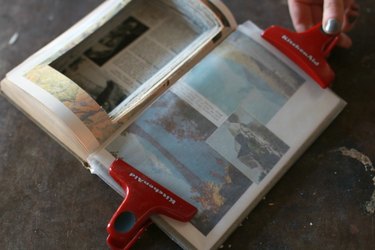
Using a paintbrush, apply a heavy and even coat of decoupage medium into the hollowed-out cavity, along the walls of the cut pages. You can find decoupage medium at most craft stores or make a batch of your own using a 50/50 solution of general-use white glue to water.
Step 1
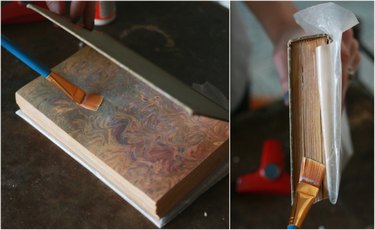
Brush decoupage medium onto the inside back cover, and then close the book and brush more medium along the outside edges of the book pages. The sealer will bind all of the pages together, still allowing them to appear natural.
Step 2

Weight down the book while drying. The weight will help the pages dry straight and evenly, avoiding warps and curves. Allow to dry for at least four hours.
Step 3
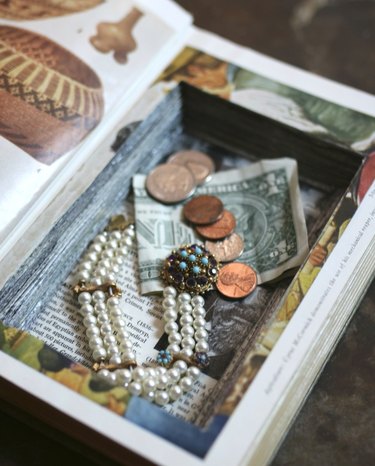
When dry, remove the wax paper and open the book to reveal the finished and sealed hollow safe opening. Use it to store cash, jewelry and other valuables you'd like to keep concealed.
Step 4
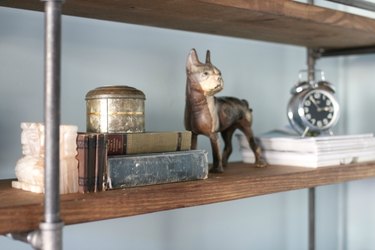
Close the book cover and slide onto a bookshelf among other novels and treasures, knowing your secrets are safe.