Things You'll Need
White body suit, onesie or footed pajamas
2 or 3 pairs of white socks
Needle
Thread
Cardboard
1/2 pint bottle of black fabric paint
Medium art paintbrush
Permanent marker
Black fabric dots
Fabric adhesive tape
White cap
Pipe cleaners
Wirecutters
1/3 yard of white fabric
Sewing machine (optional)
Cotton batting or cotton balls
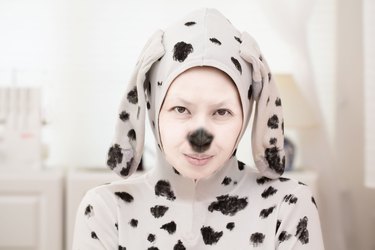
Someone will certainly want to know who let the cute puppy out if you or your child shows up for a Halloween party dressed as a Dalmatian. The costume is easy to make for yourself or for a child of any age, and it doesn't cost a lot. Once the costume is assembled, use a little makeup to create facial spots and a puppy nose to finish your costume in style.
Step 1
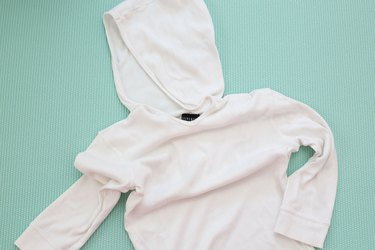
Start with a long-sleeve white onesie for a baby, or long-sleeve, footed white pajamas for an older child or adult.
Video of the Day
Step 2
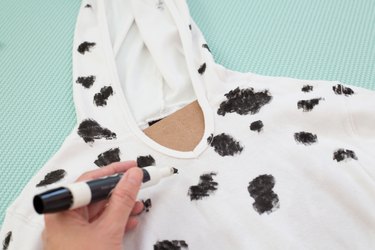
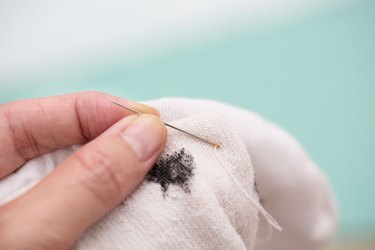
Insert cardboard in the garment before you paint the spots to keep it from bleeding through to the other side of suit. Paint black spots on the body suit using fabric paint and the paintbrush or draw them on with a permanent marker for permanent spots. Make the spots any size and shape you like. Alternatively, for temporary decoration, cut spots from black material and stitch the spots in place using black thread along the edge of the spot or iron them in place with fabric adhesive tape between the spot and the suit.
Step 3
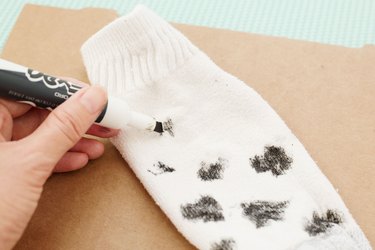
Paint spots and puppy claws on the socks, or use black adhesive tape, to create paws for your puppy suit. Repeat the process with another pair of white socks to make paws for the hands. Sew the hand socks to the ends of the sleeves to ensure they don't come off.
Step 4
Use a close-fitting white cap with a chin strap to make a head covering. Insert a pipe cleaner into a child's calf-length white sock and shape it into an ear for a child or adult, choosing an appropriately proportioned sock for the costume wearer. Cut off the excess pipe cleaner with wirecutters and sew the end of the sock closed. Repeat for the second ear. Sew the ears in place on either side of the cap. Add black dots to the cap and ears.
Step 5

Cut a length of white fabric 4 inches wide and proportionally long enough for a tail based on the costume size. A baby tail may not be longer than 4 inches, but an adult tail may be 12 inches in length. Sew the fabric together along the open long side and one of the short sides, right sides together, leaving one short side open for stuffing the tail.
Step 6
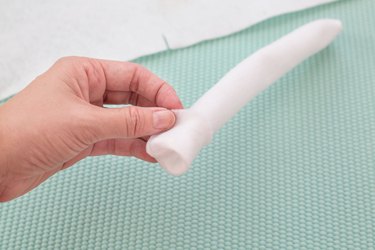
Turn the tail right side out and stuff the tail full of rolled up cotton batting or cotton balls to give it body. Sew the open end closed and add dots to the tail. Sew the tail to the center rump of body suit.
Tip
Use a long-sleeve white shirt with white leggings if you can’t find the footed pajamas. Sew a pair of white socks to the leg hems to give a footed pajama effect. Use socks with non-slip strips for the feet to prevent falling.
Video of the Day