If you favor home decor with organic silhouettes, then you'll love this fun, low-cost project that'll bring the natural beauty of the tropical ocean indoors. With just hot glue, wire, a wood block (or other pedestal of your choice), and craft paint, you can create this fabulous faux coral sculpture you'll be proud to display in your home. Ready? Grab your DIY gear and let's dive in!
Video of the Day
Watch the Video Tutorial
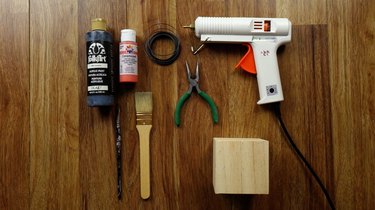
Things You'll Need
Hot glue gun and glue
16 gauge aluminum craft wire
Pliers with wire cutter
Acrylic craft paint colors of your choice for faux coral and pedestal
Craft paint brushes
Wooden block of desired size and shape (I used a 3.5 inch cube) for pedestal
Parchment paper (or other non-adhesive surface)
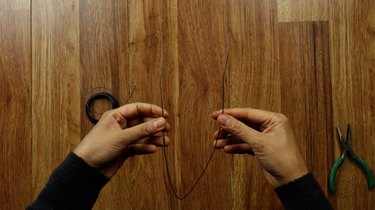
Step 1
Cut nine pieces of wire of various lengths. Mine were between 9 and 22 inches, and I cut each in progressively longer lengths (see last image in step 3). Bend each into a v shape.
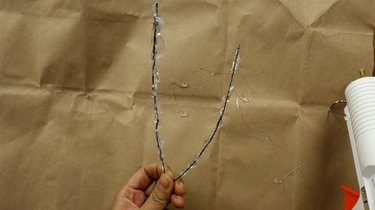
Step 2
Grasp one piece of wire at the bend with your thumb and forefinger and apply hot glue in globs along its entire surface (except the tip of the bend where you're holding it). Allow to dry, then apply another coat. Keep in mind that you're going for a bumpy, organic look here. Repeat for all nine pieces.

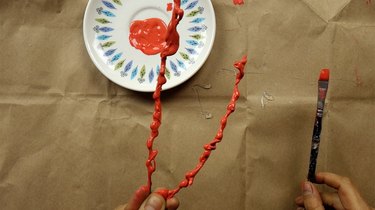
Step 3
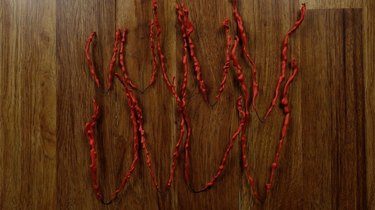
Paint all of the glue-coated wire pieces -- your faux coral "plumes" -- in your chosen color (I used mostly Delta Ceramcoat Deep Sea Coral with a few drops of Americana True Red.) and allow to dry for a few hours or overnight. I hung my pieces to dry on a wire clothes hanger, which worked nicely.

Step 4
Once dry, you're going to bind the pieces together with wire, three at a time. To do so, cut a piece of wire about 12 inches in length, and (from its center) wrap it around 5 or six times around the bend of three pieces of your faux plumes.
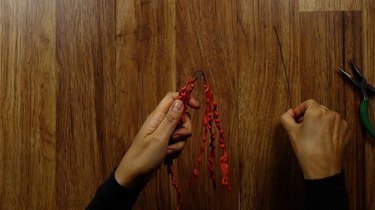
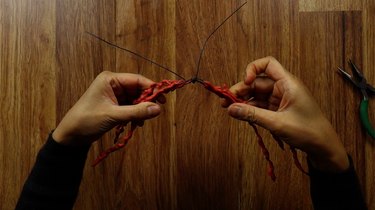
Use your pliers to twist the tails of your wrapping wire together to form a single tail.
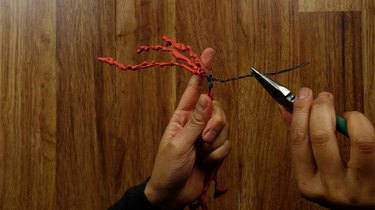
Bend the tail to form a loop.
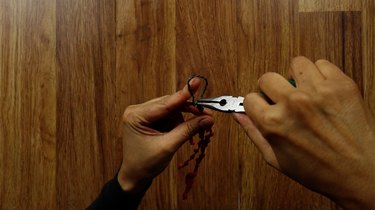
Bend the loop so that it's horizontal to the plumes to create a "foot." Repeat this wrapping step for the six remaining pieces for a total of three bundles.
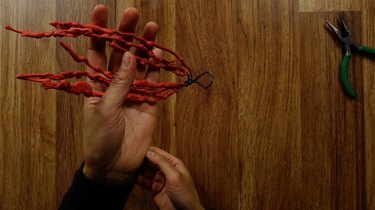
Step 5
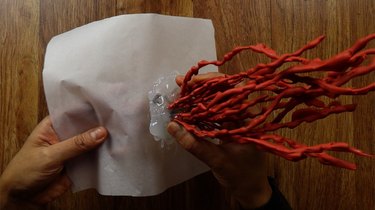
You're now going to glue all three bundles together while simultaneously creating the flat base for your faux coral plumes. For this step, you'll need to work on a surface to which hot glue won't permanently adhere. I used parchment paper, but you can also use a smooth piece of glass, sheet metal, or aluminum foil. Apply a generous amount of hot glue to the feet of the plumes and stand them up all together on your non-adhesive work surface so your base will have a flat bottom. Start with two first, then add the third once the first have been securely joined.
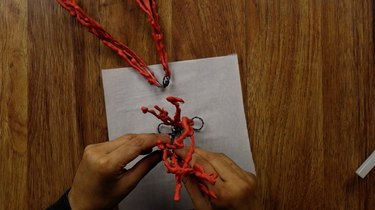
Continue to generously apply glue all around the base of your plumes. Be sure to cover any exposed wire. Your goal is to create a solid base allowing your faux coral to stand on its pedestal. Once you've done so, allow your glue to dry.
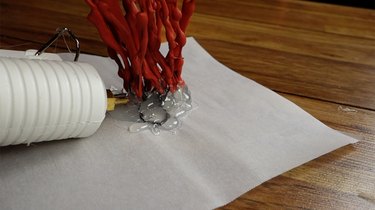
Once dried, remove your faux coral from the non-stick surface.
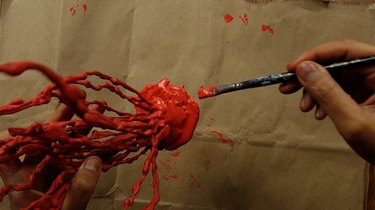
Step 6
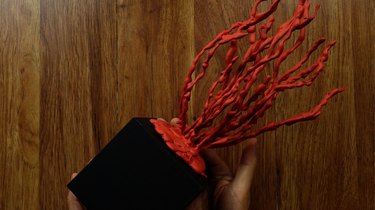
Paint the newly created base to match the coral plumes and allow to dry.
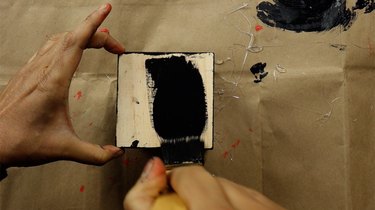
Step 7
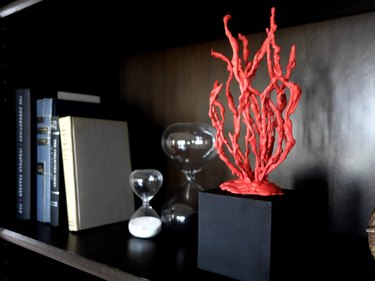
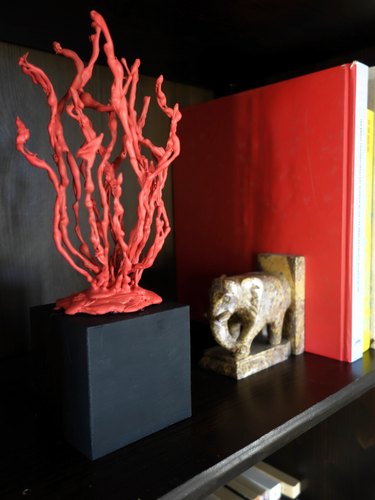
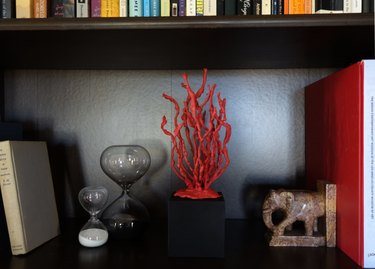
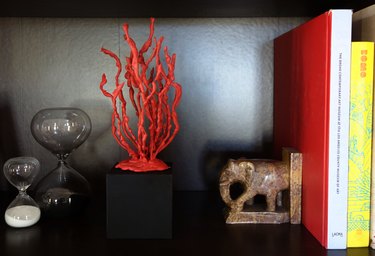
Paint the wood block pedestal your desired color. I chose black, as I like how it contrasts with the bright faux coral, allowing it to really pop. Leave to dry.
Tip
If you'd like to maintain an all natural, organic appearance for your sculpture, consider using wood stain for your block pedestal rather than paint.
Step 8
Your sculpture is nearly ready. You can either set it atop the pedestal as is or permanently attach it with hot glue.
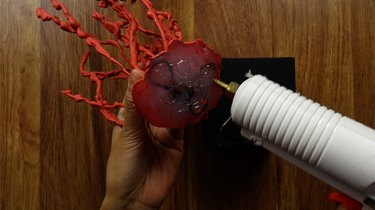
Your plumes are completely pliable, so bend them to achieve the exact look you'd like.
Finally, display your handiwork with pride!