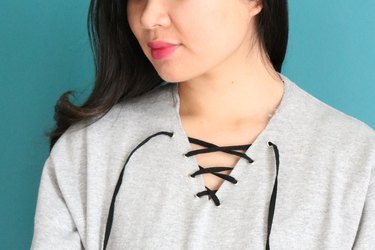
From bell bottoms to wide-brimmed hats, 70s style has been making quite the comeback, and some of the decade's most notable trends — like the lace-up detail featured in this DIY — are experiencing a surge in popularity. Luckily, you can recreate this trend right in your own home for no more than $20. Here's how!

Video of the Day
Things You'll Need
Sweatshirt
Fabric scissors
X-acto knife
Ruler
Cutting mat
Hammer
Thin cotton cord (1 yard)
3/16-inch eyelet setter
3/16-inch eyelets (8)
Fabric pencil (optional)
Fabric glue (optional)
Tip
Craft and fabric stores often sell eyelet setter kits in the leather or notion section. You can also buy a grommet setter kit for extra hardware that will provide additional security for your eyelets.

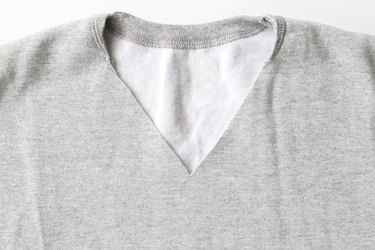
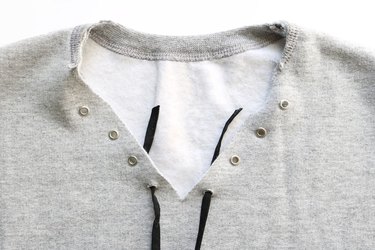
Step 1
Using fabric scissors, cut the collar into a deep "V" shape. Each side of the "V" should measure five inches long. Before cutting, fold the sweatshirt in half so that the shoulders meet. The center fold will give you an idea of where the deepest point of the "V" will fall. If you want some extra guidance, you can easily create a cutting guide with a fabric pencil and ruler. Remember, only cut through the top layer of the fabric.
Video of the Day
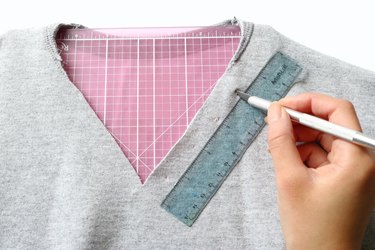
Step 2
After you've made your "V" cut, insert the cutting mat into the sweatshirt. On one side of the V-neck collar, position a ruler so that the 0-inch mark lines up with the deepest point of the "V." Use the X-acto knife to create four holes at 1-inch intervals.
Simply pierce the fabric — do not drag or move the blade around. Use the ruler to ensure that the holes are exactly 1 inch apart. Again, you can always mark these points with a fabric pencil before piercing the holes.
Repeat on the other side to create another four holes.
Step 3
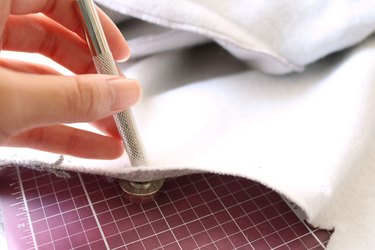
Remove the cutting mat, turn the sweatshirt inside out and then place the cutting mat back into the garment. Carefully insert one eyelet into a hole. The flat side of the eyelet should be on the cutting mat.
Step 4
Without removing the eyelet from the sweatshirt, place the eyelet directly onto the anvil. This will provide support when you position the setter directly onto the eyelet. Check out this close-up photo for reference.
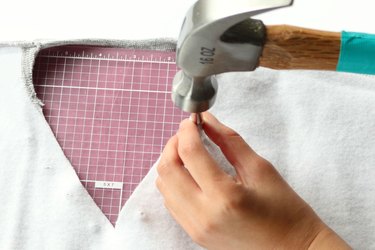
Step 5
With your non-dominant hand, place the setter tool into the eyelet and hold in place. The bottom of the setter should fit perfectly into the opening of the eyelet. Double check that the anvil is in place. Using the hammer in your dominant hand, pound the top of the setter several times.
Warning
Watch your fingers! Hit the setter with the hammer in small, short bursts. Most importantly, take your time. This way, if you miss and catch your fingers, you'll be less likely to experience a super painful accident. Patience is key during this step.
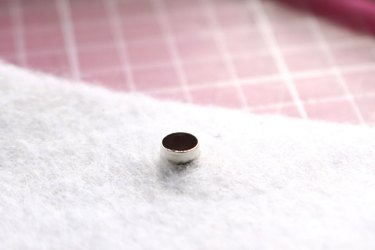
Step 6
Eventually, the eyelet will look a little something like the photo below. The pressure of the setter and hammer combined will bend the eyelet's rim outward, securing it to the fabric. Repeat to fill the remaining holes with eyelets.
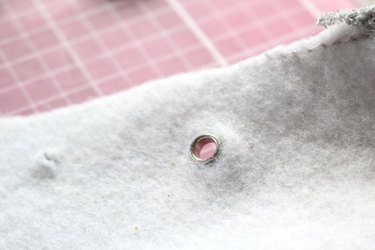
Tip
Because the sweatshirt's fabric is so soft, it may help to reinforce the the eyelets with fabric glue. This can be done once you have added all of the eyelets. Simply add a few dots of fabric glue along the rim along the back side. Clear nail polish also works just as well.
Step 7
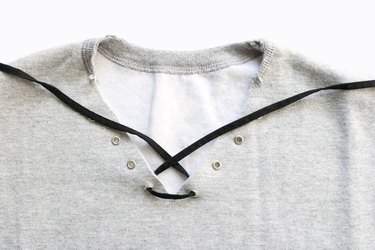
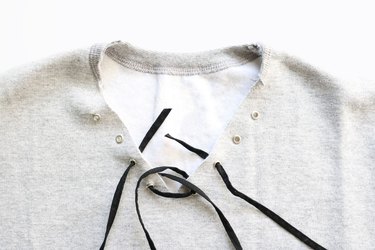
Insert both ends of the cord into the two bottom holes. Pull through completely. Take a moment to check that there is an equal length of cord on each side of the "V" neck. If not, adjust it accordingly.
Step 8
Move each end of the cord to the other side, creating a criss-cross in the center.
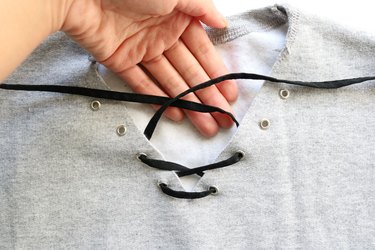
Step 9
Keep each end of the cord on its new side. Insert the ends through the next set of holes, starting from the front of the sweatshirt and working your way through.
Step 10
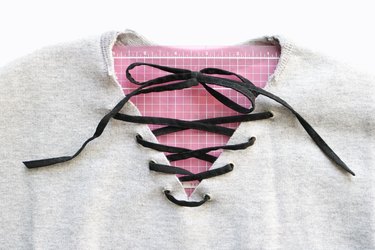
Pull through completely and criss-cross once again.
Step 11
Continue this method to finish lacing up the V-neck collar. Once complete, you can tie the cord into a bow. Alternatively, you can leave the ends hanging loose. Feel free to trim the cord, if you'd like. It's totally up to you!
Tip
Emphasize the 70s look by cutting the sleeves at the elbows. This take the chicness level up a notch. If the sweatshirt has an over-sized fit, this idea will also create slight bell sleeves.
You can also weave the lace in the opposite direction for a different look.