I love the look of high-end lucite framed scarves, but with retail prices starting at several hundred dollars, they're simply not budget friendly. Luckily for your wallet, making your own is easier than you might think, and with a few simple tools and a little time, you can create your own luxe lucite framed scarf to add to your gallery wall, a blank wall or a bland corner. Requiring only $50 (depending on the price of the scarf) and an afternoon of your time, you can make a custom piece of art that will rival those expense retail versions.
Video of the Day
Things You'll Need
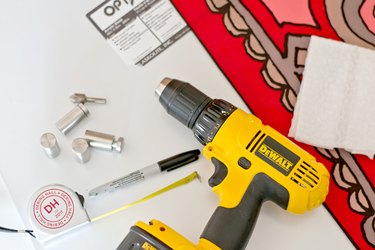
Acrylic sheet 24 inches x 24 inches (x2)
Tape measure
Standoff (x4) (purchased from Amazon)
Permanent marker
Drill
3/8-inch masonry drill bit (or any bit with a chisel or cutting end)
Scrap wood block to drill into
Scarf (eBay and Etsy have a wide selection)
Tip
If your acrylic sheet is larger, you can usually have the store cut it to size for you for free (I went to Lowes). Keep in mind that you want a few inches surrounding the scarf, so measure accordingly.
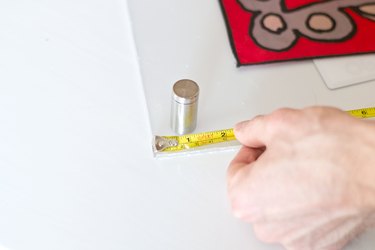
Step 1: Measure Inset for Standoff Placement
Determine desired inset for standoff. Typically, 1 inch from the center of the standoff is a good starting point.
Video of the Day
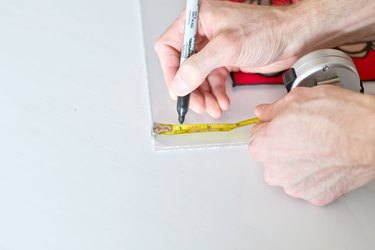
Step 2: Mark Center of Standoff
With a permanent marker, mark the center. Repeat for all four corners.
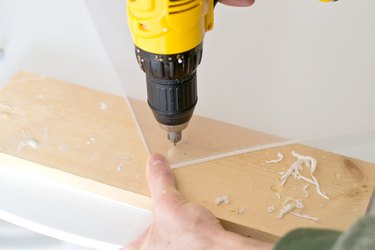
Step 3: Drill Hole for Standoff
On the mark created, use the 3/8-inch masonry bit (or the size of your standoff), drill a hole for each standoff on all four corners. A typical bit will catch and potentially break the fragile acrylic. A masonry bit (or anything with a broad, cutting end) will cut through the acrylic.
Tip
If you don't have a masonry bit, a standard bit will work. Drill in reverse instead of forward. As the bit heats up, this will slowly melt the plastic and reduce the risk of breaking the plastic. Try drilling on a scrap piece of plastic to practice first.
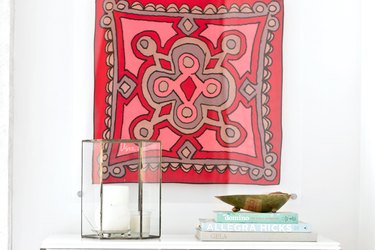
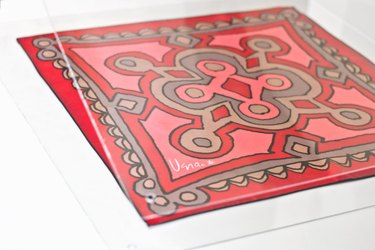
Step 4: Remove the Protective Plastic and Place the Scarf
Remove the protective plastic sheeting and remove any dust with a microfiber cloth. If needed, iron the scarf, center and place it between the sheets of acrylic.
Tip
I recommend performing this step on a clean white surface, as this will make it easier to see any dust.
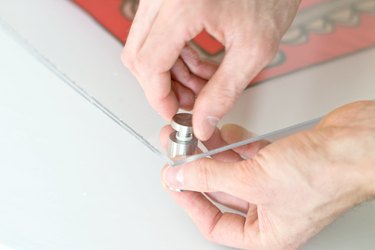
Step 5: Apply the Standoffs
Unscrew the standoff, place it through the hole and screw back together. Repeat on all four corners.
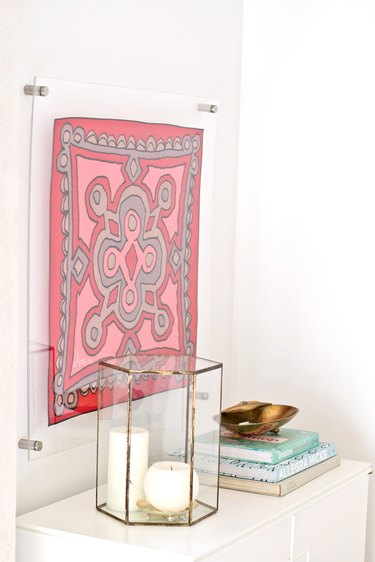
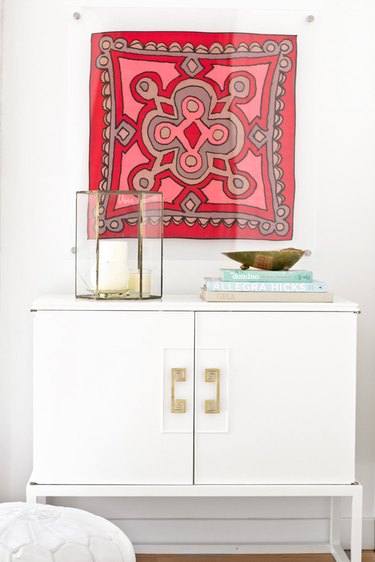
Step 6: Hang on Wall
Measure and mark the placement for nails.
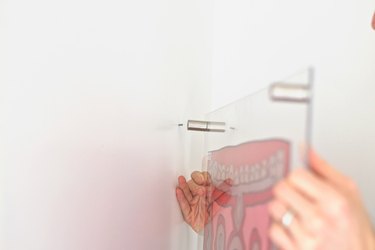
Hang over a dresser, nightstand, or table and style with your favorite accessories.