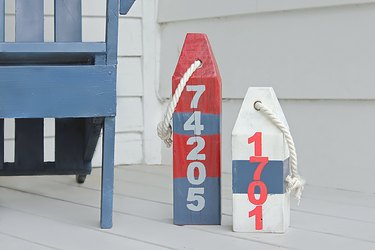
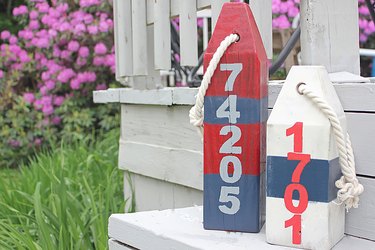
For centuries, fishermen and sailors have used hand-crafted wooden buoys for navigation, lobstering and safety precautions. Today, decorative wooden buoys are often used as an artistic decor element. Pay homage to ancient mariners of the past and create an elegant nautical style in your favorite room or outdoor space with these decorative pieces.
Video of the Day
Things You'll Need
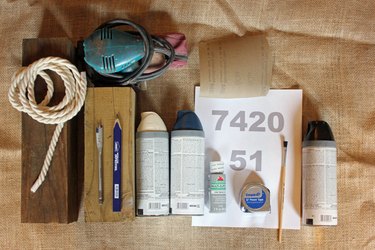
4-by-4-by-10-inch wooden block
Tape measure
Eye protection
Band saw
Drill press
1/2-inch drill bit
Electric hand sander
Sandpaper, 80 grit
Surface protection, such as cardboard
Spray paint (multiple colors)
Number stencils
Acrylic paint
1/4-inch paintbrush
Nautical rope, 3 feet
Cardboard or newspapers (optional)
Tip
Experience with woodworking saws is recommended.
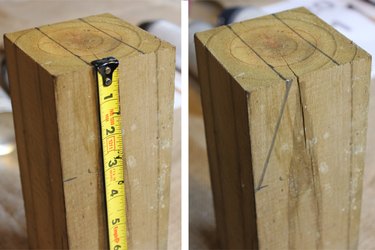
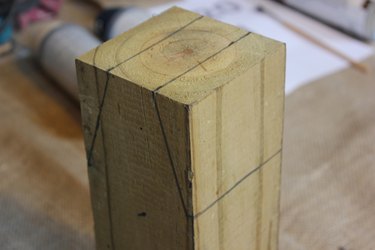
Step 1: Draw the First Cut Lines
Draw two parallel lines down the width of the wood, each 1 inch in from the outer edge.
Video of the Day

Step 2: Draw the Next Cut Lines
Beginning on the end of the line you just marked, measure 3 inches down the length of the wood, and make a mark along the edge. Connect the mark on the length to the line on the width to form a triangle on the length of the wood. Repeat the process on the opposite side so there are two triangles drawn on the length of the wood.
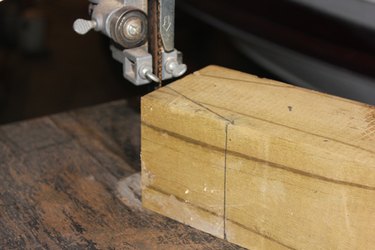
Step 3: Form Two Wedges
Beginning at the 3-inch mark on the length of the wood, draw a horizontal line across the adjacent side of the wood. This line will form a wedge shape that will be cut out. Draw another horizontal line on the opposite side so there are two wedges to cut out.
Step 4: Cut Out the First Two Wedges
Place the wood length-side down on the band saw. Line up the wedge mark on the width of the wood with the band saw blade. Make a diagonal cut down the length of the wood, following the diagonal line you drew. This will remove the first wedge. Line up the wedge on the other side with the saw blade and cut out the second wedge.
Warning
- Operating a band saw is dangerous. Keep your fingers away from the blade at all times. Hold onto the end of the wood that is farthest away from the moving blade.
- Wear eye protection while using all power tools.
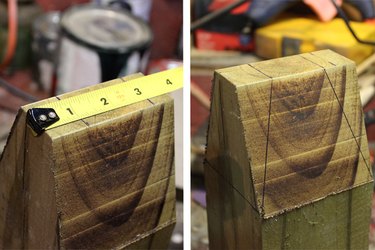
Step 5: Draw the Second Cut Lines
Create two new wedges by measuring 1 inch in on each side of the end you just cut. Draw a diagonal line connecting the 1-inch line to the edge of the first cut mark and continue the line horizontally across the adjacent side to form another wedge. Repeat the process on the opposite side to create two new wedges.
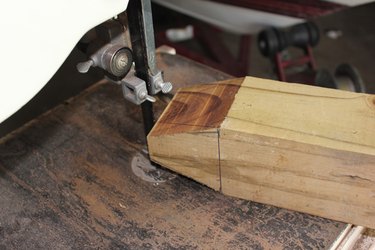
Step 6: Cut Out the Last Two Wedges
Line up the new wedge line with the band saw blade and make another diagonal cut, removing one wedge. Line up the other wedge line and make a second diagonal cut to remove the second wedge.
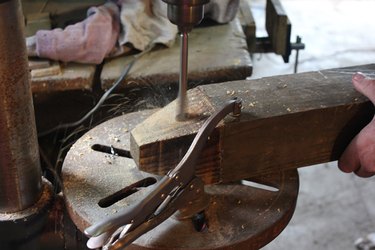
Step 7: Drill the Wood
Place the wood on the drill press base and position it so that the drill bit is directly above the cut end of the wood, about 2 inches above the cut lines. Secure the wood with a clamp, and slowly pull the drill down through the wood. Raise the drill when you feel the drill bit go completely through the wood.
Warning
- Use caution when operating the drill press. Keep your fingers away from the drill bit while you are drilling.
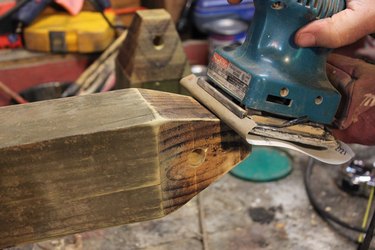
Step 8: Sand the Wood
Attach a piece of 80-grit sandpaper to the electric hand sander and sand down the rough edges of the wood.
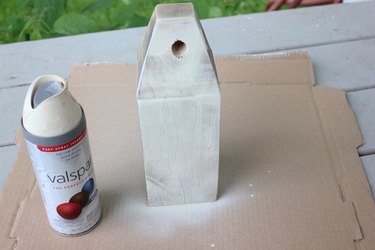
Step 9: Paint the Wood
In a well-ventilated room or outside, apply a thin coat of paint to the wood. Allow the paint to dry completely, and add another thin layer of paint. Painting in thin, light coats prevents paint drips.
Tip
- Protect your work surface by covering it with scrap cardboard or newspapers.
- If you plan on displaying the wooden buoys outdoors, use an outdoor paint that will withstand rain and wind.
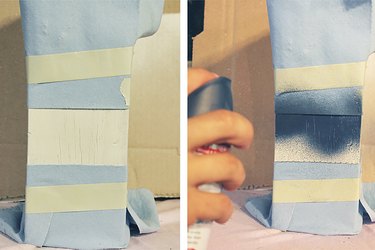
Step 10: Add Stripes
Tape-off the sections you wish to remain the base color. Apply a thin layer of the second paint color to the exposed wood. Allow the paint to dry completely, and add another thin layer of paint.
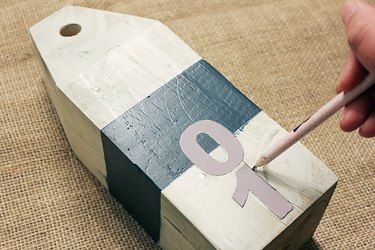
Step 11: Outline the Numbers
Once the paint is dry, use stencils and a pencil to trace an outline of the numbers onto the wood.
Tip
Instead of buying stencils at the craft store, print them out on your computer at home and cut them out.
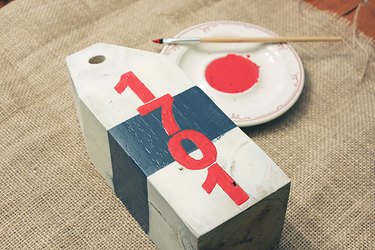
Step 12: Paint the Numbers
Use a 1/4-inch paintbrush and a small amount of acrylic paint to fill in the outlined numbers. Allow the paint to dry completely.
Step 13: Tie the Rope
Cut a 1 1/2-foot piece of nautical rope and thread it through the hole at the top of the buoy. Tie the rope in a tight knot.

Display the Wooden Buoys
Choose an area to display your new decorative wooden buoys.