It can often be a challenge to find gender-neutral bar carts on the ready-made market. So take matters into your own hands by making your own version of this DIY solid wood rolling bar cart using pre-cut wood rounds, a drill press, hardware and stain. The results are one-of-a-kind and are fit for the homes of both guys and girls.
Video of the Day


Things You'll Need
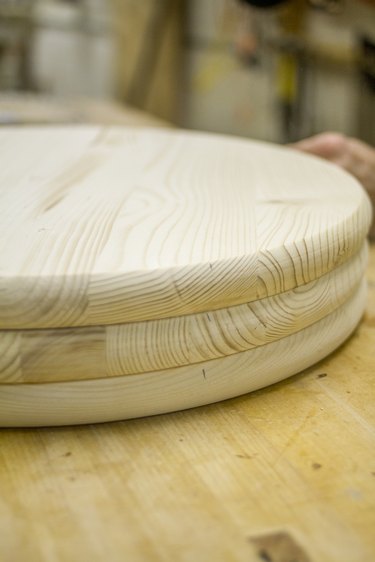
18 1/4 inch x 1 inch diameter pre-cut, pre-beveled wooden rounds (3)
Fabric measuring tape
Pencil
Metal lockable caster wheels and accompanying screws (4)
Drill press
1 5/8 inch Forstner bit
5/8-inch Forstner bit
1 1/8 inch x 48 inch wooden dowel rods (2)
Metal measuring tape
Circular saw
1 1/2 inch screws, #6 (12)
Power drill
Wood stain
Urethane wood sealer
Paint brush
Rags
Fine grit sandpaper or steel wool
Microfiber towel
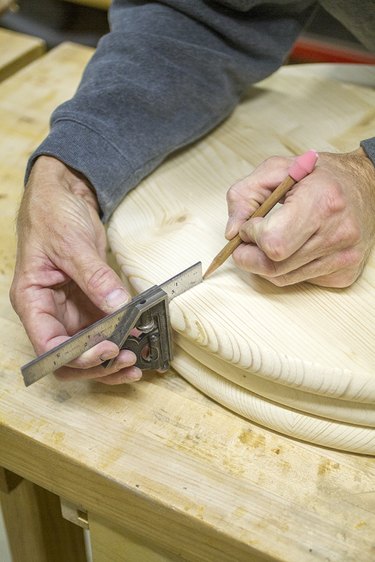
Step 1: Measure the Circumference of the Wooden Rounds
Find out the circumference of your wooden rounds using fabric measuring tape, and then divide the number by three to figure out where to place each of your three wooden dowel rod braces.
Video of the Day
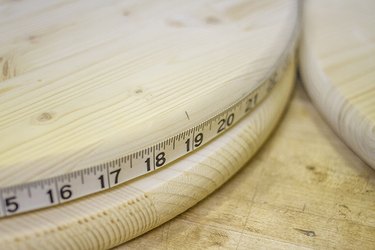
For this particular set of rounds, the braces are set at 19 inches apart from one another. Mark all three spots for the braces on the edge of the first round, and then place the rounds on top of one another to mark the rest so that you don't have to measure them each separately (as shown below).
Step 2: Mark Holes for the Braces
Note that the middle tier will have staggered brace placements, so on the top, mark the holes every 19 inches and 1 inch in from the edge (as pictured below). On the underside of the wooden round, make marks every 9 and 1/2 inches and 1 inch in from the edge between the 19-inch marks so that the braces will stagger correctly. You don't need to worry about this on the underside of the top tier or on the top of the bottom tier.
Again, keep in mind that because of this staggered design the brace placements will be specific to the tier. The bottom tier will have braces on the top and casters on the bottom, so just mark the top of the wooden round every 19 inches and 1-inch in from the edge. The middle tier will have braces on both sides, although staggered as explained above, while the top of the cart will only have braces attached on the underside.
Tip
Temporarily mark the middle of the wooden rounds with a "T" for "Top," "M" for "Middle" and "B" for "Bottom" using a pencil so that you don't get them confused. These marks can be erased or sanded off before staining.
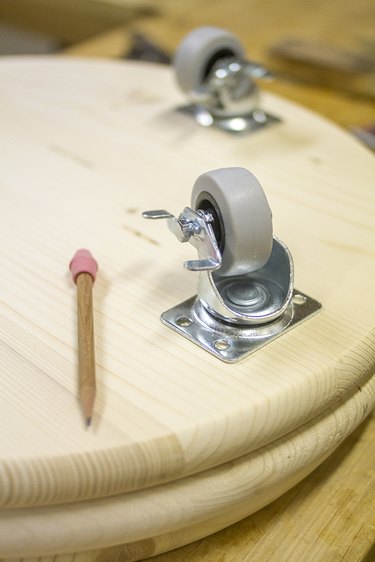
Step 3: Mark Holes for the Casters
Flip the bottom tier upside down and place the four casters on the round. Make sure they are 1-inch in from the edge and roughly the same distance apart, although this doesn't have to be exact. You can eyeball it. Then mark through the holes in the casters onto the wood with a pencil. Set the casters aside when done.
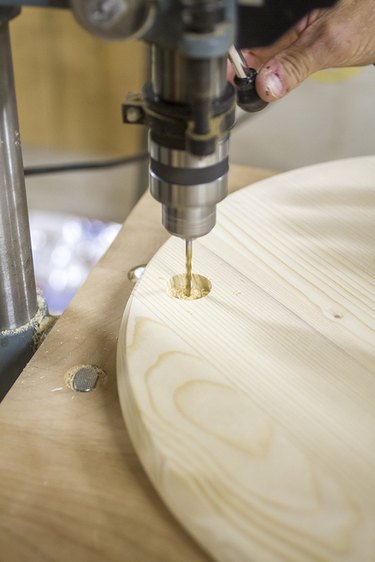
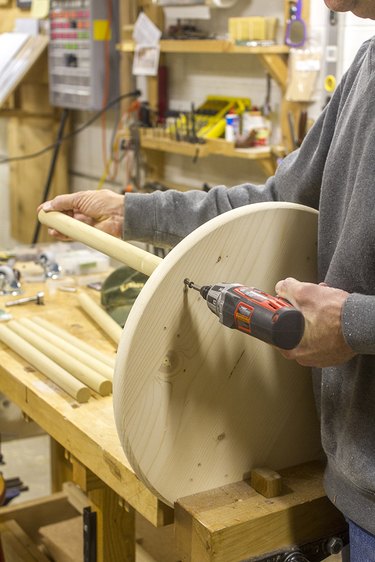
Step 4: Pre-Drill Holes for the Braces
Lay the wooden round on the base of a drill press outfitted with a 1 5/8 inch Forstner bit. Make sure to set the depth of the bit to go into the wood 1/2 inch. Drill out all of the marked holes for the braces — three on the top tier, six on the middle tier (both top and bottom) and three on the bottom tier.
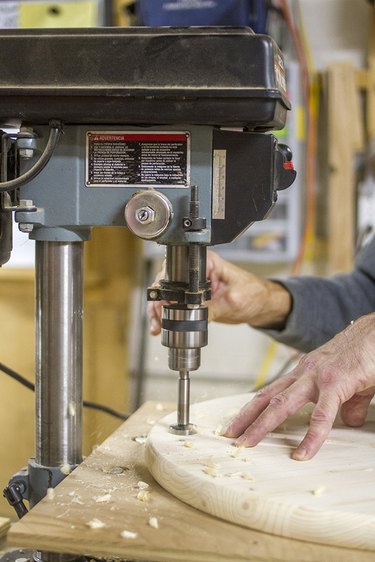
Warning
Always make sure to wear safety goggles while using a drill press.
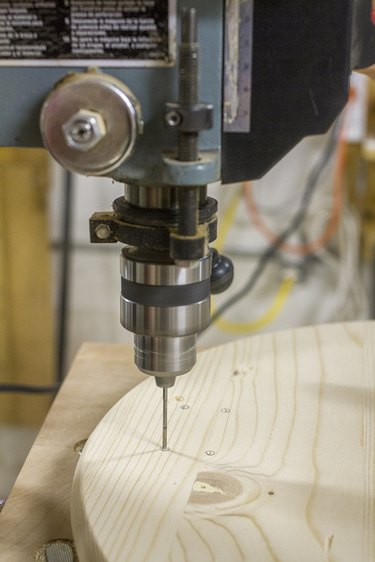
Step 5: Pre-Dill Holes for the Brace Screws
Once the brace holes have been drilled, outfit the drill press with a 5/8-inch Forstner bit and set the depth to go all the way through the wood round. Drill through the center of each drilled brace hole. These holes will later be used to drive screws into the back end of each brace.
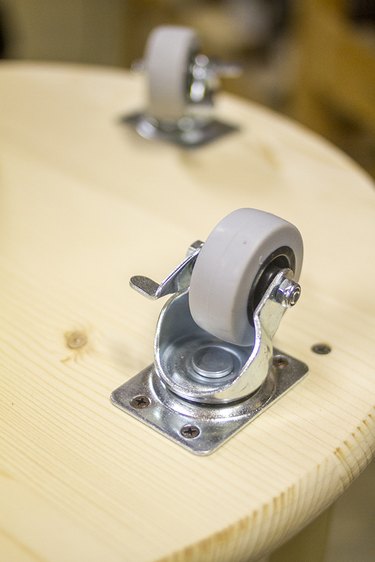
Step 6: Drill Holes for the Casters
Outfit the drill press with a bit to match your specific caster screw hardware, and drill all 16 of the marked holes.
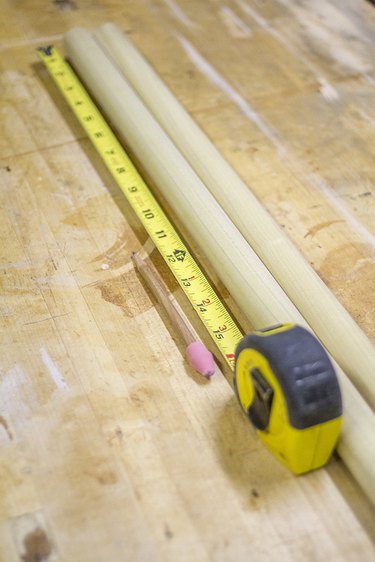
Step 7: Measure and Mark the Braces
Lay the two dowel rods out side-by-side and use measuring tape and a pencil to mark lines every 16 inches. In the end, you will need six 16-inch long braces.
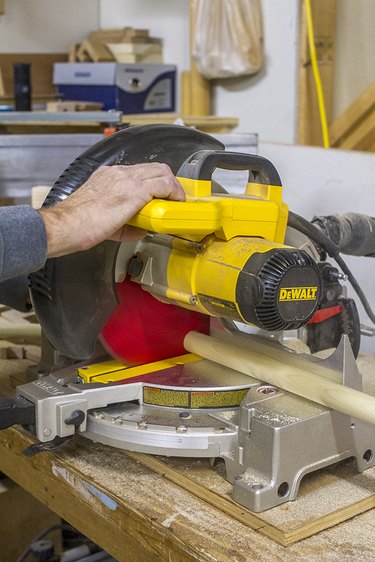
Step 8: Cut Down the Braces
Place the first dowel rod on the base of a circular saw, and cut at the marked line. Repeat the steps until you have all six braces cut from the two 48-inch dowel rods.
Warning
Always make sure to wear safety goggles while using a circular saw.
Step 9: Place and Screw in the Braces
Place the cut braces one-by-one into the holes that were drilled earlier in the wooden rounds. Screw the braces in using #6 1 1/2 inch screws. Repeat the steps until all of the braces have been placed and screwed into place, attaching the tiers to one another as you go.
Step 10: Place and Screw in the Casters
Flip the assembled cart upside down and screw in the casters using the accompanying hardware.
Step 11: Complete the Two-Part Finish
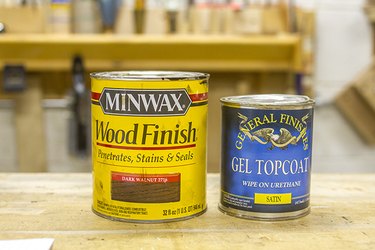
Erase or sand off the pencil marks that were made earlier to denote the tiers as "T," "M" and "B." Use a paint brush to apply a coat of stain, and wipe off the excess with a clean, dry rag before it has a chance to dry. Allow the stain to fully cure for roughly 24 hours (follow your stain's manufacturer instructions for specific details on dry time), and then use a clean paint brush to apply a layer of urethane sealer. Wipe off the excess with a clean, dry rag before it has a chance to dry. Apply a second coat of urethane with a clean paint brush after the first layer has fully cured for another 24 hours, give or take depending on your specific stain. Allow the final coat to fully dry before handling.
Tip
Lightly sand the dry, sealed wood with a fine grit sandpaper or steel wool between coats for an ultra smooth finish. When done, buff with a microfiber towel to make it shine.
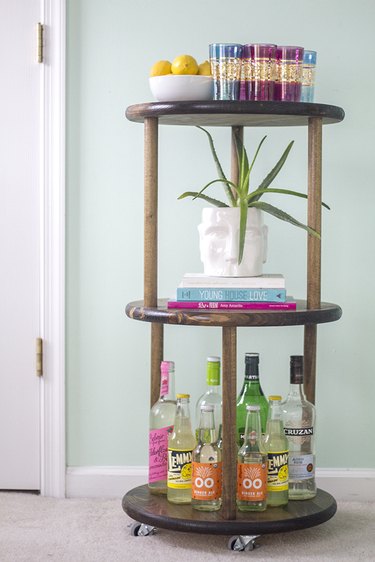
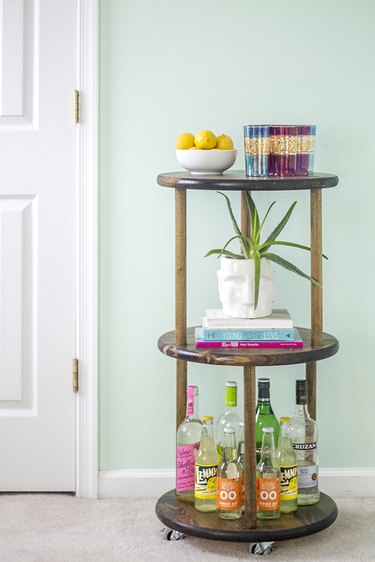
Step 12: Style the Finished Bar Cart
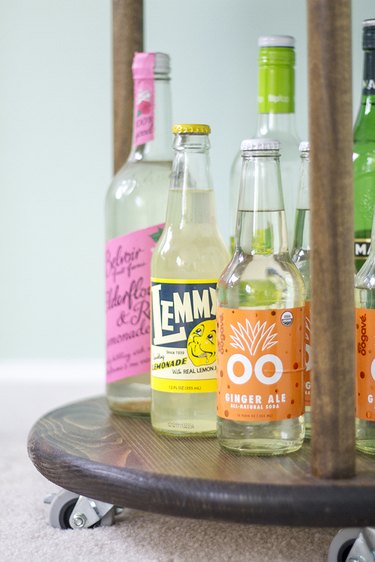
Once the bar cart is completely dry to the touch, fill it up with your favorite bar cart accessories, glassware and bottles of soda and liquor. Because of the construction of the three-tiered cart, it's best to put the heavy items, such as bottles, on the bottom tier.