Things You'll Need
Tape measure
24-by-8-by-1/4-inch plywood board
Table saw
22-by-16-inch picture print
24-by-18-by-3/4-inch plywood board
Adhesive spray
Plastic squeegee
Wood glue
Clamps
2 medium hinges
Cordless drill
1/2-inch screws

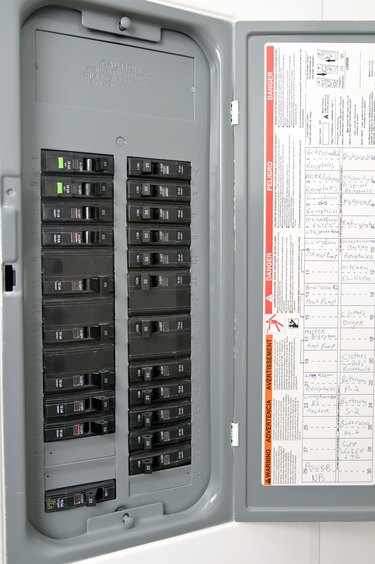
An electrical panel, also known as the fuse box, holds the fuses for the entire home in one recessed metal box. This box is not an attractive addition to the wall. Even though the fuse box is often located in tucked away areas, such as the basement or a bathroom alcove, a decorative door covering the fuses adds to the appeal of the room. This door, small but efficient, should match the decor of the room to aesthetically include the electrical panel.
Step 1
Measure the height and width of the electrical box. Add 1 inch to both measurements. For example, from edge to edge lengthwise, if an electrical box measured 23 inches, add 1 inch to make your measurement 24 inches.
Video of the Day
Step 2
Use a table saw to cut the 24-by-8-by-1/4-inch plywood board into two 24-by-2-inch strips and two 16-by-2-inch strips.
Step 3
Glue a 22-by-16-inch picture print centered on a 24-by-18-by-3/4-inch plywood board using adhesive spray, leaving a 2-inch trim around the edges of the picture. Smooth out the picture to remove air pockets using a plastic squeegee.
Step 4
Drip wood glue on the trim around the picture. Place a 24-inch plywood strip, cut in Step 2, on each 24-inch-long edge. Place a 16-inch strip, cut in Step 2, on the remaining edges. Clamp the strips to the plywood back. Allow two hours for the wood glue to cure.
Step 5
Attach two medium hinges to the left-side edge of the board using 1/2-inch screws and a cordless drill. The hinges must open toward the back of the door.
Step 6
Attach the door to the wall along the left edge of the electrical box using 1/2-inch screws and the cordless drill.
Tip
The door does not need a handle because it will have an obvious edge. Having no handle makes the door look like a picture. Paint or stain the plywood to match your decor.
Warning
Wear protective eye gear to prevent any debris from injuring an eye.
Video of the Day