Things You'll Need
Newspaper
Glue gun with glue sticks
1/4-inch metallic gold and silver twisted cord
Tennis ball
Scissors
Tape measure
Decorative satin ribbon (gold or silver)
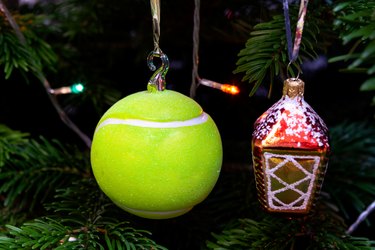
Making homemade tennis ball Christmas ornaments is a project that can be enjoyed by the whole family. If you are an avid tennis player, instead of tossing out your dead and used tennis balls, recycle them to make inexpensive holiday decorations. With minimal tools and materials, in a short amount of time you will have several one-of-a-kind tree ornaments that will last year after year.
Step 1: Protect Your Work Area
Spread newspaper over your work area for protection. Prepare and heat up your glue gun; insert a glue stick into the gun and plug the gun into an electrical outlet.
Video of the Day
Step 2: Glue the Cord to the Ball
Apply a bead of glue to the bottom of your tennis ball. Take the end of the twisted cord and press it against the glue. Hold the cord in place 30 seconds or longer to ensure it is stuck to the ball.
Step 3: Wrap the Ball With Cord
Squeeze out more glue and apply it clockwise, in a circular fashion, around the end of the attached cord. Only apply enough to make one circle around the cord's end. Bend, hold and press the cord against the glue while you turn the ball. Make the first circle tight around the end of the cord. Allow the glue to set before continuing.
Step 4: Add the Next Cord
Apply another circle of glue onto the ball next to the attached cord and repeat the process to adhere another circle of cord. The circles should be tight against each other and you should not be able to see the ball between the circles. Continue the process of gluing, wrapping and adhering the cord around the tennis ball ornament as you work your way toward the top.
Step 5: Cut and Glue
Cut the twisted cord with scissors when you have reached to top of the ball. Apply a bead of glue to the top of the ball, press the end of the cord against the glue and hold it in place until it is securely stuck to the ball.
Step 6: Measure and Cut
Measure and cut 6 inches of your decorative satin ribbon. Put a dab of glue 1/4 inch in from one end of the ribbon. Take the other end and stick it to the glue so the ends overlap each other by 1/2 inch. Hold the ribbon ends together until they are sufficiently stuck to each other.
Step 7: Finish Your Tennis Ball Christmas Ornament
Apply a small bead of glue on top of the cord's end at the top of the ball. Finish your tennis ball ornament by positioning the glued ends of the satin ribbon flat on top of the glue. Hold the ribbon in place with your fingertip until it is securely stuck to the ball. The ornament is now ready to hang on your tree.
Tip
Several different colors and varieties of twisted cord are available at many hobby or fabric stores.
Video of the Day