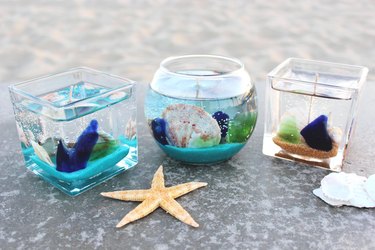
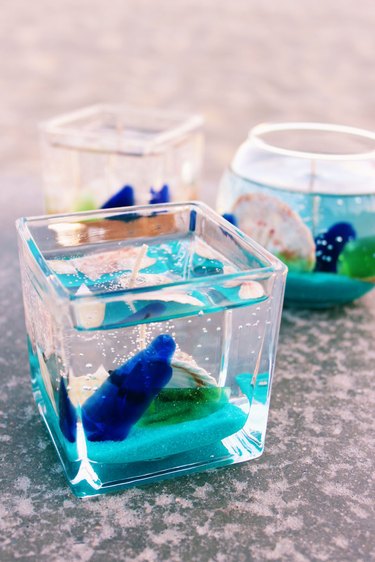
If you can't make it to the beach, no problem—bring the beach to you. These candles take you underwater to a diorama of sand, sea glass and shells. And because they're made with gel wax, you'll see everything as clearly as if you were snorkeling. Ideal for summer entertaining and decorating, they also make thoughtful gifts for any occasion.
Video of the Day
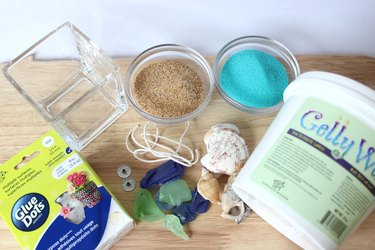
Things You'll Need
Zinc-core wicks and tabs
Heat resistant glass containers
Glue dots
Sand
Sea glass or rocks
Shells
Gel wax
Blue dye (optional)
Step 1: Prepare Wicks
It is important to select the appropriate wick for gel candles, as all wicks are not created equal. Use a zinc core wick rather than a plain cotton wick. The zinc core helps the wick stand on its own even when the wax is melted, which is particularly helpful when working with gel wax. Also avoid wicks that are pre-coated in wax, as the wax on the wicks will melt and cloud the gel wax.
Video of the Day
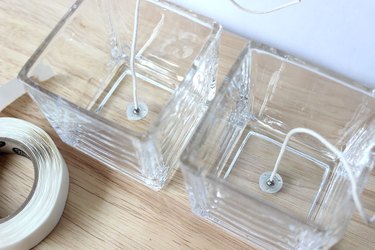
Cut an 8-inch piece of the zinc core wick, and insert it through the hole of a wick tab.
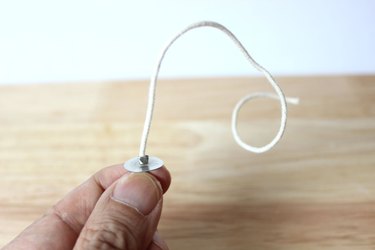
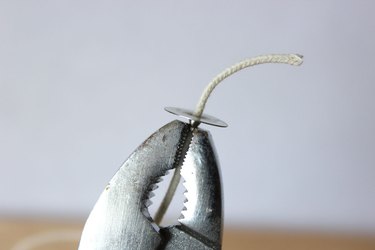
Using pliers or a wrench, crimp the tab to secure the wick in place. Cut off any excess wick at the bottom of the tab.
Center the tab at the bottom of a clear, heat-resistant glass container, and adhere it with a glue dot.
Step 2: Add Sand
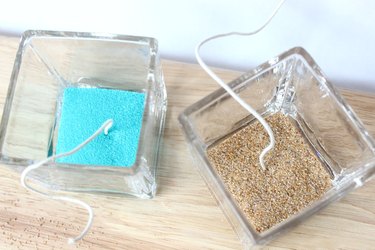
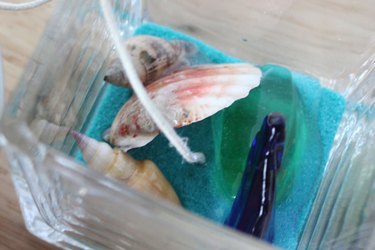
Pour about a half-inch of sand into the glass container. The sand should be clean, so avoid sand taken from the beach, opting instead for new sand from the crafts store. An added bonus to purchasing sand is that it comes in a lot of fun colors.
Step 3: Preheat the Glass
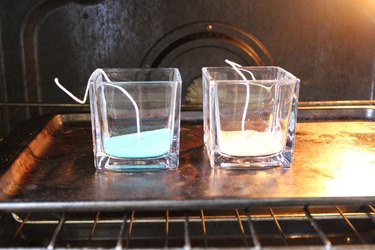
Place your glass containers (with the wicks and sand inside) on a cookie sheet in a cold oven, and then turn on the heat to its lowest setting. Heat the glass for about 30 minutes. Preheating the glass will allow the wax to cool more slowly, which gives air bubbles time to escape to the top.
Step 4: Melt the Wax
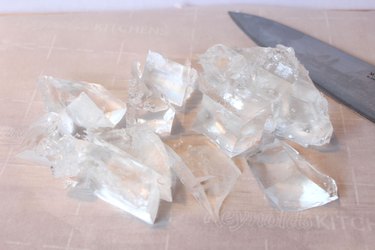
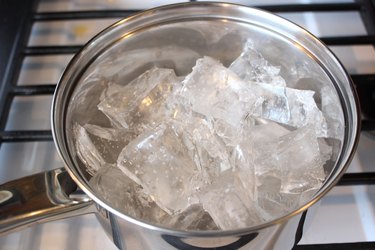
Cut the gel wax into smaller pieces to help it melt more easily.
Place the chunks of wax into a metal pot, and melt over low heat until the wax is completely liquified. Keep an eye on the pot, making sure that the heat is low and the wax does not start smoking.
When the wax is melted, you can add a color, if you'd like. Use only a liquid dye made especially for gel wax. Solid candle dyes can make the gel wax cloudy. You'll only need a few drops, as too much color will reduce the wax's clarity.

Step 5: Position the Shells and Rocks
While the wax is melting, remove the pre-heated glass containers from the oven and position shells and rocks around the candle wicks.
Step 6: Pour the Wax
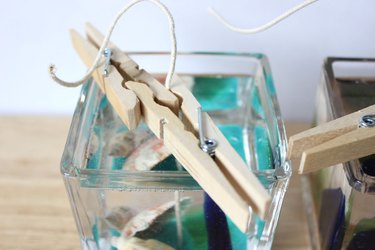
Slowly pour the wax into the glass containers. The sand and shells will actually stay in place and not float to the top of the wax. Hold the candle wicks in place with clothespins so they stay centered. Let the candles harden for a full 24 hours before moving them around.
Step 7: Reduce the Bubbles
When you check on the candles the next day, you will probably discover many little bubbles clouding the wax, even if there weren't any bubbles initially. Don't worry, we can make the wax clear again.

Place the candles on a cookie sheet in a cold oven, and turn the oven to 250 degrees Fahrenheit. Let the candles sit in the warm oven for an hour, and the wax will slowly melt, releasing the bubbles to the surface.
Do not open the oven door—only look through the window with the oven light turned on. When it looks like most of the bubbles have dissipated, turn the oven off and let the candles cool completely overnight before removing them. There will likely still be a few bubbles remaining in the wax, but they are actually appropriate for the underwater scene. Maybe this is what Don Ho was referring to when singing about "Tiny Bubbles."
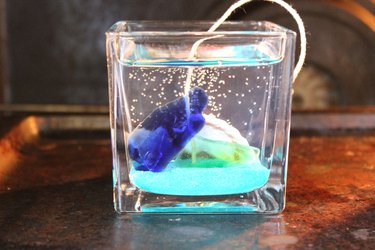
Trim the wicks to about 1/8 inch. However, these candles are so beautiful, you may never want to light them.
Warning
Never leave a burning candle unattended.