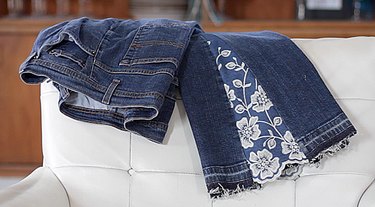
Let's face it, even if you have a closet full of jeans, it's hard to resist just one more pair. And these days, pretty much anything goes when it comes to the style of your denim, so why not embrace your free spirit with some embroidered bell bottoms. There's no need to go out and buy a new pair when all you need is a little embroidered denim and four straight seams to easily transform one of your straight legs jeans into a fun new pair.
Video of the Day
Things You'll Need
Pair of straight leg jeans
Seam ripper
Iron
Freezer paper
Embroidered denim- 1/2 yard
Pins
Sharp scissors
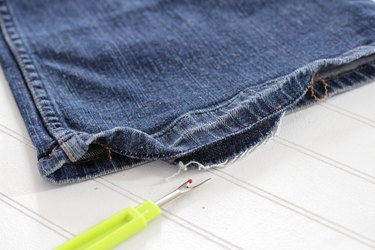
Step 1
Take out the hem of the jeans with a sharp seam ripper.
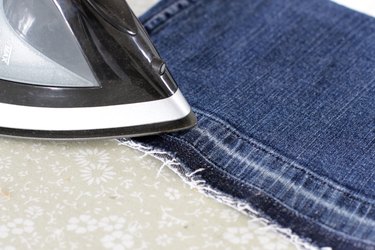
Step 2
Press the hems flat with a hot iron.
Step 3
Use a sharp seam ripper to take out 20-inches of the side seam from the bottom. This will take some patience since most jeans will have a regular seam and a finished edge.

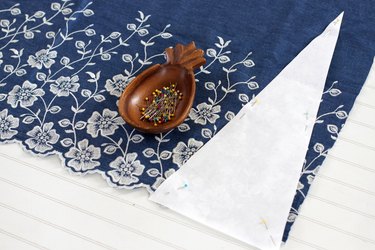
Step 4
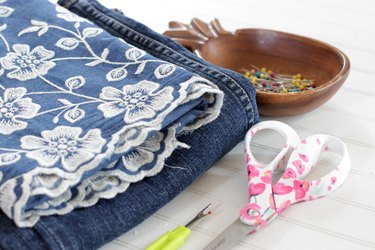
Cut a 5-inch by 20-inch triangle from freezer paper. Pin the paper pattern piece onto the embroidered denim with the short side at the bottom edge of the fabric.
Tip
If you'd like your bell bottoms to be wider or narrower, you can adjust the size of the triangle accordingly.
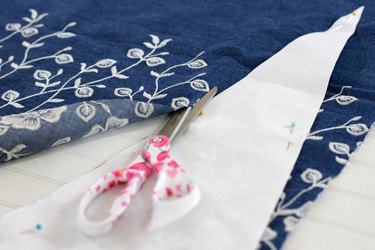
Step 5
Use a sharp pair of scissors to cut around the pattern to create a triangular insert piece from the embroidered denim.
Step 6
Place the insert piece into the opening in the side of the jeans with the right sides together. Line up the raw edges and pin in place.
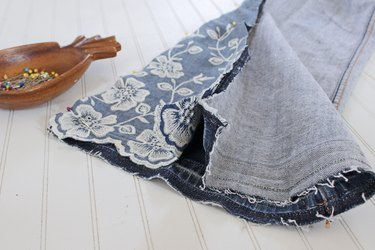
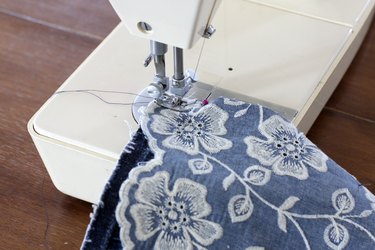
Step 7
Sew a 1/2-inch seam on both sides of the opening.
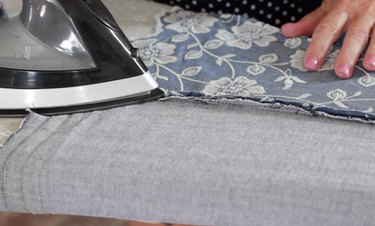
Step 8
Press the seams open with a hot iron.
Step 9
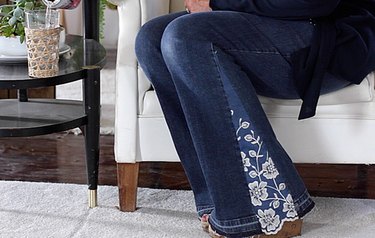
Now you're ready to "get your groove on" with these fresh new bell bottoms.