Things You'll Need
Custom scissor trusses, traditional trusses, and delivery crane.
2-by-6 and 2-by-4 lumber / framing materials
Miscellaneous 1-by-6 and 1-by-4 trim materials
1/2 inch OSB roof decking and roof deck plywood clips
Air compressor and roof shingle nail gun
Hammer, utility knife, pencil, tape measure, framing square, and asst framing tools
Construction framing nailer and fasteners
Hurricane ties
Extension cords, air hoses, ladders,
Builders 7 1/4 inch saw
Contractors saws-all
Miter saw and saw horses
Building crew of at least three people
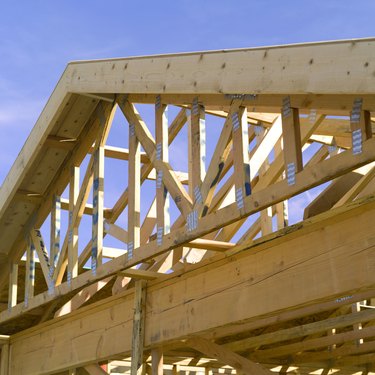
Scissor trusses are used to create vaulted ceilings in a home. Standard trusses have a one piece, straight and level lower cord that forms the mounting surface for a traditional ceiling. Scissor trusses feature a 2 plane, 2 piece lower cord. When the truss is installed, the upper cords support the roof planes, and the lower cords frame a vaulted ceiling inside the home. Scissor trusses are often installed right alongside traditional trusses when framing a roof system.
Step 1
Layout the trusses along the top plate of the home. Trusses are installed either 16 or 24 inches on center apart from each other. Draw the locations for the trusses on the top wall plates across the entire length of the home.
Video of the Day
Step 2
When the trussed are delivered, install the gable / traditional trusses at each end of the roofline first. These trusses are built differently, and called the Gable Truss. Hold the gable trusses in place by running multiple pieces of 2-by-4 framing down to the ground level. These will be removed after the roof trusses are connected and the rest of the roof framed in.
Step 3
Frame in the gable end of the roof so that the first truss is anchored in place. The truss must be level, plumb, and square to the frame of the home because the rest of the trusses are connected to this truss as the roof is framed
Step 4
Install the trusses across the length of the home. Each truss must be level, plumb, and square to the frame of the house. Use 2-by-4 nailed diagonally across the tops of the trusses to hold them in place as they are installed. Toe nail the trusses into the wall plates, and then install the hurricane ties between the wall plate and the truss.
Step 5
After the trusses are installed, install 1/2 inch OSB roof decking across the roof deck planes. Since the sheets of OSB are perfect rectangles, use the OSB to pull the trusses into alignment. The result will be a perfectly square roof that is ready to receive the roofing material.
Tip
When performing home improvement and building projects, make sure to wear proper safety equipment, such as leather gloves, steel toe safety boots, safety glasses and hard hats.
Video of the Day