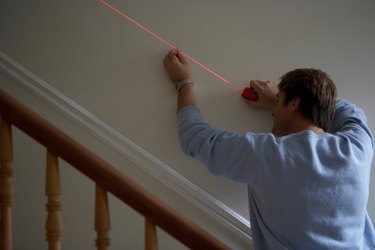
The use of the X3 Laser Level is an excellent way to ensure that all of your interior lines are straight when mounting cupboards, shelving or simply hanging pictures. The use of the X3 Laser Level by Strait-Line requires just a few simple steps to set up and, because it sticks to the wall using 3M adhesive tape, it will save you from juggling your tools, pencil and traditional level when marking drill holes or mounting locations along a straight line. You will see the best results from most laser levels when used indoors, where the colored laser beam is clearly visible. Because laser levels operate by sending off a highly concentrated beam of light, outdoor projects in the sun may make the beam difficult to see and reduce overall accuracy.

Video of the Day
Things You'll Need
3M Adhesive Tape
Rag
Pencil
Laser
Step 1
Clean the surface of the wall to which you will affix the X3 Laser Level. Remove the red adhesive tape liner from the strip. Line up the adhesive tape with the marked area on the X3 and affix to the unit. Remove the black side of the adhesive tape. Press the X3 against the clean wall, and hold for 30 seconds until the X3 is sturdily affixed to the wall.
Video of the Day
Step 2
Turn on the X3. Choose either a horizontal or a vertical laser orientation by rotating the X3 along its axis. Use the on-board bubble level to ensure the laser beam is completely level. Further adjust the laser orientation by using the micro-adjust knobs on the top of the X3.
Step 3
Mark all appropriate locations along the straight laser beam with the pencil before proceeding. Mark spaces on adjacent walls with your pencil after you release the adjustment knob and angle the laser level at the adjacent wall via the bubble level. Adjust the length of the beam for smaller work areas by pressing down on the laser side of the laser arm. Adjust the beam for longer work areas by pressing down on the bubble side of the laser arm.
Step 4
Grasp the X3 in your hand firmly and slowly pull away from the surface of the wall when finished using the laser level. Remove the adhesive tape from the X3 before storage and clean any residue.
Tip
The X3 uses two AA batteries, which are installed on its underside in two separate battery cartridges.
Once level, if you choose to mark straight lines at angles other than perfectly horizontal or vertical, you may wish to use a fixed guide, like a staircase that is parallel to your intended line. Use the micro-adjustment feature for any degree value.
If the laser lens becomes dirty it may cause degraded performance. The lens can be cleaned using a cotton swab and glass cleaner.
Warning
Never look directly into the laser beam lens as this may cause damage to your eyes.