Things You'll Need
Slotted screwdriver
Phillips screwdriver
Pliers
Adjustable wrench
Towel
Appropriate flush valve repair kit
Tank to bowl repair kit
A flush valve is the mechanism inside a toilet tank that allows water to flow from the tank to the bowl. Depending on the particular style of Eljer brand flush valve that your toilet uses, the parts will include a flush lever or button, chain, flapper or tank ball assembly, and overflow tube. Problems that may occur when a flush valve malfunctions include the toilet not flushing, the water constantly or intermittently running, or the presence of a leak between the tank and bowl.
Toilet Does Not Flush
Step 1
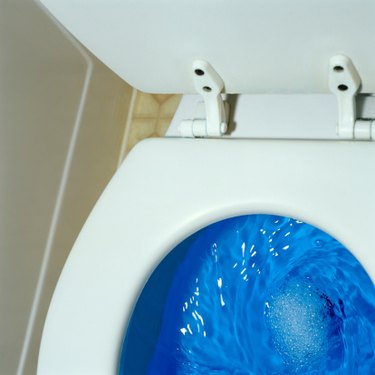
Remove the tank lid and carefully place it upside down on towel.
Video of the Day
Step 2
While looking inside the toilet tank, press the flush lever or button to flush. If the toilet flushes with the tank lid off, the problem is the chain length. Proceed to Step 3. If the toilet does not flush, go to Step 4.
Step 3
Shorten the chain so that lever mechanism raises the flapper or ball assembly before the top of the lever rises above the top of the tank. Replace the tank lid and test flush.
Step 4
See if the chain is broken or detached. Reattach or replace the chain as needed. To ensure that the chain is the appropriate length, consult Step 3 above.
Toilet Runs Constantly or Intermittently
Step 1
Remove the tank lid and carefully place it upside down on towel.
Step 2
Look inside the tank and see if the chain that runs from the flush lever or button has slack. If the chain is too tight, it can prevent the flapper or ball assembly from seating properly. Lengthen chain slightly to provide some slack when it is resting. If the chain appears in order, proceed to Step 3.
Step 3
Lift the flapper or ball assembly by hand, allowing the water to flow from tank to bowl. Check for debris or deterioration around the flapper or ball assembly. Remove any debris and reset the flapper or ball assembly. Test flush. If the toilet still runs, proceed to Step 4.
Step 4
Turn off the water supply at the wall. Flush the water from the tank and remove the flapper or ball assembly from the overflow tube.
Step 5
Install the new flapper or tank ball included in the Eljer flush valve repair kit. Turn the water supply on, replace the tank lid and test flush.
Toilet Leaks Between Tank and Bowl.
Step 1
Turn off the water supply, remove the tank lid and carefully place it upside down on a towel.
Step 2
Disconnect the supply line and flush the water from the toilet tank. Determine if the heads of the bolts securing the bowl to the tank are Phillips or slotted.
Step 3
Using the appropriate screwdriver, hold bolts in place from top while unscrewing the wing nuts beneath the tank. Lift the tank from the bowl and carefully place it on its back.
Step 4
Remove the tank-to-bowl bolts using a screwdriver and adjustable wrench or pliers. Install new tank-to-bowl bolts, washers and gaskets from the repair kit. Replace the old foam rubber tank-to-bowl gasket with the new gasket from the repair kit.
Step 5
Replace the tank onto the bowl. Make sure the tank is level and tighten the wing nuts. Attach the supply line, turn the water on, replace tank lid and test flush.
Video of the Day