Things You'll Need
Tongue-and-groove pliers
36 inches of tie wire
2 pipe wrenches with 12-inch handles
Plumber's tape
Replacement water valve
Rags
Work gloves
Safety glasses
The washing machine in your home is fed by two water valves. One supplies cold water and the other supplies hot. These valves should be replaced anytime they start leaking so the water coming from them does not damage your walls or floor. Although you can repair these valves, it generally is less expensive and labor-intensive to simply replace a faulty water-supply valve. Once the valve has been replaced, you can hook your washing machine back to the line and resume doing your laundry.
Step 1
Shut off the appropriate water-supply valve to the washing machine. Turn off the outflow valve coming from your water heater if you are replacing the washer's hot-water shutoff. Turn off the cold-water valve on the main line above the water heater if you are working on the machine's cold-water shutoff. Open all the faucets in your house to purge the lines of water.
Video of the Day
Step 2
Locate the hose coming from the shutoff valve to the washing machine. Grip the adapter on the hose with your tongue-and-groove pliers. Turn the adapter counterclockwise to remove it from the valve. Hold up the end of the hose so any water in the hose and washing machine do not spill onto the floor.
Step 3
Wrap the end of the hose with the tie wire. Loop the free end of the wire loosely around the control knob on the front of your washing machine to keep the hose upright. Pull the machine away from the wall so you have enough room to work on the valve.
Step 4
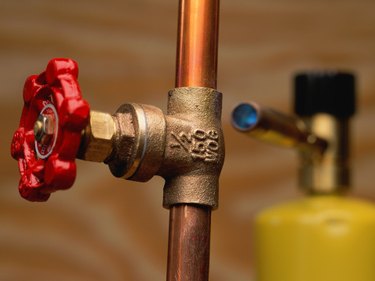
Grab the pipe under the shutoff valve, using one of your pipe wrenches and making sure the tips of the wrench jaws are pointing left. Grip the hex seat on the shutoff valve with the second pipe wrench, making sure the jaws point to the right. Pull on the wrench holding the valve to loosen it from the pipe. Remove the faulty valve and discard it.
Step 5
Wipe the threads of the pipe with a rag to remove any moisture or other residue. Wrap plumber's tape around the pipe threads.
Step 6
Twist the new valve onto the pipe with a clockwise motion to tighten it. Be careful not to cross-thread the valve on the pipe. Snug the valve, using both pipe wrenches to prevent loosening the pipe from its seat below.
Step 7
Wipe up any spilled water. Untie the hose from the washing machine and connect it to the valve. Snug the hose with your pliers.
Step 8
Push the washing machine back into place. Turn on the water-supply valves. Turn off the faucets around the house after the water runs from each of them without air in the lines.
Warning
Work gloves and safety glasses are required when working with hand tools.
Video of the Day