The invention of the digital multimeter made learning to use a multimeter a much easier task. The older analog multimeters were harder to master because the meter's movement was so easily damaged when using the meter set to the wrong range or by touching the negative test probe to a positive voltage source. One second of lapsed attention could destroy a meter movement. The manual ranging digital multimeter eliminated that danger. You still had to select the function and range with the first digital multimeters, but there was little risk of damage if you selected the wrong range. The auto ranging multimeter is even easier to use because all you need to do is select the desired function.
Using the Meter to Check Voltage
Video of the Day
Step 1
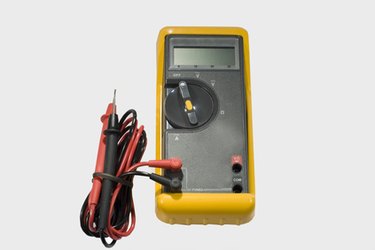
Select the auto ranging feature on your meter. Meters, such as the Velleman DVM68, allow you to select the metering range manually or to use the meter as an auto ranging meter. You select manual ranging or auto ranging by pressing the ranging mode button on the meter. The ranging mode you select, "Auto Ranging" or a value range, is displayed on the LCD.
Video of the Day
Step 2
Using the "Function Switch," select the voltage to be measured--AC or DC. Depending on your meter, the "Function Switch" may be a rotary switch or a push button. The function you select will display on the meter's LCD.
Step 3
Touch the red (+) and the black (-) test probes to the terminals where the voltage is to be measured. When taking an AC voltage reading, the polarity of the test leads does not matter since polarity reverses itself 60 times every second. Polarity does matter when you measure DC voltages, but no harm done if you reverse the test probes. If you were to reverse the test probes, a "minus" sign (-), displayed on the LCD would indicate that the test probes reversed polarity. The reading itself will be correct when the test probes are used with the correct polarity or with their polarity reversed.
Measuring Current
Step 1
Using the "Function Switch," select the current to be measured--AC or DC.
Step 2
Connect the meter in series between the voltage source and one side of the circuit to be tested.
Step 3
Read the current flowing in the circuit on the meter's LCD. If a "Negative" sign appears before the numerical readout, it means that the polarity of the connections to the meter is reversed.
Measuring Resistance
Step 1
Set the "Function Switch" to the Ohms Function.
Step 2
Remove all power to the device to be tested.
Step 3
Touch one of the meter's probes to each connection of the device being tested.
Step 4
Read the resistance in Ohms on the meter's LCD.
Warning
Read the manual that came with your meter before using it for the first time. Failure to follow the manual can cause irreparable damage to your meter. Although all digital auto-ranging meters are basically the same, every manufacturer designs their meters differently. The controls vary slightly from one meter to the next, as does the way the readings are displayed.