Things You'll Need
1/2 yard blue or gray felt
Cardboard
Stiff black leather or cardboard
Flexible black leather or vinyl
5/8-inch brass sliding buckle
2 brass buttons, 5/8-inch
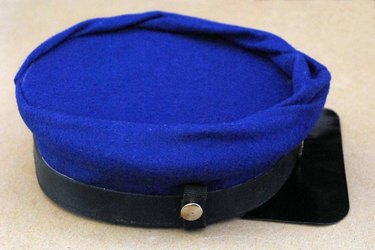
Both Union and Confederate soldiers wore hats called kepis during the Civil War. The French army originally adopted the kepi as part of their uniform, but Americans copied the style. A private might wear a plain blue or gray kepi or add a brass or cloth letter, number or symbol to designate his company, regiment or corps. In the Union army, he might add a brass hunting horn on the top. Fancy gold braid sometimes adorned officers' kepis. You can make a simple costume kepi for a Civil War play or Halloween costume out of cloth and cardboard or leather.
Step 1

Measure around the head of the person who'll be wearing the kepi.
Video of the Day
Step 2
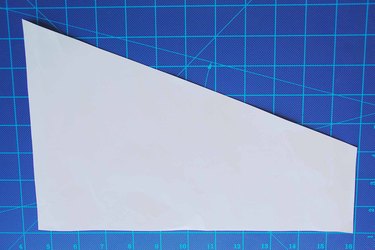
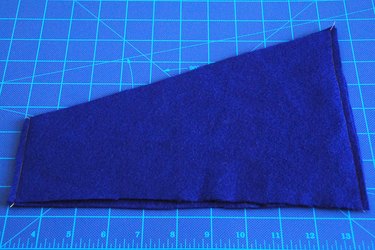
Draw and cut out a paper pattern that's half as wide as the person's head circumference and seven inches high at one end, angling down to three inches high at the other. Cut the 7-inch side at a slant so the top is 2 1/2 inches shorter than the bottom.
Step 3
Measure the length of the top of the pattern and multiply it by 0.6. Cut another paper pattern that is a circle with that diameter.
Step 4
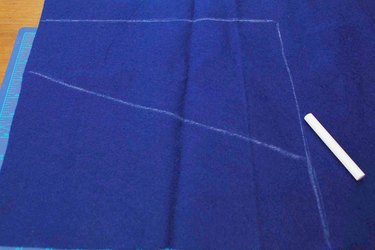
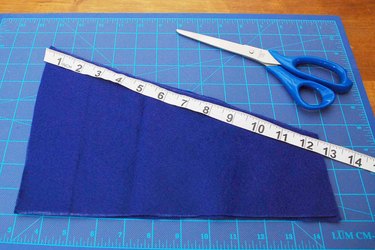
Fold a piece of cloth in half, lay the patterns on them and trace them in chalk. The original makers used wool, but you can also use lightweight felt for a similar look in a costume. Cut out the pieces, allowing a 5/8-inch seam allowance around the outside edges of the chalk marks. Also cut a circle out of stiff, non-corrugated cardboard that's the same size as the circle pattern, with no seam allowance.
Step 5
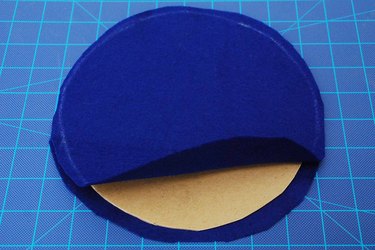
Place the cardboard circle between the two circular pieces of cloth, with the right sides of the cloth facing out. Sew the cloth 1/8 inch outside the cardboard, sandwiching it between the cloth.
Step 6
Place the slanted rectangles of cloth right sides together and sew the 3-inch end and the 7-inch end. Open the newly formed ring of cloth which will become the sides of the kepi. Iron the bottom seam allowance so it's turned to the inside. Top-stitch the seam allowance up, 1/2 inch from the edge.
Step 7
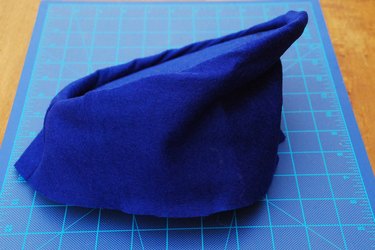
Pin the sides of the kepi to the seam allowance around the outside edge of the circle, right sides together. You'll see the kepi beginning to form. Sew the sides to the circle and turn the right side to the outside.
Step 8
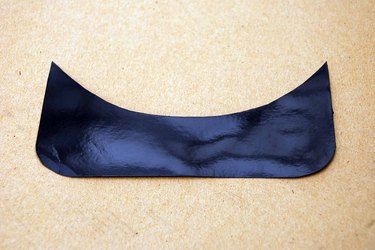
Cut the brim pattern by drawing a circle the same size as the person's head on a piece of paper. Mark off an arc one-third the circumference of the circle. Draw two parallel lines out from each end of the arc. Connect them with a line that's 1 3/4 inches beyond the farthest point of the arc. Cut out this shape, which will be a rectangle with one side that's curved inward. Fold it in half and trim the 90-degree corners so they're rounded, then unfold it. Use this paper pattern to cut a brim out of stiff black leather or, for a more inexpensive costume, heavy cardboard painted gloss black.
Step 9
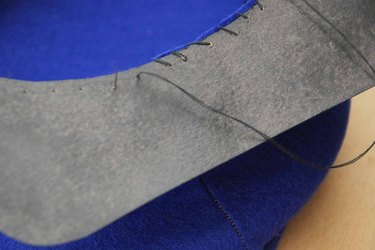
Hand-sew the edge of the brim to the front of the kepi, taking small whip-stitches between the brim and the cloth. If you're using cardboard, use glue as well to prevent it from tearing out.
Step 10
Cut a sweat band of lightweight leather or vinyl 1 3/4-inch wide and long enough to circle the inside bottom edge of the kepi. Whip-stitch it to the inside of the kepi and the back edge of the brim, 1/16 inch up from the cloth edge so it won't show on the outside.
Step 11
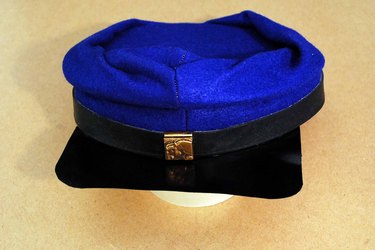
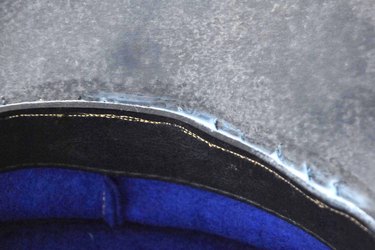
Cut a black lightweight leather or vinyl strap 5/8-inch wide and long enough to reach along the front of the kepi from one side of the brim to the other. Slip a small decorative brass sliding buckle onto the strap and sew each end of the strap to the side of the kepi, so it rests along the front edge of the kepi just above the brim. Sew a brass button on top of each end of the leather strap. You can make this leather strap into a functional chin-strap which can be expanded with the sliding buckle, though soldiers generally kept it shortened and resting along the front of the kepi and rarely used it beneath the chin.
Video of the Day