Things You'll Need
Hammer
Nail set
Rubber mallet
Shims
Metal putty knife
Hand saw
Wood plane
Spackle
Protective eyewear
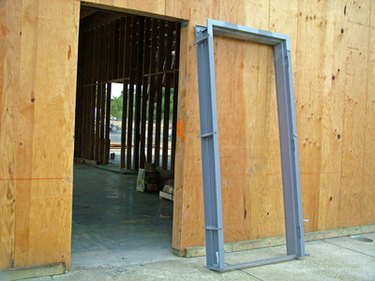
Warped door frames can cause a door to jam or stick and let outside air and pests inside. Slight warps can be repaired by planing or sanding surfaces that are rubbing. For more serious warping, take the trim strips off one or both sides of the door frame and square the frame by hammering tighter or placing shims in between the door frame and the wall frame. Replace the trim and paint if necessary.
Step 1
Remove the trim strips around the door frame. Use the putty knife to loosen molding or trim strips around the frame of the door. These are the pieces of wood that are parallel to the door and frame the top and sides of the door. Carefully pry the molding up, to avoid spliting or cracking the molding. Once the molding is removed, pull the finishing nails out of the wall frame with a claw hammer. You may have to remove the molding on both sides of the door. If you pull the trim carefully, you may not have to re-paint after you fix the door frame.
Video of the Day
Step 2
Evaluate the warp. If the door is rubbing on the frame, hammer the door frame tighter to the wall framing with a rubber mallet. If there are shims between the door frame and wall frame, remove them or pull them out slightly so the door frame can be tightened against the wall frame. Open and close the door frequently while adjust to get a perfectly square door frame.
Step 3
Plane the frame. If the door frame is already tight against the wall frame and you need more room, use a plane to take wood evenly off the frame where the door is rubbing. Take fine shavings and evaluate repeatedly until the frame is square. Take a little extra off to account for the thickness of a new coat of paint.
Step 4
Shim the frame. Use wedge-shape shims to make the frame tighter. Gently tap shims in from either side of the frame to correct warping. Shims should hold by themselves. Use a handsaw to trim the portion of the shim that extends past the wall before replacing molding.
Step 5
Replace the molding. Use finishing nails to fasten the frame molding and trim with a plane if the molding extends beyond the new border of the frame. Use a nail set to make the finishing nails flush with the trim.
Step 6
Spackle gaps and nail holes. Use the putty knife and spackle to fill any gaps, crevices or holes. Allow to dry and repaint if necessary.
Tip
Make sure the door is hung properly before you start tearing off trim to get at the door frame. Sometimes hinge screws loosen and the result is the door does not hang square in the frame. Try adjusting the hinges to see if you can avoid re-setting the frame.
Warning
Never drive or pull nails without protective eyewear. Be careful not to plane the door itself. Most doors are hollow-core construction and you will destroy the door if you plane too deeply. Solid wood doors can be safely planed.
Video of the Day