Things You'll Need
Table-mounted vise
Manual ratchet handle
Cutting fluid
Wire brush
Clean rag
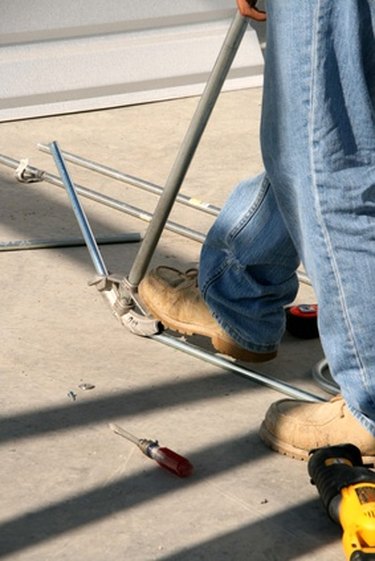
Conduit pipe provides superior protection for the electrical wiring of your home. Long runs of electrical conduit often require threaded connections per local building codes. Since conduit does not come pre-threaded, you need to cut threads on the end of the conduit entering a threaded connection. The threads are standard piping threads that taper toward the middle of the cut threads. The threads are cut using either a power cutting and threading tool or the more affordable manual threading ratchet. Both types of threading tools utilize a die to cut the threads on the end of the conduit.
Step 1
Place the conduit in the table-mounted vise with the end of the conduit to be threaded protruding four to six inches from the edge of the vise jaws.
Video of the Day
Step 2
Inspect the die of the manual ratchet to ensure that the cutting threads of the die are sharp. If you notice the threads are dull or chipped, replace the die before proceeding. Worn or damaged cutting threads will result in threads that are difficult to use.
Step 3
Apply cutting fluid to the internal cutting threads of the die.
Step 4
Push the inside edge of the die onto the end of the conduit with the palm of one hand and turn the handle of the manual threading ratchet clockwise three to four turns with the other hand to start threading the conduit.
Step 5
Liberally apply cutting fluid to the surface of the conduit immediately behind the front edge of the tapping die and continue turning the manual threading ratchet clockwise to cut the threads on the conduit.
Step 6
Flip the directional switch of the manual ratcheting handle and turn the handle counter-clockwise 1/4 turn, apply additional cutting fluid to the conduit and the front edge of the tapping die and flip the directional switch back to clockwise.
Step 7
Repeat the steps until the three to four threads on the conduit protrude past the rear edge of the tapping die.
Step 8
Reverse the direction of the manual ratchet handle by flipping the directional switch and turning the manual ratcheting handle counter-clockwise until the tapping die is free of the threaded conduit.
Step 9
Run the wire brush around the freshly cut threads to remove any metal shavings left on the threads by the threading process.
Step 10
Wipe the cleaned threads with a clean rag to remove cutting fluid left on the conduit by the thread cutting process and release the threaded conduit from the table-mounted vise.
Video of the Day