Things You'll Need
Step ladder
Tape measure
Pencil
Tongue & groove ceiling planks
Miter saw
Trim nailer
Small piece of scrap plank
Hammer
Table saw
Ceiling trim

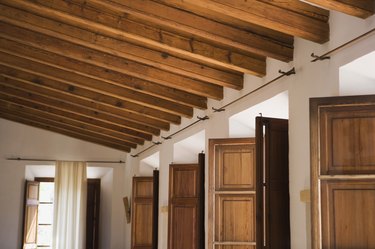
A wood-plank ceiling gives a warm, rustic look to any room. Ceiling planks today lock together with tongue-and-groove milling, just like floorboards, but they're significantly different than typical flooring. Ceiling planks are made to be much lighter than flooring, and they should always be pre-finished because finishing them after installation is difficult and messy. If the existing ceiling is plastered or drywalled, you'll have to use a studfinder to locate the ceiling joists to secure the planks. If the ceiling has bare joists, it's a much easier project; in fact, it might make sense to remove old wall board or plaster before installing a wood ceiling.
Step 1
Set your ladder up at one side of the room. Measure the width of the ceiling, perpendicular to the ceiling joists (with the tape measure crossing over them).
Video of the Day
Step 2
Set your first ceiling plank into your miter saw box. Measure to the reading you took from the ceiling, and mark it on the board. Cut it at a 90-degree angle (straight across).
Step 3
Hold the plank up to the edge of the ceiling where you measured, so the plank runs across each of the ceiling joists and the grooved side is to the wall. Use your trim nailer to sink two nails through the face of the board at each point where it crosses a joist.
Step 4
Cut your second plank to size. Set it against the first plank, with the grooved side of the second plank locking around the tongue of the first plank. Set a piece of scrap plank against the second plank and gently tap it with your hammer to get a tight fit, being careful not to damage the tongue of the plank.
Step 5
Install the second plank by shooting one nail into the side, just above the tongue, going up at an angle, at each point where it crosses a joist. That will hide the nails as you install the ceiling.
Step 6
Repeat the process for each plank, crossing the whole ceiling. For the final piece, cut it lengthwise on your table saw if necessary to get it to fit, and install it by face-nailing as you did on the first one (since you won't be able to side-nail the last one).
Step 7
Install ceiling trim around the perimeter of the ceiling to cover the seam where the planks meet the walls.
Tip
If the room is consistently square, you can make all your board cuts at once, instead of measuring and cutting each one separately. To determine whether the room is square, take measurements at five or six different points across the ceiling and see if they're the same.
Warning
Wear eye protection when cutting the boards. Because of the length of ceiling planks, it is strongly recommended that you have an assistant to help lift and hold ceiling planks.
Video of the Day